The Linux shell scripting language has always been a hot topic and will always be in the future. The Shell Scripting Language is magical and its so easy to do a program in scripting language as in any other Language. However, it needs an in-depth knowledge of what we are doing and what the result is expected.
Understanding Variables in Shell Scripting
All the shell scripting articles we have written for our readers are highly appreciated including the last one “An Insight of Linux Variables”. We are extending the last article to a new Level.
Variable Attributes
Each Variable in Linux Environment has certain options, and those are called ‘attributes’. These options or attributes can be turned On and Off, when required according to the situation using a command “declare”.
An Example of variable attribute is using a switch say ‘-i‘ which will turn on the integer attribute for the corresponding variable. Even if a non-numeric value is passed to switch ‘-i‘ it won’t throw an error message and output ‘0‘ as integer interpretation. Here it becomes more clear from the example below.
Declare a variable Integer, bill = 121
avi@localhost:~$ declare -i bill=121
Printf the value of variable bill.
avi@localhost:~$ printf "%d\n" "$bill"

121
Let the variable value be a string. The variable bill is already declared, no need to declare it second time. Just change the value of variable as.
avi@localhost:~$ bill=tecmint
Now, again printf the value of variable bill.
avi@localhost:~$ printf "%d\n" "$bill"

0
Notice ‘0‘ in the place of error message.
Now, the question is, how to know the attributes of already declared variables?
avi@localhost:~$ declare -p bill

declare -i bill="121"
Here, a -p (stands for print) switch comes to rescue.
Again, what should I do to switch off the attributes of a variable?
In order to switch Off the attributes of a variable what we need all is to put a + (plus) sign just before the switch. Here it is more clear from the example below.
Switch Off the integer attribute for the above variable.
avi@localhost:~$ declare +i billCheck the value of the variable.
avi@localhost:~$ printf "%d\n" "$bill"

bash: printf: bill: invalid number
0
Now print the value of variable using switch string.
avi@localhost:~$ printf "%s\n" "$bill"

tecmint
Here in the above example, bash could not judge non-numeric value as error, however printf is interpreting, what could be a number and what could not be.
Read-only Variables
You might have heard Read Only Memory (ROM), but what is Read-only Variable? Has it any similarity with ROM?
Well Read-only Variables like Read-only Memory is something the value of which can’t be change once it is assigned. Hence it is called Read-only. You can’t write, edit or modify a new value for that variable. Here is an illustration using example.
Decalre a read only (-r) variable name, the value of which is “Tecmint.com”.
As discussed above the attributes of a read-only Variable can be changed using ‘+‘ sign.
Exporting Variables in Linux
All the shell variables declared in a shell script are available till the script is running. Outside of the script the variable from the script does not exist. The process of making variables available outside of the script is called exporting variables.
A Variable can be exported outside of the shell using switch declare -x (export), which acknowledge the shell what you wanted to export. A declare export switch can be used as.
All the changes made to the variable while the script is running, is lost when the variable is exported outside of the script. Exporting variable is very important in shell scripting.
We want to have a variable that should be read-only and available outside of the script, we need to use switch -r and switch -x at the same time.
The variables that are shared between the program and the program that execute them. Environment variables can be exported but the attributes can’t be assigned to it.
Understanding the above theory practically. Here we have two scripts 0.sh and 1.sh.
Here what is going on, is a variable (name) is declared as read only and exported and immediately after that second script is called.
The second script just printed the variable from the first script that was exported in the first printf statement. In the second printf statement it shows the new value assigned to variable ‘name‘.
No need to worry, that the variable was read-only, how can it be reassigned. Don’t you remember that “All the changes made to the variable while the script is running, is lost when the variable is exported outside of the script.”
References
The declare command allows all the switches below along with their combination.
-a : Declares an array.
-f : Display Function and Definition.
-F : Display Function Name.
-r : Declare variable as read-only.
-x : Declare Variable as Exportable.
-I : Declare variable as Integer.
That’s all for now. In the very next article we will be discussing ways to substitute variables using ‘eval‘ command and the variables already defined in bash before closing this topic. Hope you people are enjoying your journey to in-depth of scripting.
In this post, I will be discussing the scripts from a mathematical and numerical point of view. Although I posted a more complex script (Simple Calculator) in the previous post, it was difficult for users to understand. Hence, I thought I would teach you another useful aspect of learning in smaller parts.
Before this article, three articles in the Shell Scripting Series have been published and they are:
You might also like:
Understand Linux Shell and Basic Shell Scripting – Part I
5 Shell Scripts to Learn Shell Programming – Part II
Sailing Through The World of Linux BASH Scripting – Part III
Let’s continue the learning process with exciting new shell scripts, starting with mathematical ones.
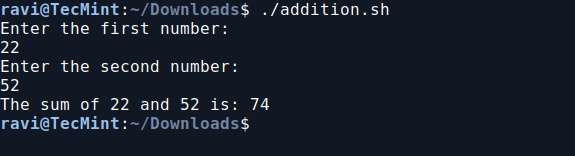
1. Basic Addition Shell Script
In this script ‘addition.sh‘, you will create a shell script to perform basic addition operations.
vi addition.sh
Add the following code to addition.sh file.
#!/bin/bash
# This script adds two numbers provided by the user

echo "Enter the first number: "
read a
echo "Enter the second number: "
read b

sum=$((a + b))

echo "The sum of $a and $b is: $sum"
Next, make the script executable and run it.
chmod 755 addition.sh
./addition.sh
Basic Addition Shell Script
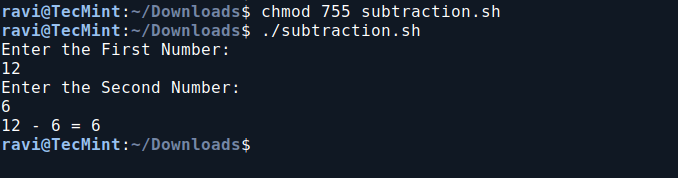
2. Basic Subtraction Shell Script
In this script ‘subtraction.sh‘, you will create a shell script to perform a basic subtraction operation.
vi subtraction.sh
Add the following code to subtraction.sh file:
#!/bin/bash
# This script subtracts two numbers provided by the user

echo "Enter the First Number: "
read a
echo "Enter the Second Number: "
read b

x=$(($a - $b))

echo "$a - $b = $x"
Next, make the script executable and run it.
chmod 755 subtraction.sh
./subtraction.sh
Basic Subtraction Shell Script
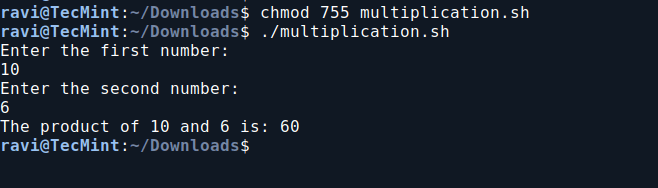
3. Basic Multiplication Shell Script
So far you would be enjoying a lot, learning scripts in such an easy way, so the next in chronological order is Multiplication.
vi multiplication.sh
Add the following code to multiplication.sh file.
#!/bin/bash
# This script multiplies two numbers provided by the user

echo "Enter the first number: "
read a
echo "Enter the second number: "
read b

product=$((a * b))

echo "The product of $a and $b is: $product"
Next, make the script executable and run it.
chmod 755 multiplication.sh
./multiplication.sh
Basic Multiplication Shell Script
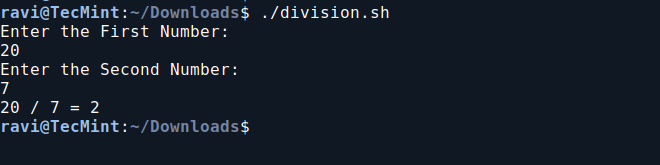
4. Basic Division Shell Script
In this division script, it prompts the user to enter two numbers, then divides the first number by the second and displays the result.
vi division.sh
Add the following code to the division.sh file.
#!/bin/bash
echo "Enter the First Number: "
read a
echo "Enter the Second Number: "
read b
echo "$a / $b = $(expr $a / $b)"
Next, make the script executable and run it.
chmod 755 division.sh
./division.sh
Basic Division Shell Script
5. Print Multiplication Table in Bash
In this script, we will print the multiplication table of a user-specified number. It prompts the user to enter a number and then displays the multiplication results from 1 to 10 for that number.
vi table.sh
Add the following code to the table.sh file.
#!/bin/bash
echo "Enter the number for which you want to print the table: "
read n
i=1
while [ $i -le 10 ]
do
  table=$(expr $i \* $n)
  echo "$i x $n = $table"
  i=$(expr $i + 1)
done
Next, make the script executable and run it.
chmod 755 table.sh
./table.sh
Print Multiplication Table in Bash
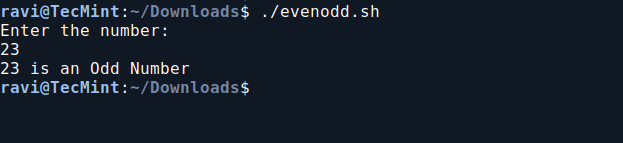
6. Check If a Number is Even or Odd in Bash
In this Bash script, we will determine whether a user-provided number is even or odd. It prompts the user to enter a number, checks its divisibility by 2 using the modulo operator, and then prints whether the number is even or odd based on the result.
vi evenodd.sh
Add the following code to evenodd.sh file.
#!/bin/bash
echo "Enter the number:"
read n
num=$(expr $n % 2)
if [ $num -eq 0 ]
then
  echo "$n is an Even Number"
else
  echo "$n is an Odd Number"
fi
Next, make the script executable and run it.
chmod 755 evenodd.sh
./evenodd.sh
Check If a Number is Even or Odd in Bash
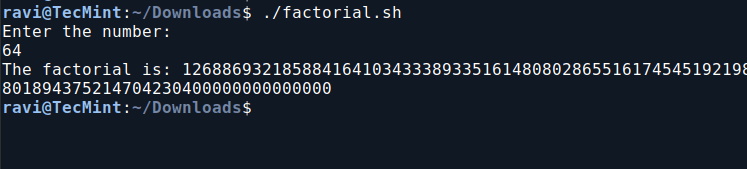
7. Calculate Factorial Using Bash Script
This script calculates the factorial of a user-input number using a `while` loop, and then prints the result.
vi factorial.sh
Add the following code to the factorial.sh file.
#!/bin/bash
echo "Enter the number:"
read a
fact=1
while [ $a -gt 0 ]
do
  fact=$(expr $fact \* $a)
  a=$(expr $a - 1)
done
echo "The factorial is: $fact"
Next, make the script executable and run it.
chmod 755 factorial.sh
./factorial.sh
Calculate Factorial Using Bash Script
You can now relax knowing that calculating `12*11*10*9*8*7*6*5*4*3*2*1` is much simpler with the script above than doing it manually. Imagine needing to find `99!` – this script will be incredibly useful in such situations.
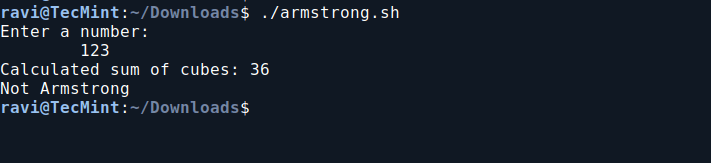
8. Check if a Number is an Armstrong Number in Bash
This Bash script determines whether a given three-digit number is an Armstrong number. An Armstrong number (or Narcissistic number) is a number where the sum of the cubes of its digits equals the number itself.
For example, 371 is an Armstrong number because 3×3×3+7×7×7+1×1×1 =371.
vi armstrong.sh
Add the following code to armstrong.sh file.
#!/bin/bash
echo "Enter a number:"
read n
arm=0
temp=$n
while [ $n -ne 0 ]
do
  r=$(expr $n % 10)
  arm=$(expr $arm + $r \* $r \* $r)
  n=$(expr $n / 10)
done
echo "Calculated sum of cubes: $arm"
if [ $arm -eq $temp ]
then
  echo "Armstrong"
else
  echo "Not Armstrong"
fi
Next, make the script executable and run it.
chmod 755 armstrong.sh
./armstrong.sh
Check if a Number is an Armstrong Number
9. Check if a Number is Prime in Bash
This Bash script checks if a number is prime by counting its divisors. It prints “Prime” if the number has exactly two divisors, and “Not Prime” otherwise.
vi prime.sh
Add the following code to prime.sh file.
#!/bin/bash
echo "Enter any number:"
read n

# Initialize variables
i=1
c=0

# Check for divisors
while [ $i -le $n ]
do
  if [ $(expr $n % $i) -eq 0 ]
  then
    c=$(expr $c + 1)
  fi
  i=$(expr $i + 1)
done

# Determine if the number is prime
if [ $c -eq 2 ]
then
  echo "Prime"
else
  echo "Not Prime"
fi
Next, make the script executable and run it.
chmod 755 prime.sh
./prime.sh
Check if a Number is Prime in Bash
That’s all for now. In our next article, we will cover other mathematical programs in shell scripting. Don’t forget to share your thoughts in the comments section.
Every Linux system administrator needs to know how to verify the integrity and availability of hardware, resources, and key processes. In addition, setting resource limits on a per-user basis must also be a part of his / her skill set.
In this article we will explore a few ways to ensure that the system both hardware and the software is behaving correctly to avoid potential issues that may cause unexpected production downtime and money loss.
Linux Reporting Processors Statistics
With mpstat you can view the activities for each processor individually or the system as a whole, both as a one-time snapshot or dynamically.
In order to use this tool, you will need to install sysstat:
The output of the above commands shows these columns:
CPU: Processor number as an integer, or the word all as an average for all processors.
%usr: Percentage of CPU utilization while running user level applications.
%nice: Same as %usr, but with nice priority.
%sys: Percentage of CPU utilization that occurred while executing kernel applications. This does not include time spent dealing with interrupts or handling hardware.
%iowait: Percentage of time when the given CPU (or all) was idle, during which there was a resource-intensive I/O operation scheduled on that CPU. A more detailed explanation (with examples) can be found here.
%irq: Percentage of time spent servicing hardware interrupts.
%soft: Same as %irq, but with software interrupts.
%steal: Percentage of time spent in involuntary wait (steal or stolen time) when a virtual machine, as guest, is “winning” the hypervisor’s attention while competing for the CPU(s). This value should be kept as small as possible. A high value in this field means the virtual machine is stalling – or soon will be.
%guest: Percentage of time spent running a virtual processor.
%idle: percentage of time when CPU(s) were not executing any tasks. If you observe a low value in this column, that is an indication of the system being placed under a heavy load. In that case, you will need to take a closer look at the process list, as we will discuss in a minute, to determine what is causing it.
To put the place the processor under a somewhat high load, run the following commands and then execute mpstat (as indicated) in a separate terminal:
Finally, compare to the output of mpstat under “normal” circumstances:
Report Linux Processors Related Statistics
As you can see in the image above, CPU 0 was under a heavy load during the first two examples, as indicated by the %idle column.
In the next section we will discuss how to identify these resource-hungry processes, how to obtain more information about them, and how to take appropriate action.
Reporting Linux Processes
To list processes sorting them by CPU usage, we will use the well known ps command with the -eo (to select all processes with user-defined format) and --sort (to specify a custom sorting order) options, like so:
# ps -eo pid,ppid,cmd,%cpu,%mem --sort=-%cpu
The above command will only show the PID, PPID, the command associated with the process, and the percentage of CPU and RAM usage sorted by the percentage of CPU usage in descending order. When executed during the creation of the .iso file, here’s the first few lines of the output:
Find Linux Processes By CPU Usage
Once we have identified a process of interest (such as the one with PID=2822), we can navigate to /proc/PID (/proc/2822 in this case) and do a directory listing.
This directory is where several files and subdirectories with detailed information about this particular process are kept while it is running.
For example:
/proc/2822/io contains IO statistics for the process (number of characters and bytes read and written, among others, during IO operations).
/proc/2822/attr/current shows the current SELinux security attributes of the process.
/proc/2822/cgroup describes the control groups (cgroups for short) to which the process belongs if the CONFIG_CGROUPS kernel configuration option is enabled, which you can verify with:
# cat /boot/config-$(uname -r) | grep -i cgroups
If the option is enabled, you should see:
CONFIG_CGROUPS=y
Using cgroups you can manage the amount of allowed resource usage on a per-process basis as explained in Chapters 1 through 4 of the Red Hat Enterprise Linux 7 Resource Management guide, in Chapter 9 of the openSUSE System Analysis and Tuning guide, and in the Control Groups section of the Ubuntu 14.04 Server documentation.
The /proc/2822/fd is a directory that contains one symbolic link for each file descriptor the process has opened. The following image shows this information for the process that was started in tty1 (the first terminal) to create the .iso image:
Find Linux Process Information
The above image shows that stdin (file descriptor 0), stdout (file descriptor 1), and stderr (file descriptor 2) are mapped to /dev/zero, /root/test.iso, and /dev/tty1, respectively.
More information about /proc can be found in “The /proc filesystem” document kept and maintained by Kernel.org, and in the Linux Programmer’s Manual.
Setting Resource Limits on a Per-User Basis in Linux
If you are not careful and allow any user to run an unlimited number of processes, you may eventually experience an unexpected system shutdown or get locked out as the system enters an unusable state. To prevent this from happening, you should place a limit on the number of processes users can start.
To do this, edit /etc/security/limits.conf and add the following line at the bottom of the file to set the limit:
* hard nproc 10
The first field can be used to indicate either a user, a group, or all of them (*), whereas the second field enforces a hard limit on the number of process (nproc) to 10. To apply changes, logging out and back in is enough.
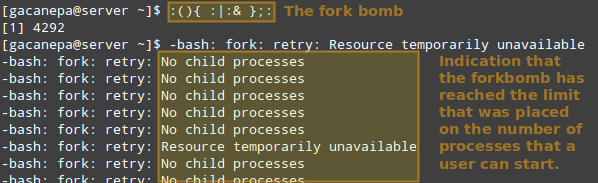
Thus, let’s see what happens if a certain user other than root (either a legitimate one or not) attempts to start a shell fork bomb. If we had not implemented limits, this would initially launch two instances of a function, and then duplicate each of them in a neverending loop. Thus, it would eventually bringing your system to a crawl.
However, with the above restriction in place, the fork bomb does not succeed but the user will still get locked out until the system administrator kills the process associated with it:
Run Shell Fork Bomb
TIP: Other possible restrictions made possible by ulimit are documented in the limits.conf file.
Linux Other Process Management Tools
In addition to the tools discussed previously, a system administrator may also need to:
a) Modify the execution priority (use of system resources) of a process using renice. This means that the kernel will allocate more or less system resources to the process based on the assigned priority (a number commonly known as “niceness” in a range from -20 to 19).
The lower the value, the greater the execution priority. Regular users (other than root) can only modify the niceness of processes they own to a higher value (meaning a lower execution priority), whereas root can modify this value for any process, and may increase or decrease it.
If the argument after the new priority value is not present (empty), it is set to PID by default. In that case, the niceness of process with PID=identifier is set to <new priority>.
b) Interrupt the normal execution of a process when needed. This is commonly known as “killing” the process. Under the hood, this means sending the process a signal to finish its execution properly and release any used resources in an orderly manner.
To kill a process, use the kill command as follows:
# kill PID
Alternatively, you can use pkill to terminate all processes of a given owner (-u), or a group owner (-G), or even those processes which have a PPID in common (-P). These options may be followed by the numeric representation or the actual name as identifier:
# pkill [options] identifier
For example,
# pkill -G 1000
will kill all processes owned by group with GID=1000.
And,
# pkill -P 4993
will kill all processes whose PPID is 4993.
Before running a pkill, it is a good idea to test the results with pgrep first, perhaps using the -l option as well to list the processes’ names. It takes the same options but only returns the PIDs of processes (without taking any further action) that would be killed if pkill is used.