MySQL Replication Setup
So, here is our MySQL replication lab setup.
Let’s get started…
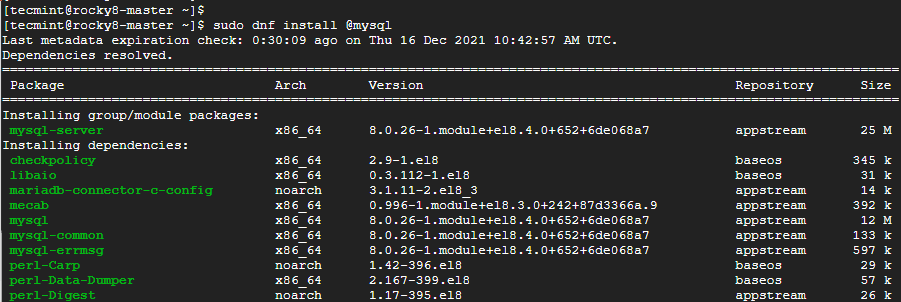
Step 1: Install MySQL on Master and Slave Server
We will start off by installing the MySQL database on both the master and slave servers.
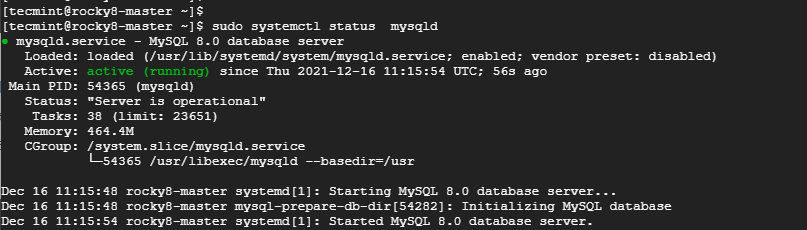
Once the installation is complete, make a point to start the database server.
Then enable it to start to system startup or upon reboot.
Thereafter, confirm that the MySQL database server is running as shown:
Step 2: Secure MySQL on Master and Slave Server
The next step is to secure the MySQL database on both the master and slave servers. This is because the default settings are insecure and present some loopholes which can easily be exploited by hackers.
So, to harden MySQL, run the command:
First, you will be required to set the MySQL root password. Be sure to provide a strong root password, preferably with more than 8 characters which are a mix of uppercase, lowercase, special and numeric characters.
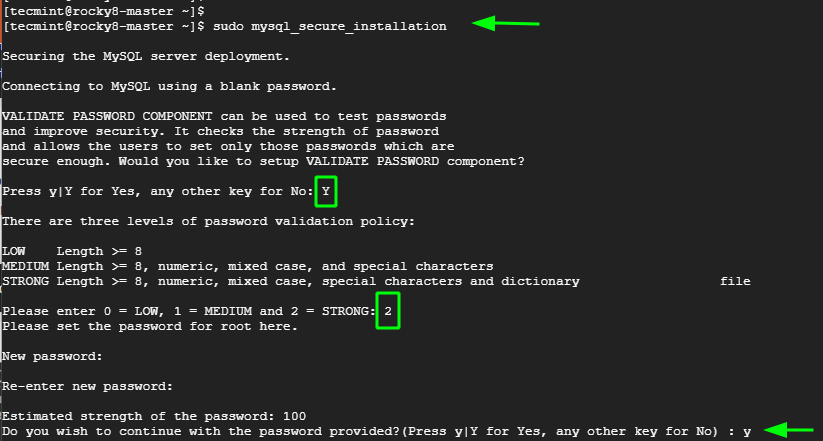
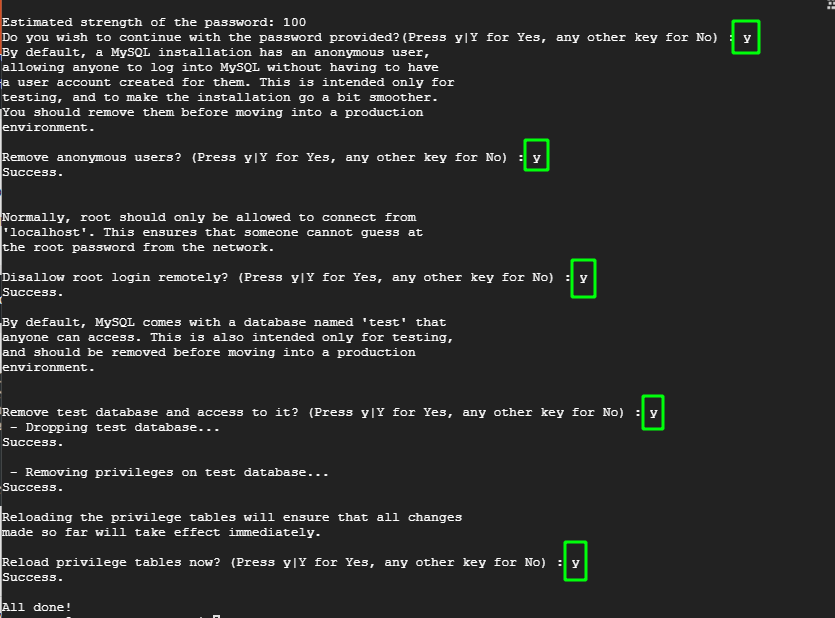
For the remaining prompts, type in 'Y' to tweak the database server to the recommended settings.
Once you have finished installing and hardening MySQL on the master and slave node, the next is to configure the master node.
Step 3: Configure the Master Node (Server)
The next step is to configure the Master node and grant the slave node access to it. First, we need to edit the mysql-server.cnf configuration file.
Add the following lines under the [mysqld] section.
Once done, save the changes and exit. Then restart the MySQL server.
Next, log into MySQL shell.
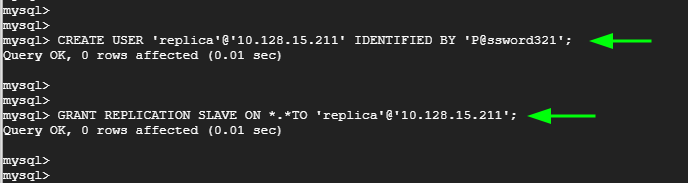
Execute the following commands to create a database user that will be used to bind the master and slave for replication.
Apply the changes and exit the MySQL server.
Verify the status of the master.
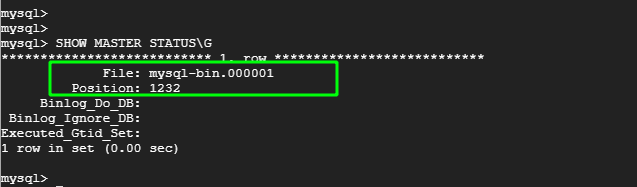
Take note of the Filename and Position. You will need this later on when setting up the slave for replication. In our case, we have the filename as mysql-bin.000001 and Position 1232.
Step 4: Configure the Slave Node (Server)
Now, head back to the Slave node. Once again, edit the mysql-server.cnf configuration file.
As before, paste these lines under the [mysqld] section. Change the IP address to correspond to the slave’s IP. Also, assign a different server-id. Here we have assigned it the value of 2.
Save the changes and exit the file. Then restart the database server.
To configure the Slave node to replicate from the Master node, log in to the Slave’s MySQL server.
First and foremost, stop the replication threads:

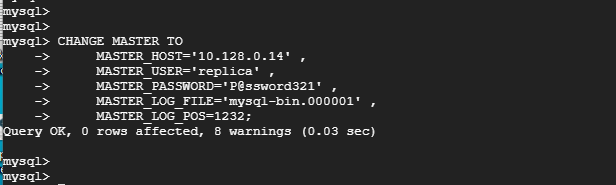
Then execute the following command to configure the slave node to replicate databases from the master.
Note that the MASTER_LOG_FILE and MASTER_LOG_POS flags correspond to the file and Position values from the Master node at the end of Step 1.
The MASTER_HOST, MASTER_USER, and MASTER_PASSWORD correspond to the Master IP address, the replication user, and the replication user’s password respectively.
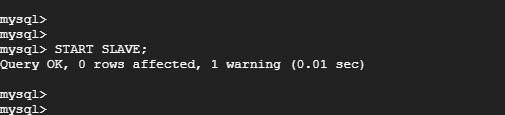
Then start the slave replication threads:
Step 4: Testing MySQL Master-Slave Replication
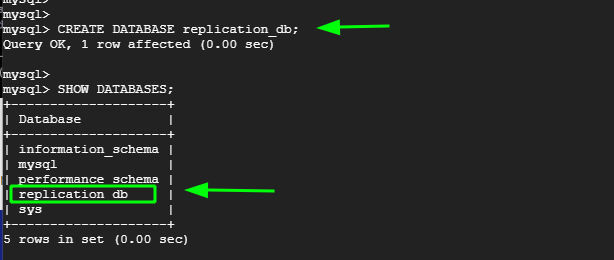
Now, to test if replication between the master and slave node is working, log in to the MySQL database server on the master node:
Create a test database. Here, our test database is called replication_db.
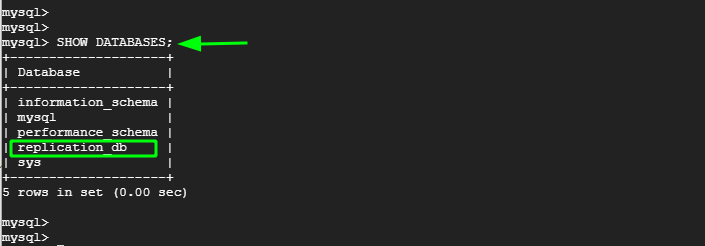
Now, head over to the slave node, log in to the MySQL server and confirm that the replication_db database is present. From the output below, we can see that the database is present. This is confirmation that replication has taken place from the Master to the slave node.


No comments:
Post a Comment