Introduction to SELinux and How to Use it on CentOS 7
Security Enhanced Linux can operate in two different ways:
- Enforcing: SELinux denies access based on SELinux policy rules, a set of guidelines that control the security engine.
- Permissive: SELinux does not deny access, but denials are logged for actions that would have been denied if running in enforcing mode.
SELinux can also be disabled. Although it is not an operation mode itself, it is still an option. However, learning how to use this tool is better than just ignoring it. Keep it in mind!
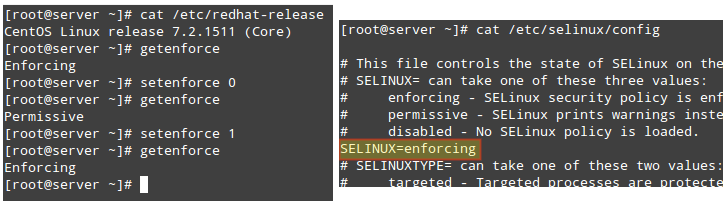
To display the current mode of SELinux, use getenforce. If you want to toggle the operation mode, use setenforce 0 (to set it to Permissive) or setenforce 1 (Enforcing).
Since this change will not survive a reboot, you will need to edit the /etc/selinux/config file and set the SELINUX variable to either enforcing, permissive, or disabled in order to achieve persistence across reboots:
On a side note, if getenforce returns Disabled, you will have to edit /etc/selinux/config with the desired operation mode and reboot. Otherwise, you will not be able to set (or toggle) the operation mode with setenforce.
One of the typical uses of setenforce consists of toggling between SELinux modes (from enforcing to permissive or the other way around) to troubleshoot an application that is misbehaving or not working as expected. If it works after you set SELinux to Permissive mode, you can be confident you’re looking at a SELinux permissions issue.
Two classic cases where we will most likely have to deal with SELinux are:
- Changing the default port where a daemon listens on.
- Setting the DocumentRoot directive for a virtual host outside of /var/www/html.
Let’s take a look at these two cases using the following examples.
EXAMPLE 1: Changing the default port for the sshd daemon
One of the first thing most system administrators do in order to secure their servers is change the port where the SSH daemon listens on, mostly to discourage port scanners and external attackers. To do this, we use the Port directive in /etc/ssh/sshd_config followed by the new port number as follows (we will use port 9999 in this case):
After attempting to restart the service and checking its status we will see that it failed to start:

If we take a look at /var/log/audit/audit.log, we will see that sshd was prevented from starting on port 9999 by SELinux because that is a reserved port for the JBoss Management service (SELinux log messages include the word “AVC” so that they might be easily identified from other messages):

At this point most people would probably disable SELinux but we won’t. We will see that there’s a way for SELinux, and sshd listening on a different port, to live in harmony together. Make sure you have the policycoreutils-python package installed and run:
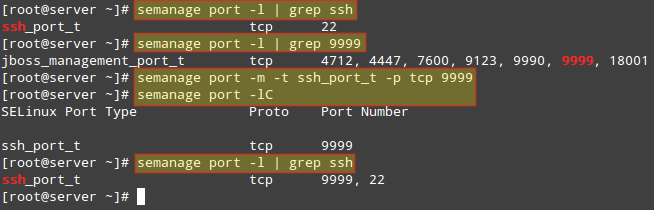
To view a list of the ports where SELinux allows sshd to listen on. In the following image we can also see that port 9999 was reserved for another service and thus we can’t use it to run another service for the time being:
Of course we could choose another port for SSH, but if we are certain that we will not need to use this specific machine for any JBoss-related services, we can then modify the existing SELinux rule and assign that port to SSH instead:
After that, we can use the first semanage command to check if the port was correctly assigned, or the -lC options (short for list custom):
We can now restart SSH and connect to the service using port 9999. Note that this change WILL survive a reboot.
EXAMPLE 2: Choosing a DocumentRoot outside /var/www/html for a virtual host
If you need to set up a Apache virtual host using a directory other than /var/www/html as DocumentRoot (say, for example, /websrv/sites/gabriel/public_html):
Apache will refuse to serve the content because the index.html has been labeled with the default_t SELinux type, which Apache can’t access:

As with the previous example, you can use the following command to verify that this is indeed a SELinux-related issue:

To change the label of /websrv/sites/gabriel/public_html recursively to httpd_sys_content_t, do:
The above command will grant Apache read-only access to that directory and its contents.
Finally, to apply the policy (and make the label change effective immediately), do:
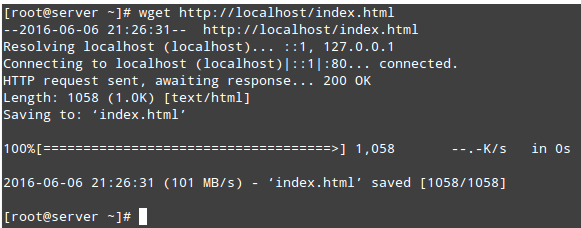
Now you should be able to access the directory:


No comments:
Post a Comment