The maximum performance achieved by compiling software from sources with Gentoo has a minimal impact, if we take as a reference today hardware’s power processing. Then what is the purpose of using Gentoo as a Web server platform you might ask? Well, the most important attribute that Gentoo has is its extreme flexibility that Portage can deliver on specific tasks and the full control that final user can achieve over the entire system, due to the fact that Gentoo it’s compiled and build from sources and doesn’t use pre-packaged binary like the majority of Linux distributions.

This guide provides a step by step installation procedure for the famous LAMP stack (Linux, Apache, MySQL, and PHP/PhpMyAdmin) using a minimal Gentoo installation environment.
Requirements
- Minimal Gentoo Linux environment installed as in this tutorial (Install Gentoo Linux)
Step 1: Configure Static IP Address
1. Before we proceed with installing LAMP stack the system must be configured with a static IP address, which is a “must” in case of a server. But, before we begin configuring network static settings use the ifconfig command to show Network Interface Cards names.
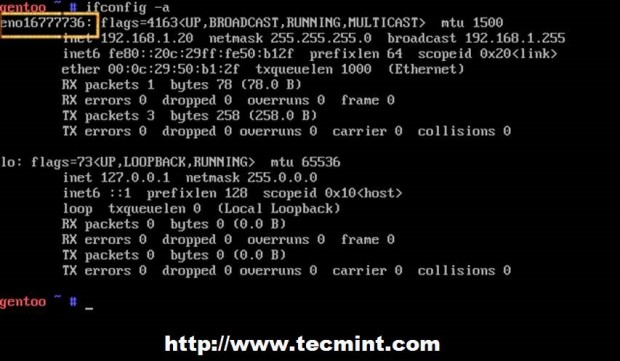
As you can see NIC’s name can differ from other common names used in Linux such as ethX, ensXX or others, so note down this name for further settings.
2. If you previously used an DHCP server for your network, make sure you tear down and disable DHCP Client on your system using the following commands (replace IPs and devices with your settings).
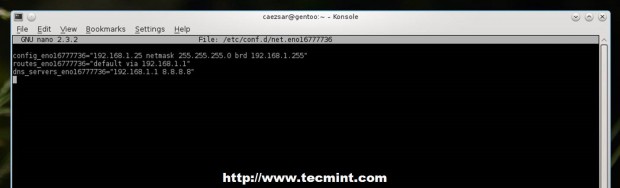
3. Then create a symbolic link from network loopback device with the name of your NIC’s connected interface and create a static configuration file for this device in /etc/conf.d/ path.
Edit this device file with the following configurations.
4. After finishing editing NIC’s static configurations, start Network Interface and verify network settings and connection using ifconfig and ping commands and if everything is successfully configured add it to start up process.
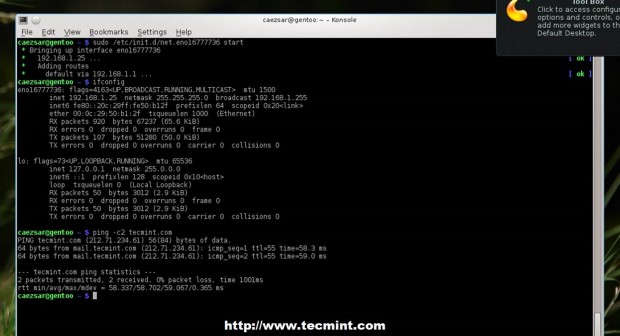
If you want DNS name servers to be system-wide configured edit /etc/resolv.conf file and append nameserver string for every DNS IP address.
Step 2: Install LAMP
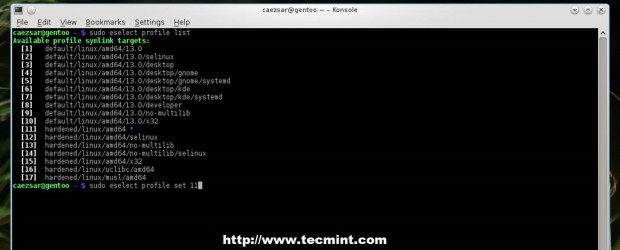
5. After you’re done with network settings proceed with installing LAMP stack, but not before you verify Gentoo profiles and update Portage tree and system.
For an Internet-facing server with security patches you will probably want to use a Hardened profile which changes package settings for your entire system (masks, USE flags, etc). Use the following commands to list and change your profile.
6. After the best-suited profile for you has been set, update your system and Portage tree.
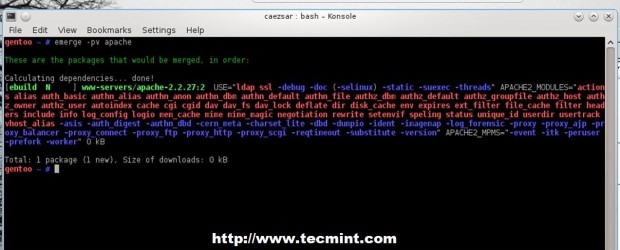
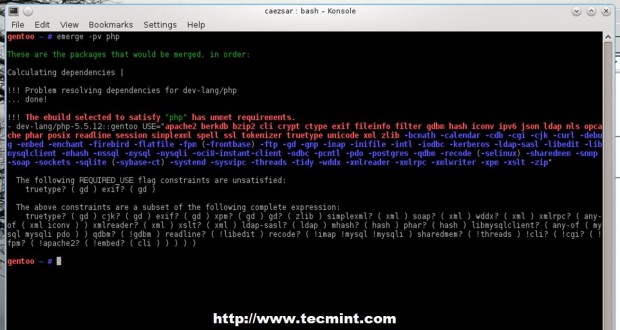
7. Now it’s time to proceed with LAMP installation. Verify Apache Web Server documentation for USE flags using emerge –pv command switch, then edit Portage make.conf file with required USE flags before attempting to install it.
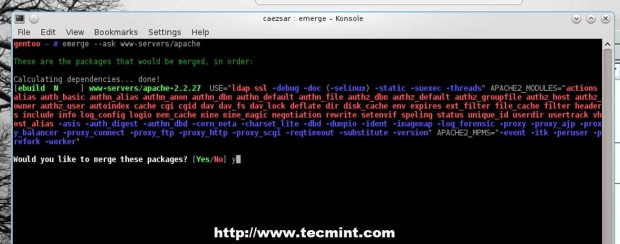
8. Choose your USE flags for compiling process (you can leave it as it is if your server don’t require certain modules), then install Apache using the following command.
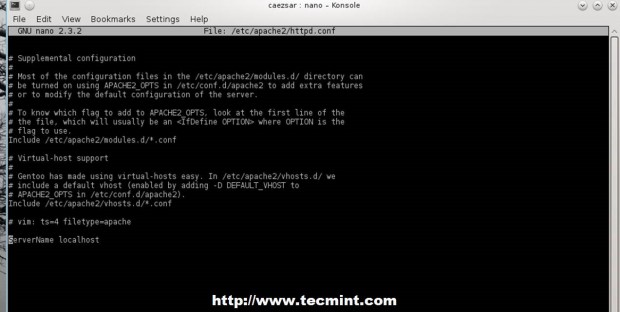
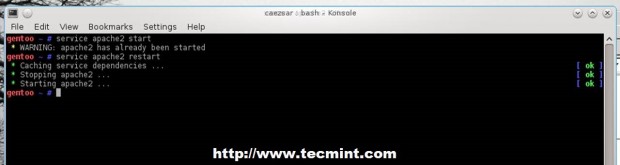
9. Before starting Apache service run the following command to avoid ServerName error, then start httpd daemon.
10. On the next step install PHP dynamic scripting language. Due to PHP modules richness, this tutorial will present you a large modules list used as USE flags, but you should stick with the ones your server configuration requires.
First get USE specific flags for PHP using the below command.
11. Then edit /etc/portage/make.conf file and use the following USE flags for PHP5.5 (USE flags must be on a single line).
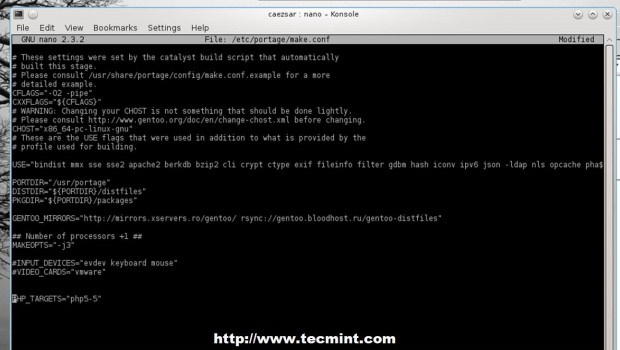
Another method you can use is by echoing USE flags to include desired PHP modules and options into /etc/portage/package.use file.
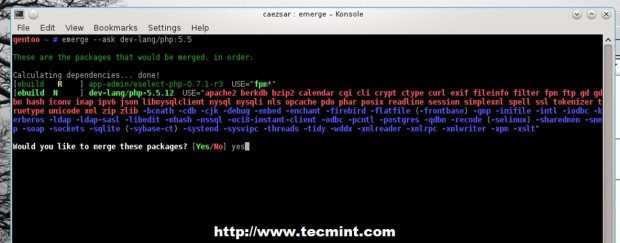
12. After you have selected required USE flags using one of the two presented methods, install PHP with the following command.
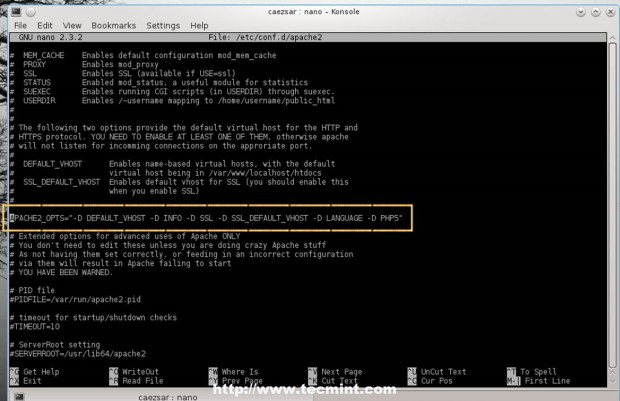
13. PHP emerging process can take a while depending on your system resources and after it finishes tell Apache to use PHP modules by editing /etc/conf.d/apache2 file and add PHP5 on APACHE2_OPTS directive.
Make APACHE2_OPTS line look like this.
To get a list of installed modules use the following command.

14. To test server configuration so far, create a phpinfo file on localhost root directory (/var/www/localhost/htdocs/) and restart Apache service, then point your browser to http://localhost/info.php or http://system_IP/info.php.
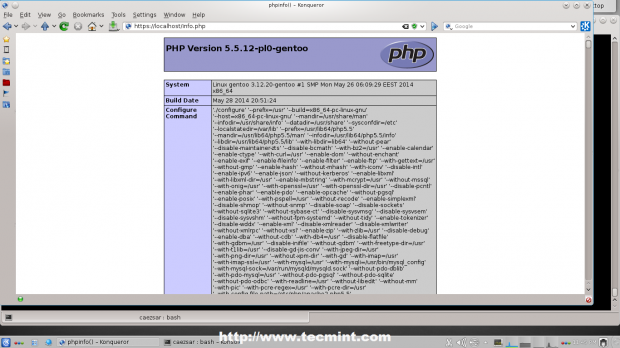
If you get the same result as the image above then your server is correctly configured. So, we can move forward with MySQL database and PhpMyAdmin installation.
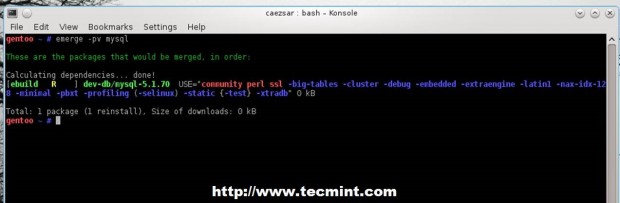
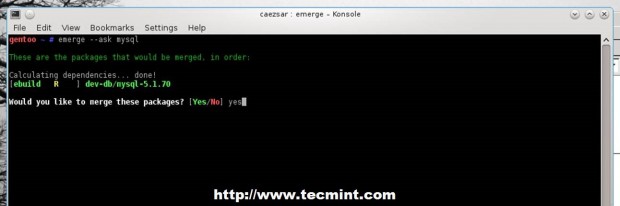
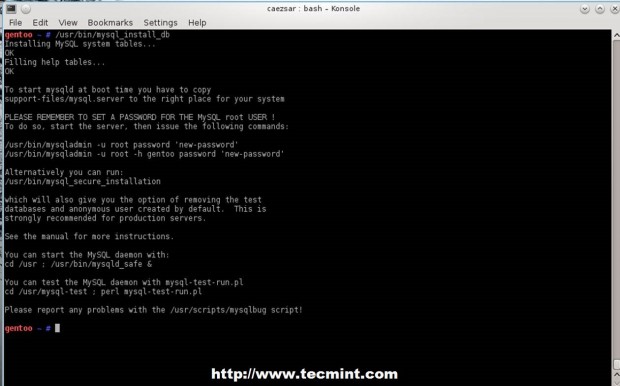
15. Before installing MySQL database verify package USE flags and edit Portage make.conf if required. Use the following commands to verify and install MySQL-server database.
16. Before you start MySQL server make sure that MySQL database is installed on you system using the following command.
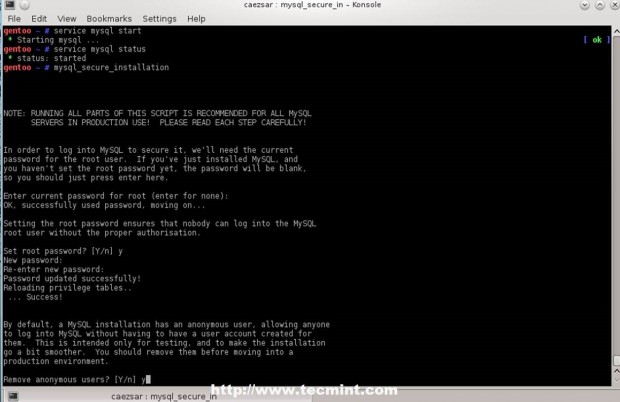
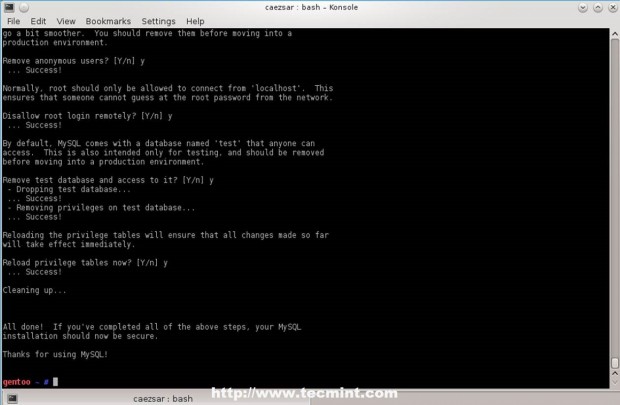
17. Now start MySQL database and secure it using mysql_secure_installation by changing root password, disable root login outside localhost, remove anonymous user and test database.
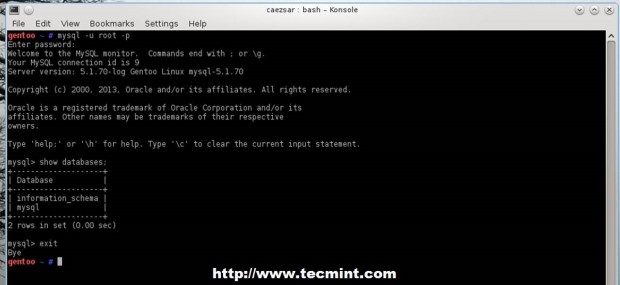
18. To test database functionality login to MySQL issuing the command below and exit database with quit statement.
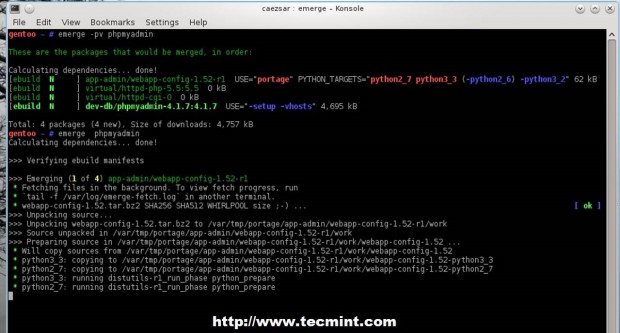
19. If you need a graphical interface to manage MySQL server install PhpMyAdmin package by running this commands.
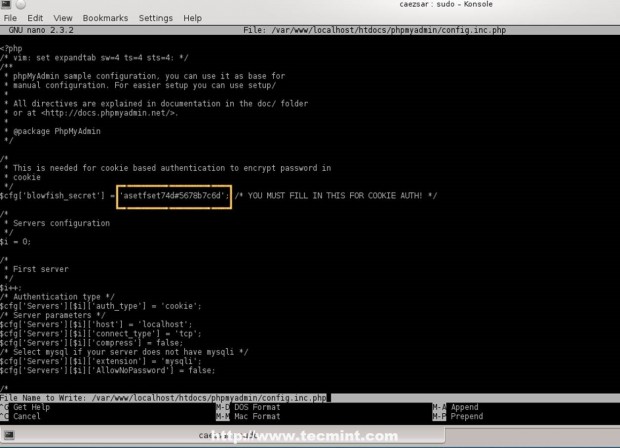
20. After the package has been compiled and installed, create a configuration file for PhpMyAdmin by copying its template file and replace blowfish_secret passphrase using an arbitrary string.
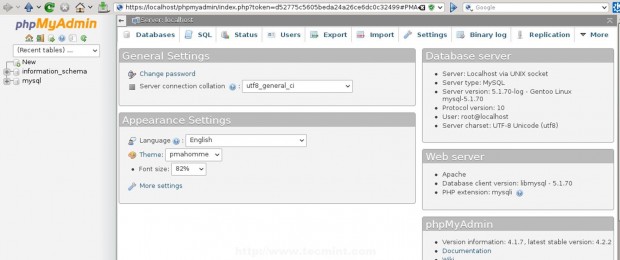
21. Test PhpMyAdmin login process by opening a browser and use the following URL.
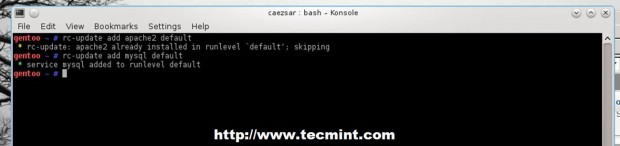
22. If everything is in place, you might want to automatically start your services after reboot by making them available system-wide using the following commands.
That’s all! Now you have a dynamic web environment with Apache, PHP scripting language and relational MySQL database on a high flexible and customizable server platform provided by Gentoo.


No comments:
Post a Comment