Introduction
Installing Fedora 40 Server can be straightforward when broken down into easy-to-follow steps. This guide aims to help users, from beginners to experienced sysadmins, set up Fedora Server efficiently. We’ll go through each step in detail, providing command-line examples, screenshots, and helpful table charts to make your experience smooth.
A Brief History of Fedora
Fedora is a community-driven Linux distribution sponsored by Red Hat, first released in 2003 as a successor to Red Hat Linux. Created to provide a cutting-edge, open-source operating system, Fedora serves as a testing ground for new technologies that often later appear in Red Hat Enterprise Linux (RHEL). Over the years, Fedora has established itself as an innovative platform with regular updates and a strong focus on security, system performance, and flexibility.
Each version of Fedora typically includes the latest advancements in the Linux kernel, software packages, and desktop environments. Known for its stability and performance, Fedora offers different editions tailored for various use cases, including Fedora Workstation, Fedora Server, and Fedora IoT. With its robust community and a reputation for embracing the latest open-source tools, Fedora remains popular among developers, sysadmins, and Linux enthusiasts around the world.
Photo by admingeek from Infotechys
Install Fedora 40 Server in 12 Easy Steps
Step 1: System Requirements |
Before beginning, ensure your system meets Fedora 40’s requirements. Here’s a table summarizing the basic hardware recommendations:
| Requirement | Minimum | Recommended |
|---|---|---|
| CPU | 2 GHz Dual-Core | 2+ GHz Quad-Core |
| RAM | 2 GB | 4 GB |
| Storage | 10 GB | 20+ GB |
| Network | Ethernet or Wi-Fi card | Ethernet |
Step 2: Download Fedora 40 Server ISO |
Head to the Fedora Project website to download the Fedora 40 Server ISO. Select the 64-bit x86_64 architecture unless you’re on specialized hardware.
Download from Command-Line (CLI) using wget:
wget https://download.fedoraproject.org/pub/fedora/linux/releases/40/Server/x86_64/iso/Fedora-Server-dvd-x86_64-40-1.14.isoStep 3: Create Bootable Media |
Using tools like Rufus (Windows), Balena Etcher (macOS/Linux), or dd (Linux), create a bootable USB drive.
CLI Example for Linux (dd command):
sudo dd if=Fedora-Server-dvd-x86_64-40.iso of=/dev/sdX bs=4M status=progressReplace /dev/sdX with your USB drive path.
Step 4: Boot from Installation Media |
Insert your USB drive into the target machine and boot from it. Access the BIOS/UEFI menu (usually by pressing F2, F12, DEL, or ESC on startup) to select your boot media.
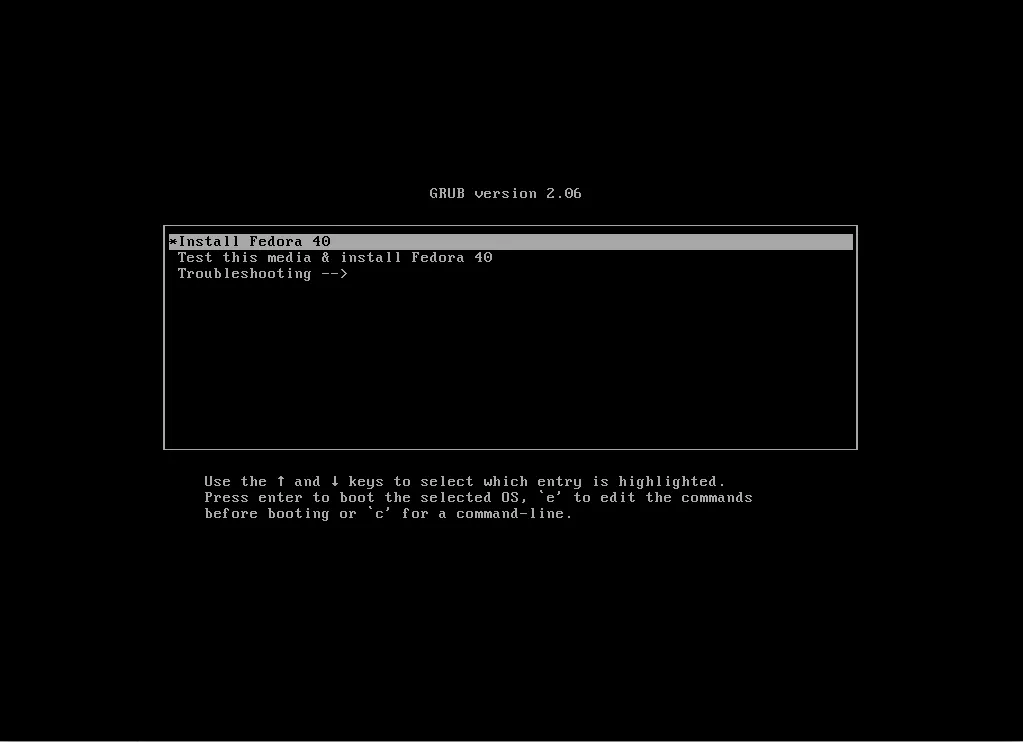
Photo by admingeek from Infotechys
Step 5: Choose Language and Keyboard |
After booting, select your preferred language and keyboard. Fedora defaults to English, but it supports various other languages.
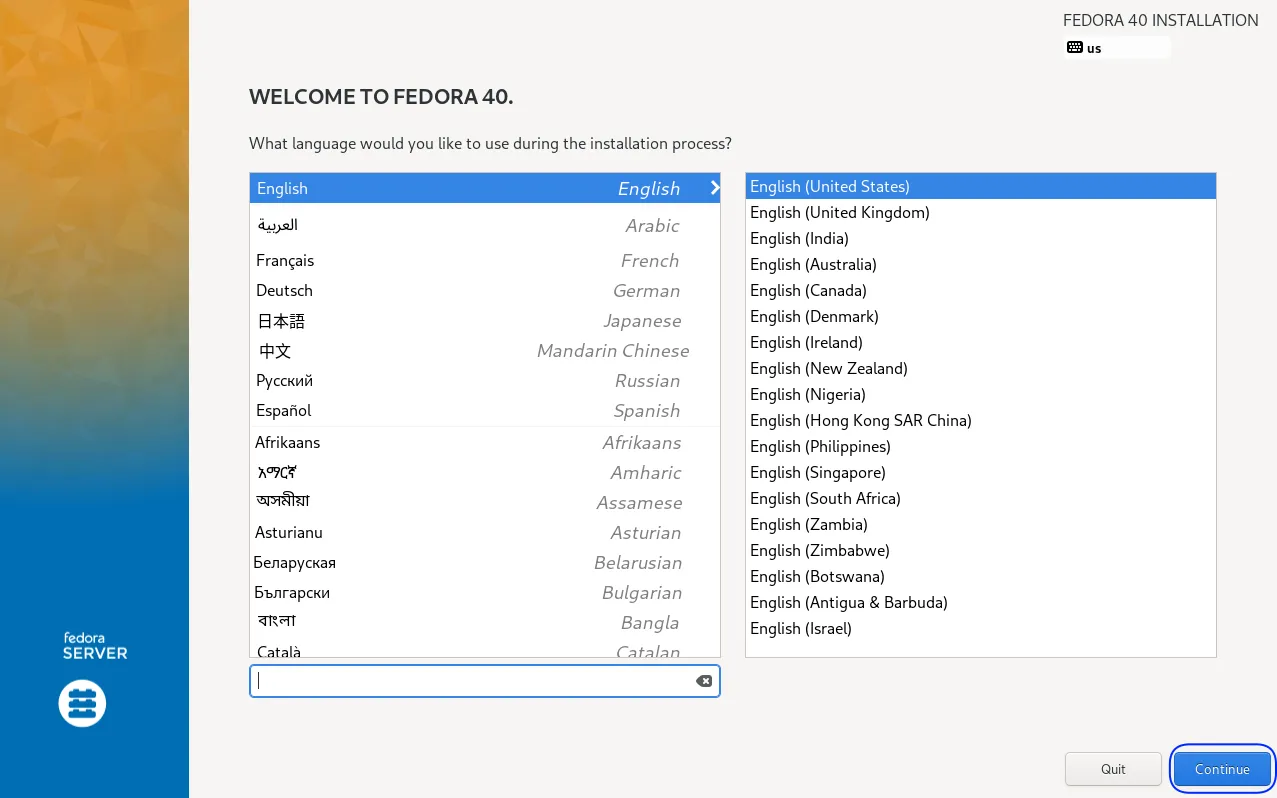
Photo by admingeek from Infotechys
Step 6: Configure Network & Hostname |
Networking is typically enabled by default; however, if it isn’t, from the setup menu, navigate to the network configuration panel. Enable networking to download any necessary updates during installation.
- Hostname: Set a recognizable hostname for your server (e.g.,
fedora40-server).
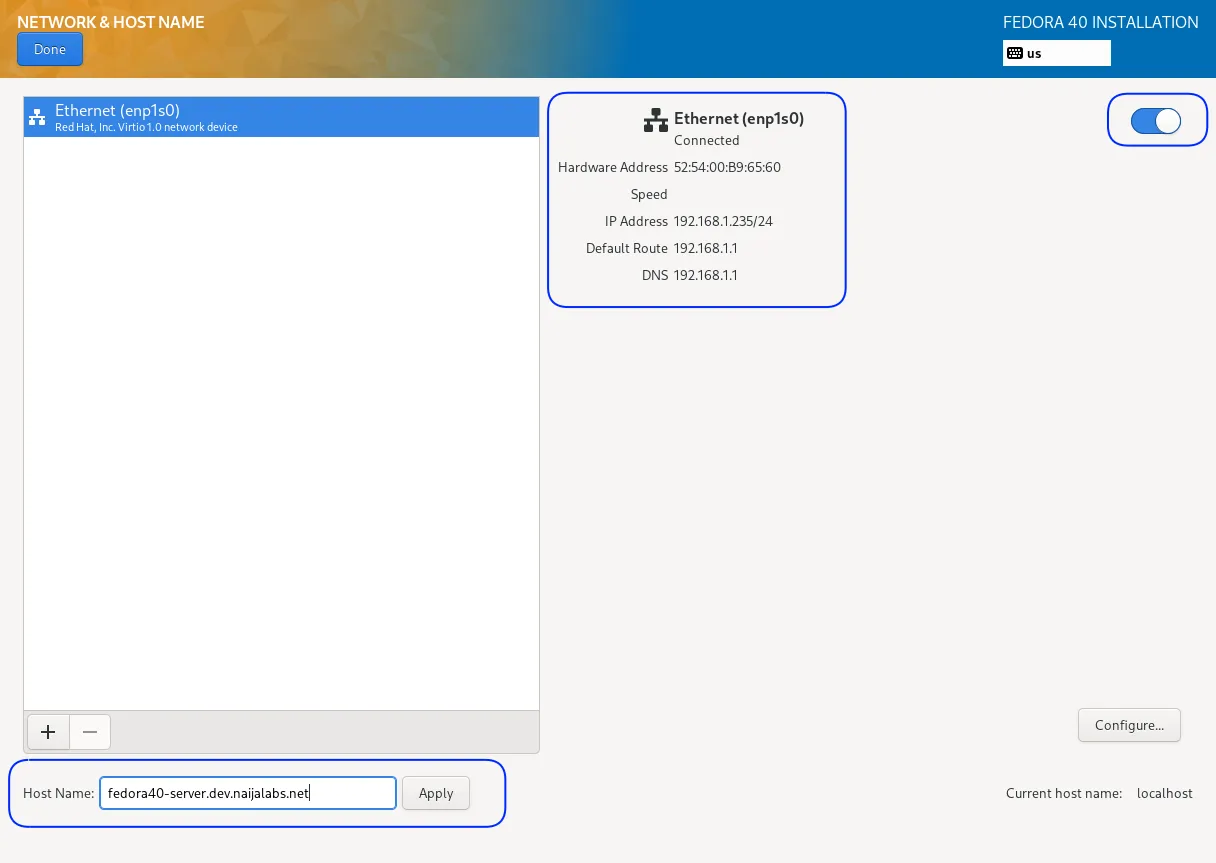
Photo by admingeek from Infotechys
Review your selections, then click the Done button to proceed.
CLI Example to Check Network Configuration Post-Install:
ip aStep 7: Set Up Disk Partitions |
Fedora offers guided and custom partitioning. Here’s a quick guide to common partition schemes:
| Partition | Mount Point | Recommended Size |
|---|---|---|
| Boot | /boot | 512 MB (BIOS Boot /biosboot 2MB) |
| Root | / | 10 GB or more |
| Swap | N/A | 2 GB (if RAM ≤ 4 GB) 4 GB (if RAM > 4 GB) |
| Home (optional) | /home | Remaining space |
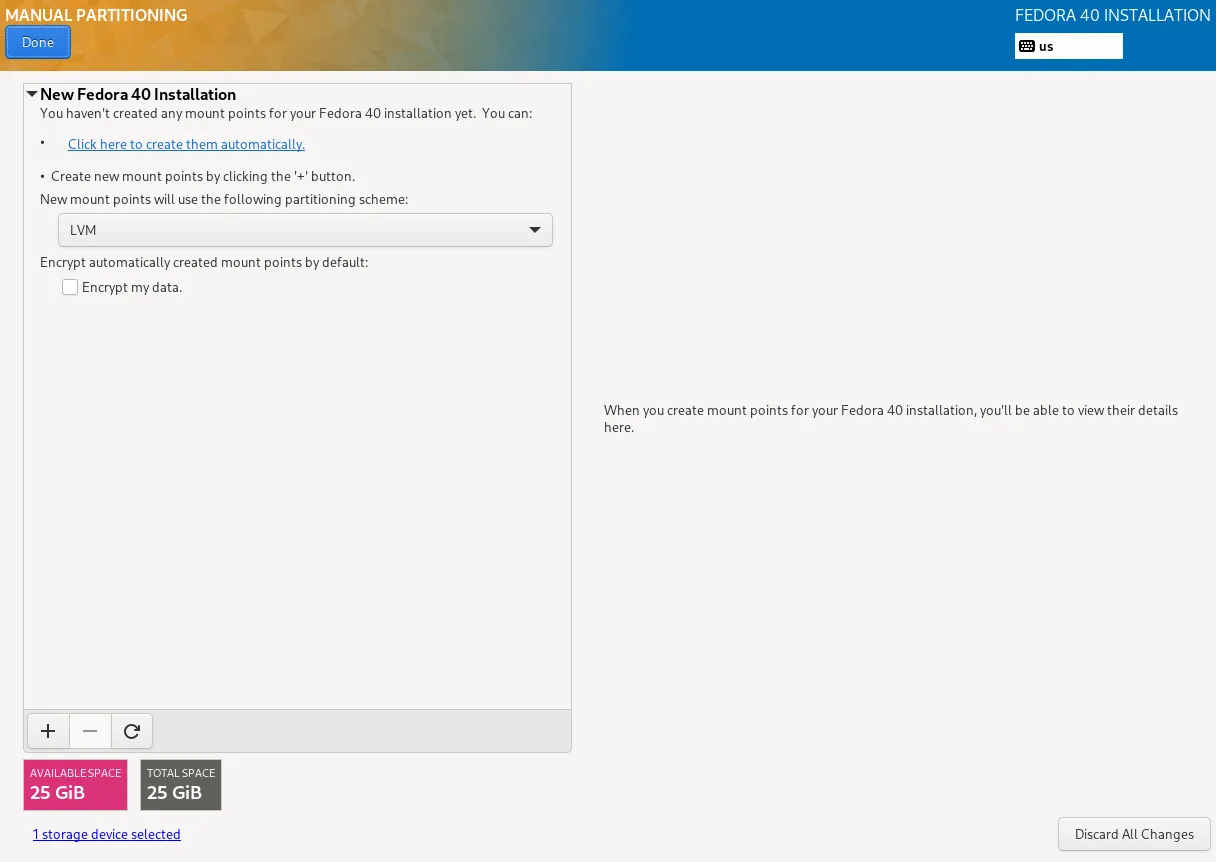
Photo by admingeek from Infotechys
For most users, selecting Click here to create them automatically will suffice. When you’re done with your selections, click the Done and Accept Changes buttons to proceed.

Photo by admingeek from Infotechys
Step 8: Select Software Packages |
Fedora Server offers multiple package options. You can choose from the following options depending on your use case:
| Environment | Description |
|---|---|
| Minimal Install | Basic Fedora setup without additional services |
| Server Edition | Recommended for general server environments |
| Custom | Manually select individual packages |
Tip: For maximum flexibility, choose Server Edition and add packages as needed post-installation.
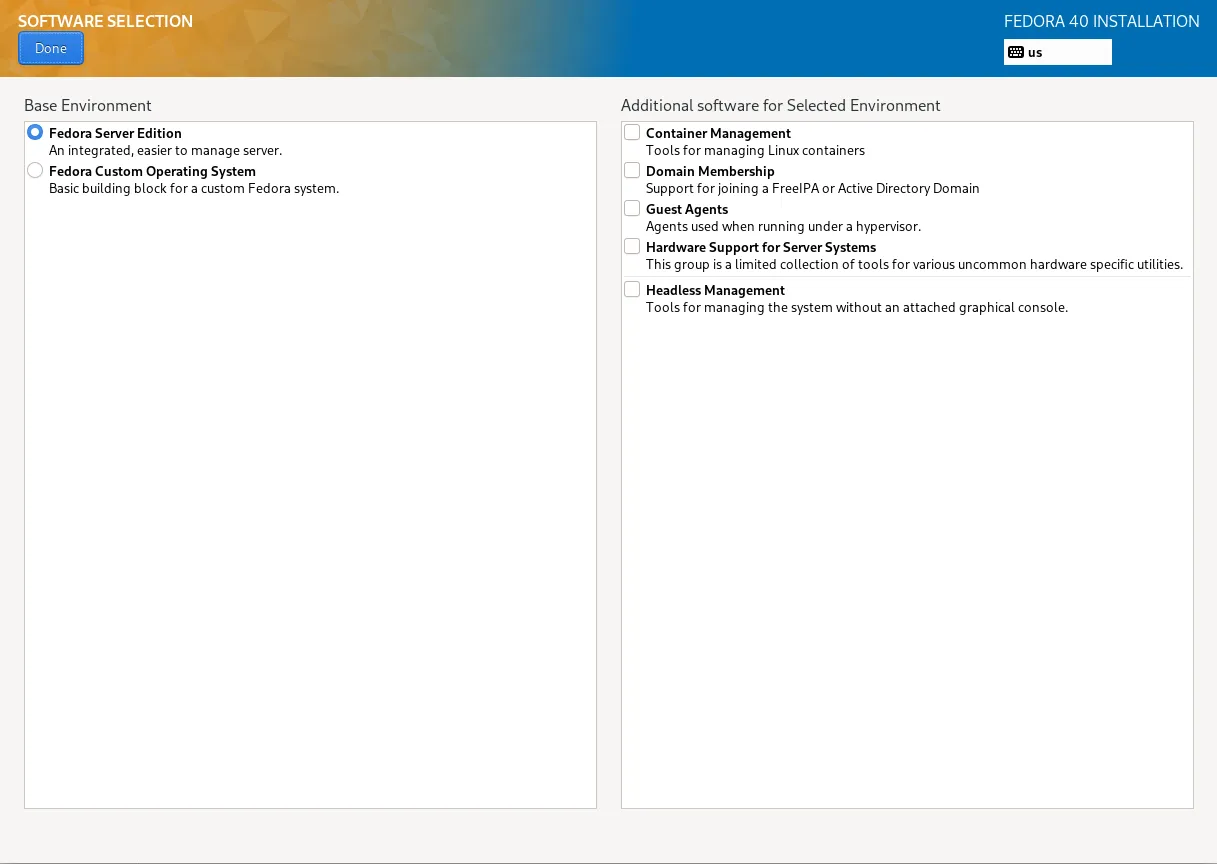
Photo by admingeek from Infotechys
Step 9: Set Time Zone |
Correct time settings are crucial for system processes. Choose your region and time zone from the list.
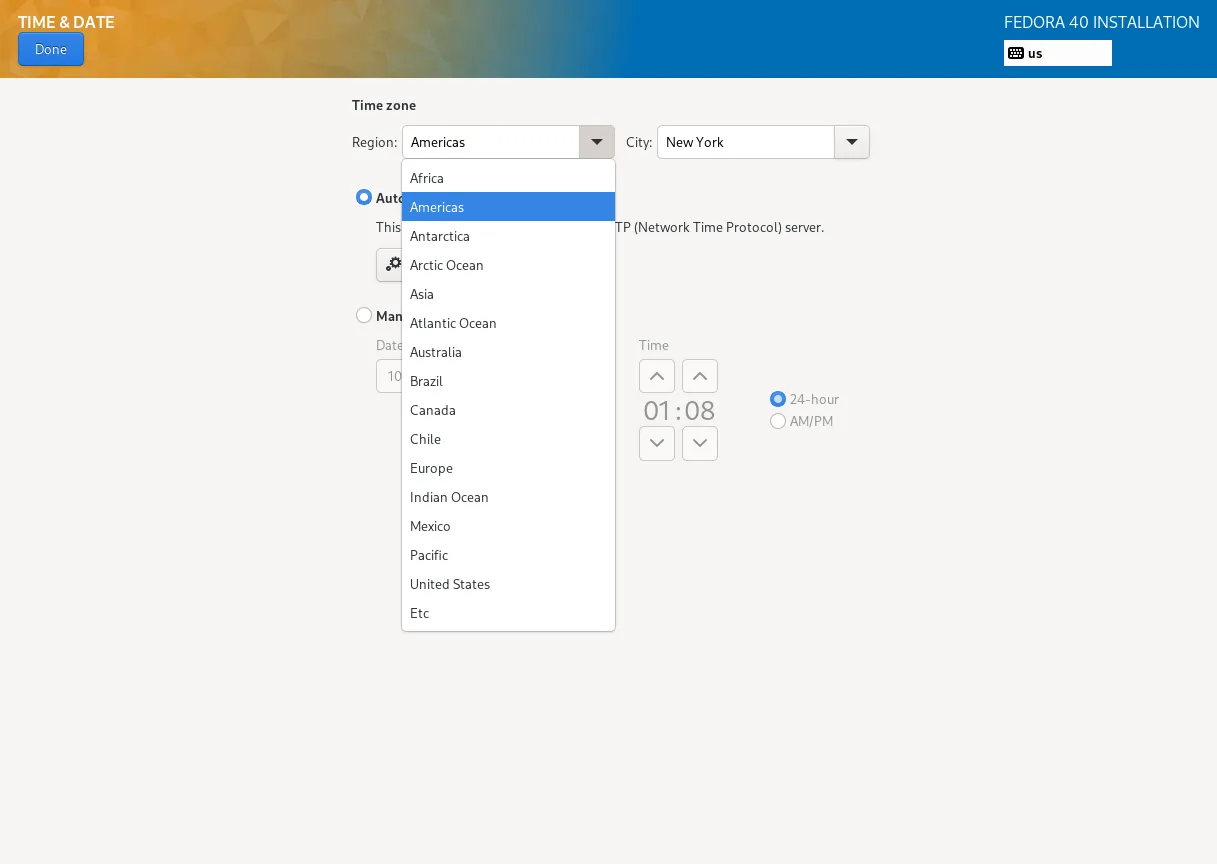
Photo by admingeek from Infotechys
CLI Example to Verify Time Zone Post-Install:
timedatectlStep 10: Create User Accounts |
Create a root password and a separate user account. It’s good practice to have an administrative user for day-to-day operations, minimizing direct root logins.
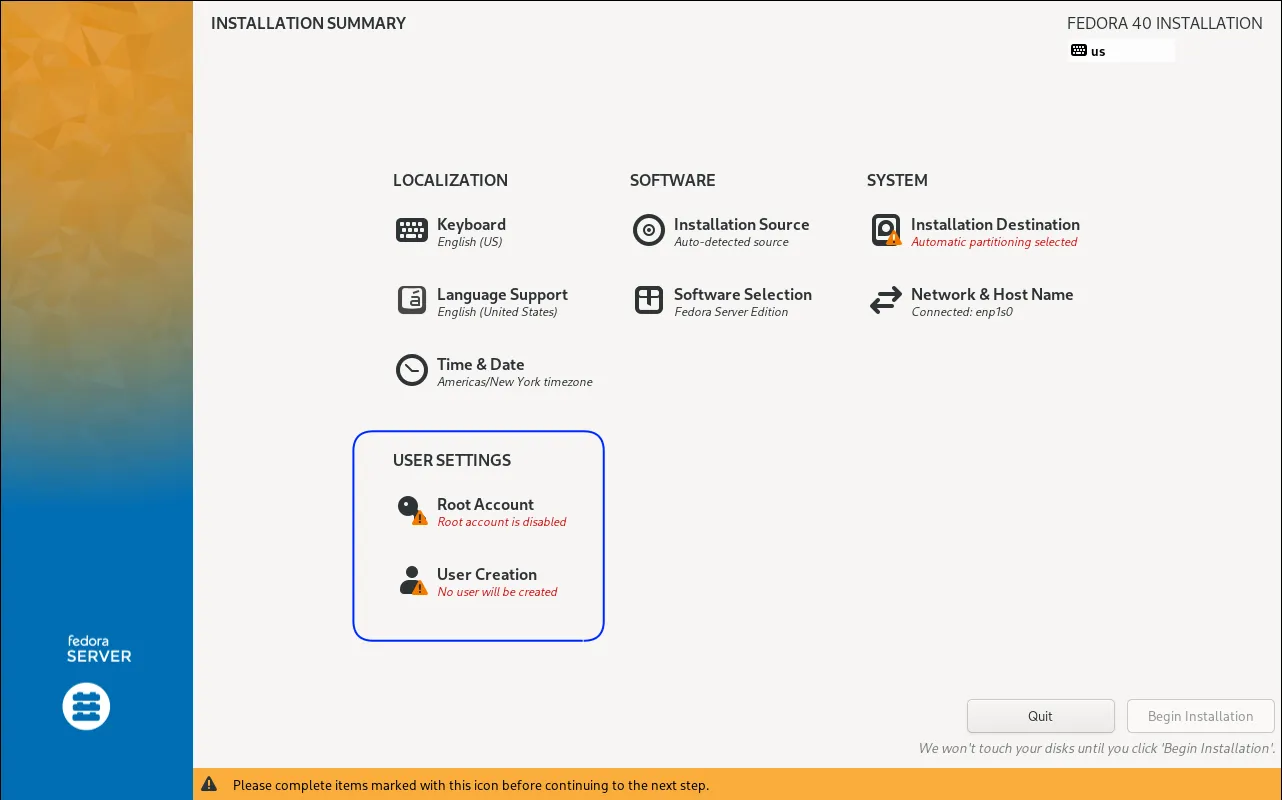
Photo by admingeek from Infotechys
Root User: Set a strong password. You can also decide to enable or disable SSH access to root.
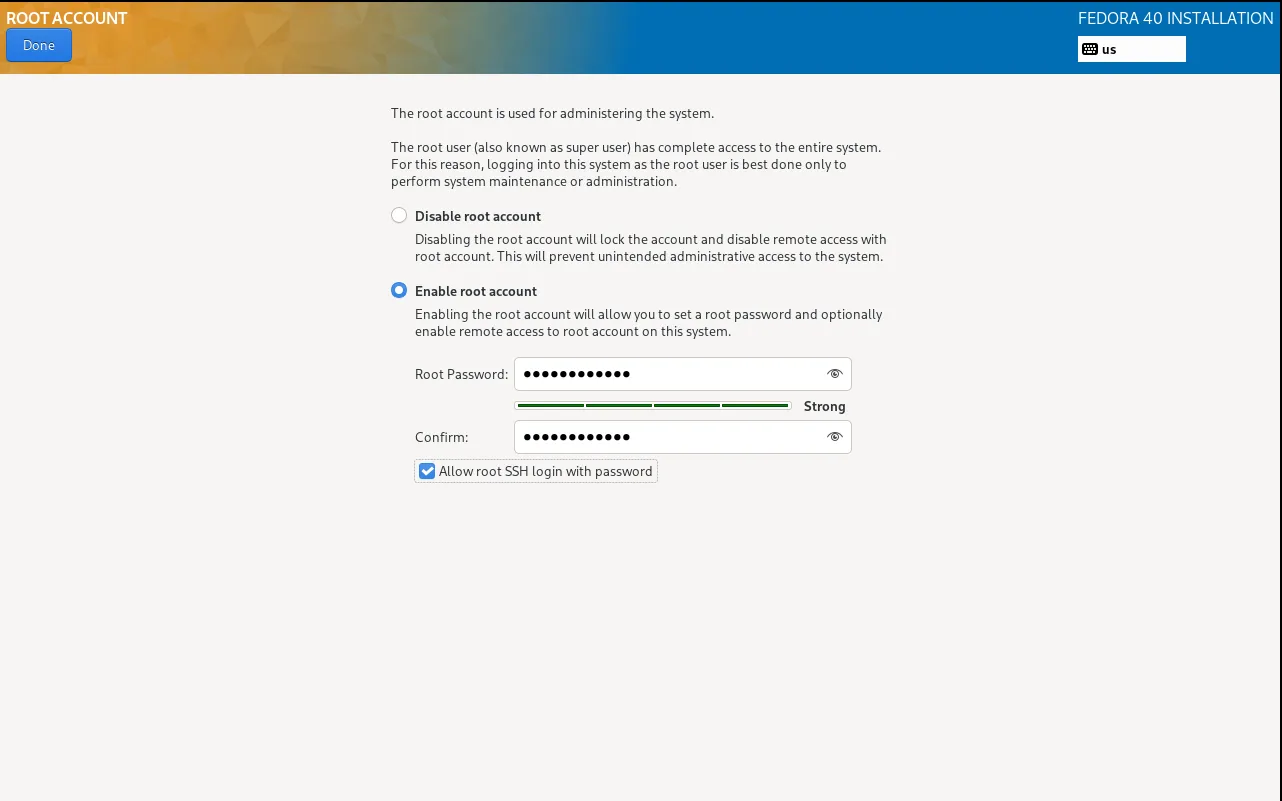
Photo by admingeek from Infotechys
New User: Choose a username and password.
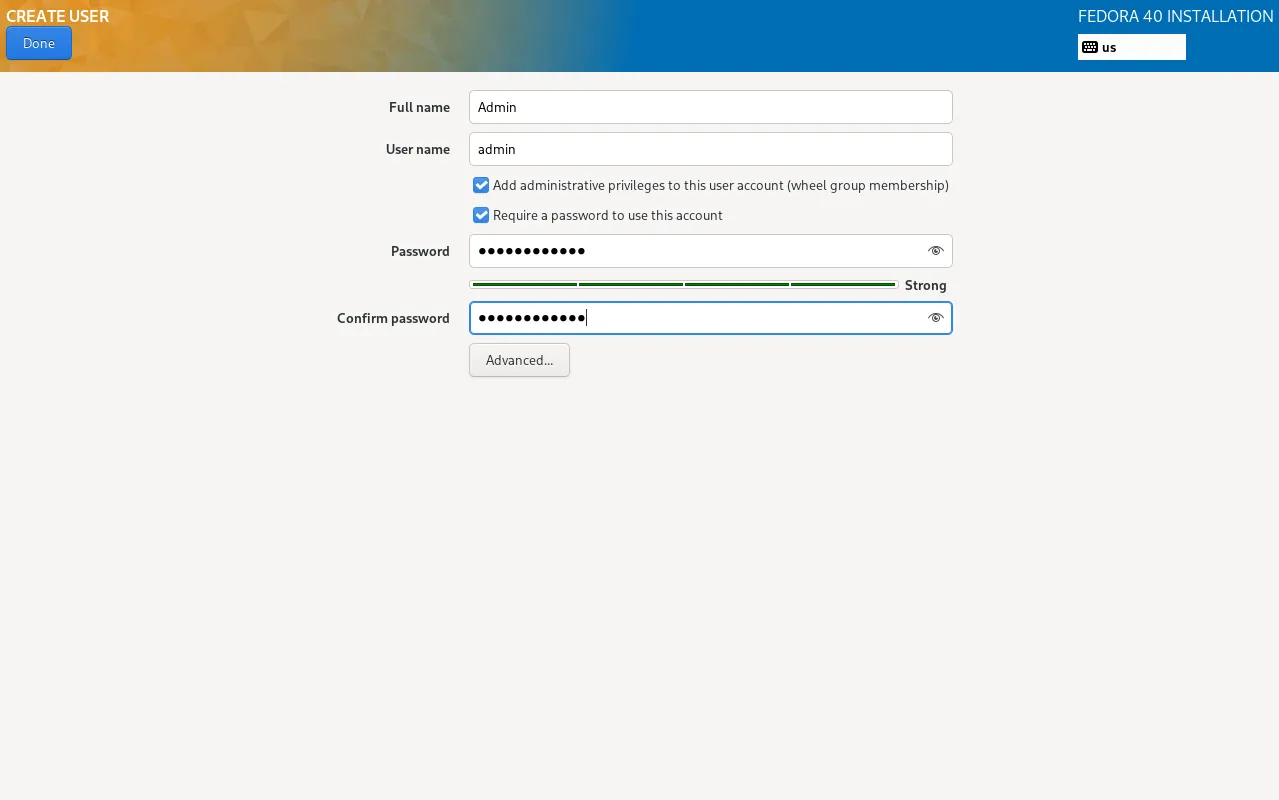
Photo by admingeek from Infotechys
Step 11: Review and Begin Installation |
Review your selections, then click Begin Installation.
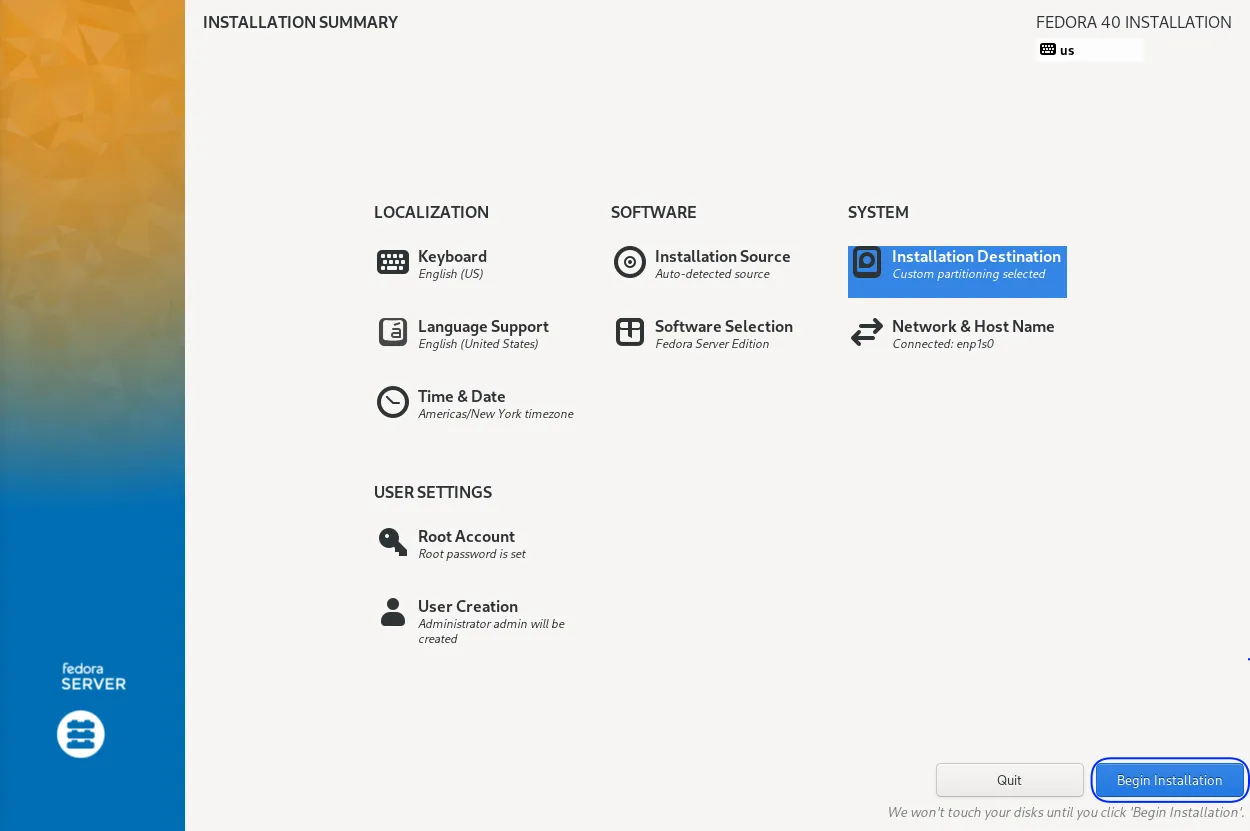
Photo by admingeek from Infotechys
Fedora will handle the installation and notify you upon completion.
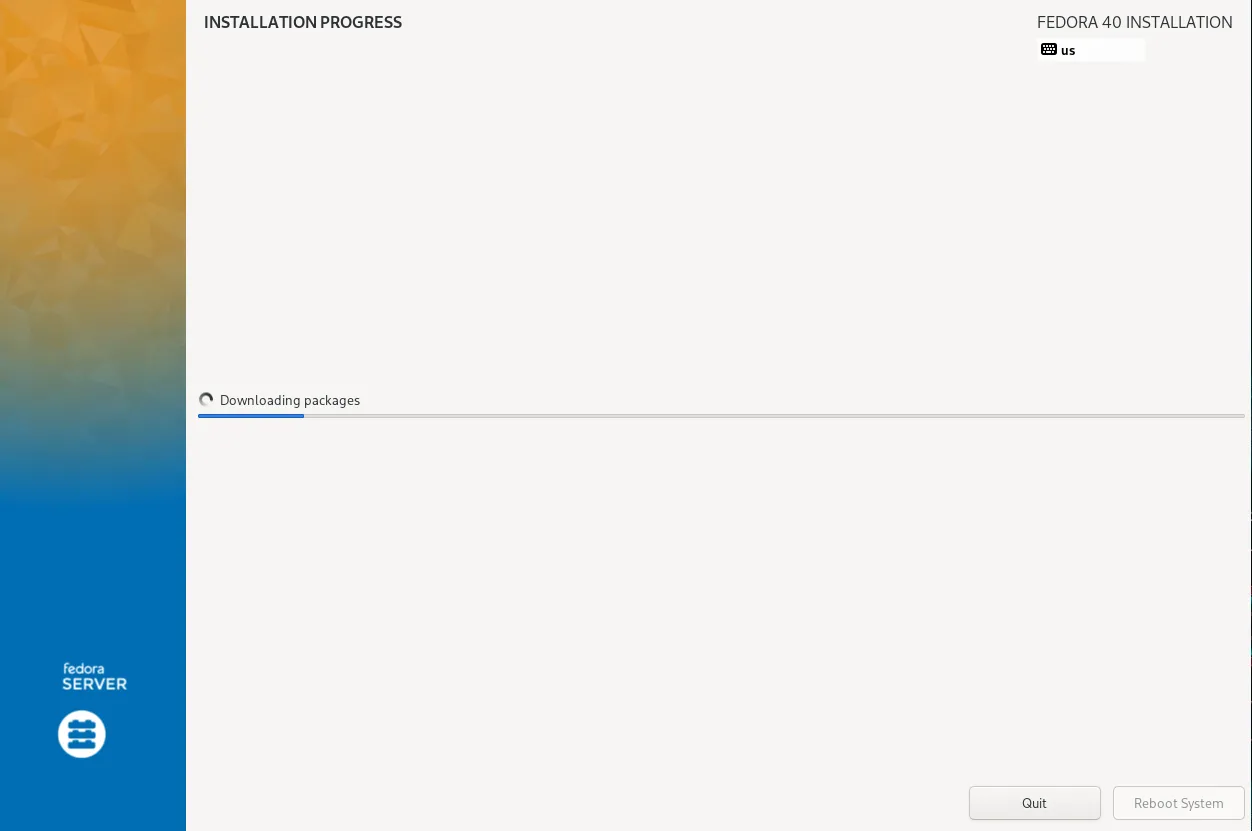
Photo by admingeek from Infotechys
Step 12: Reboot and Initial Setup |
Once installed, reboot your server and log in to complete the setup.
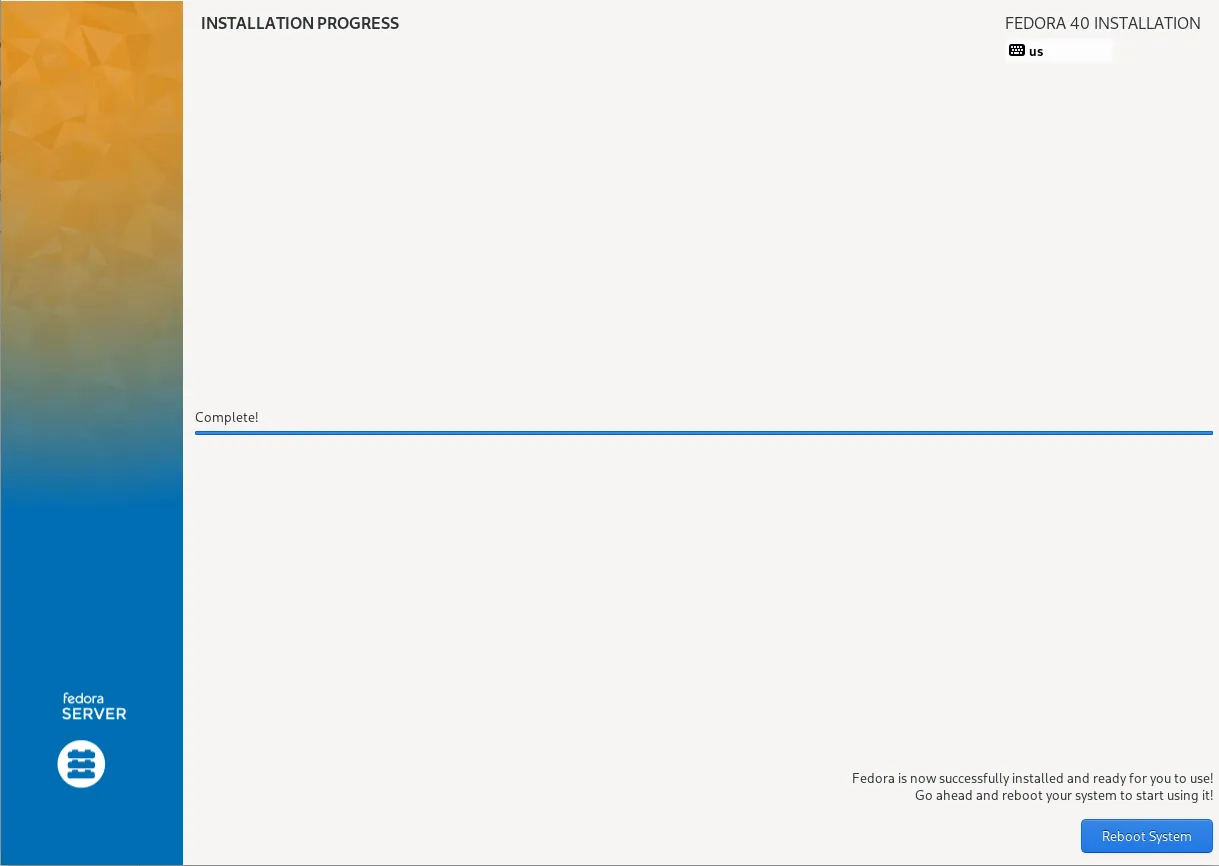
Photo by admingeek from Infotechys
Install Fedora 40 Server in 12 Easy Steps: Post-Installation
With the installation complete, perform the following checks to confirm that your instance is fully operational.
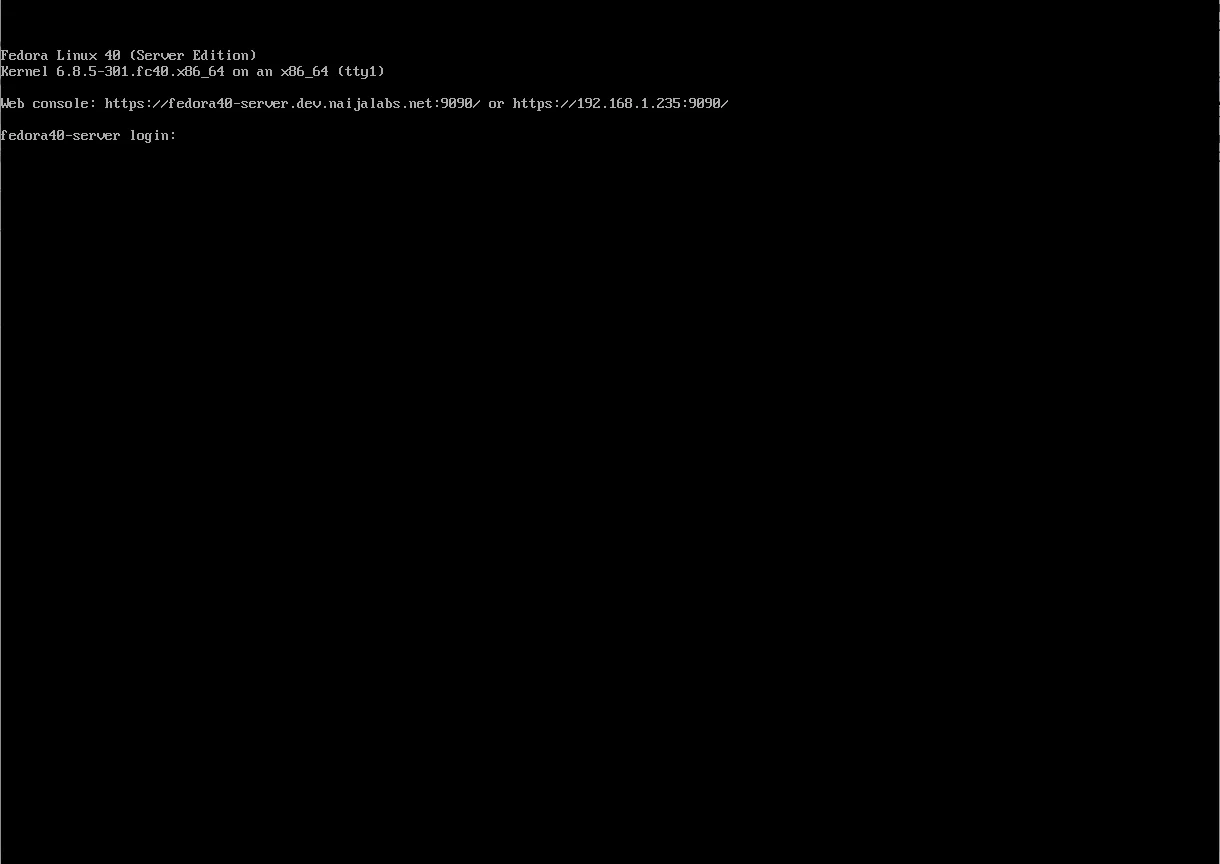
Photo by admingeek from Infotechys
Verify IP Address |
To check your IP address, run the following command:
ip a1: lo: <LOOPBACK,UP,LOWER_UP> mtu 65536 qdisc noqueue state UNKNOWN group default qlen 1000
link/loopback 00:00:00:00:00:00 brd 00:00:00:00:00:00
inet 127.0.0.1/8 scope host lo
valid_lft forever preferred_lft forever
inet6 ::1/128 scope host noprefixroute
valid_lft forever preferred_lft forever
2: enp1s0: <BROADCAST,MULTICAST,UP,LOWER_UP> mtu 1500 qdisc fq_codel state UP group default qlen 1000
link/ether 52:54:00:b9:65:60 brd ff:ff:ff:ff:ff:ff
inet 192.168.1.235/24 brd 192.168.1.255 scope global dynamic noprefixroute enp1s0
valid_lft 83532sec preferred_lft 83532sec
inet6 fe80::5054:ff:feb9:6560/64 scope link noprefixroute
valid_lft forever preferred_lft foreverSet Hostname |
If you didn’t set a hostname during installation, you can configure it now with the following command:
sudo hostnamectl set-hostname your-fedora-serverRun Updates |
To keep your new instance up-to-date, run the following command:
sudo dnf update -y

No comments:
Post a Comment