Introduction
Rocky Linux has become a popular choice for those looking for a stable, community-driven, enterprise grade Linux distribution, especially after CentOS shifted focus to CentOS Stream. Rocky Linux 9.5, based on RHEL (Red Hat Enterprise Linux), is an ideal operating system for servers and workstations
alike. Whether you’re setting up a server for production or simply testing the operating system in a virtual environment, this guide will walk you through the entire process. In this blog post, we’ll guide you through the process of installing Rocky Linux 9.5 in 12 easy steps, helping you get started with a clean installation.
Prerequisites
Before we begin, ensure that you have:
| Requirement | Details |
|---|---|
| Machine Specifications | A compatible physical or virtual machine with at least 2GB of RAM and 20GB of disk space. |
| USB Drive or Network Installation | A USB drive (minimum 12GB) or a network-based installation. |
| Rocky Linux 9.5 ISO Image | A Rocky Linux 9.5 ISO image (available from the official Rocky Linux website). |
| Tool for Writing ISO to USB | A tool to write the ISO to USB (e.g., Rufus, Etcher, or dd). |
Install Rocky Linux 9.5
Step 1: Download the Rocky Linux 9.5 ISO |
First, visit the official Rocky Linux download page to get the latest stable version of Rocky Linux 9.5.
Choose the appropriate version |
- Minimal ISO: Best for minimal installations and advanced users who want to customize their setup.
- DVD ISO: Full installation with a graphical interface, suitable for new users.
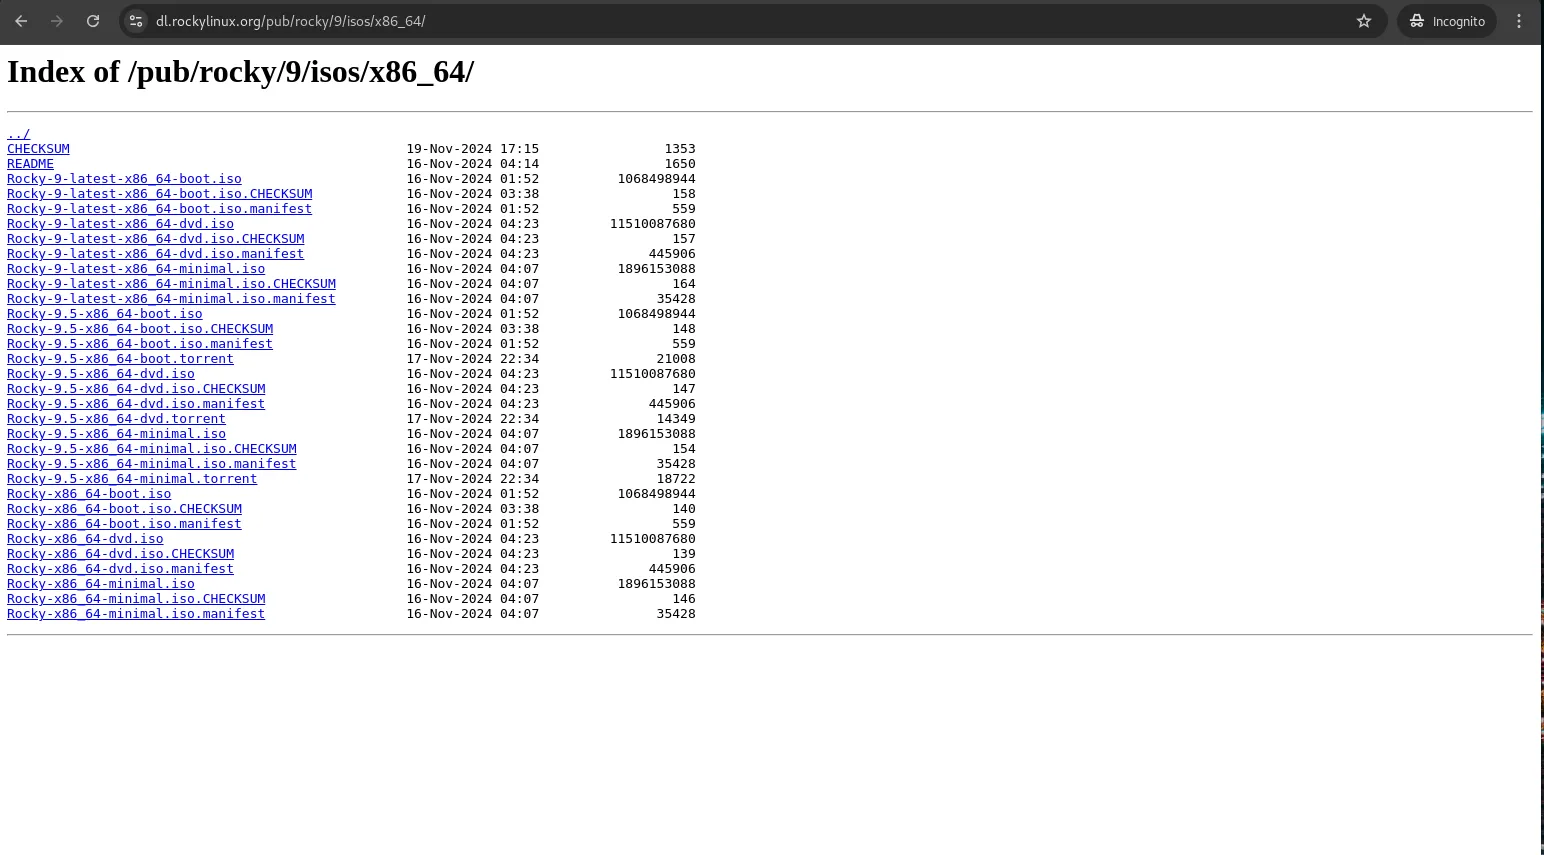
Photo by admingeek from Infotechys
Choose the ISO based on your needs and download it to your local machine.
Step 2: Create a Bootable USB Drive |
Once you have the ISO image, you need to create a bootable USB drive. You can do this on Windows, macOS, or Linux.
On Windows: |
- Download Rufus from rufus.ie.
- Insert your USB drive and open Rufus.
- In Rufus, select your USB drive, choose the downloaded Rocky Linux ISO, and click “Start.”
- Confirm the warning that the USB drive will be erased, and the tool will create a bootable USB.
On Linux (Using dd command): |
sudo dd if=/path/to/RockyLinux9.5.iso of=/dev/sdX bs=4M status=progress && syncReplace /dev/sdX with the correct path for your USB drive (e.g., /dev/sdb ). Be cautious with the dd command as selecting the wrong drive can erase data.
Step 3: Boot From the USB Drive |
- Insert the bootable USB drive into your machine.
- Restart the computer and enter the BIOS/UEFI settings (usually by pressing F2, F12, ESC, or DEL during boot).
- Set the USB drive as the first boot device.
- Save and exit the BIOS/UEFI settings. The system will boot from the USB drive.
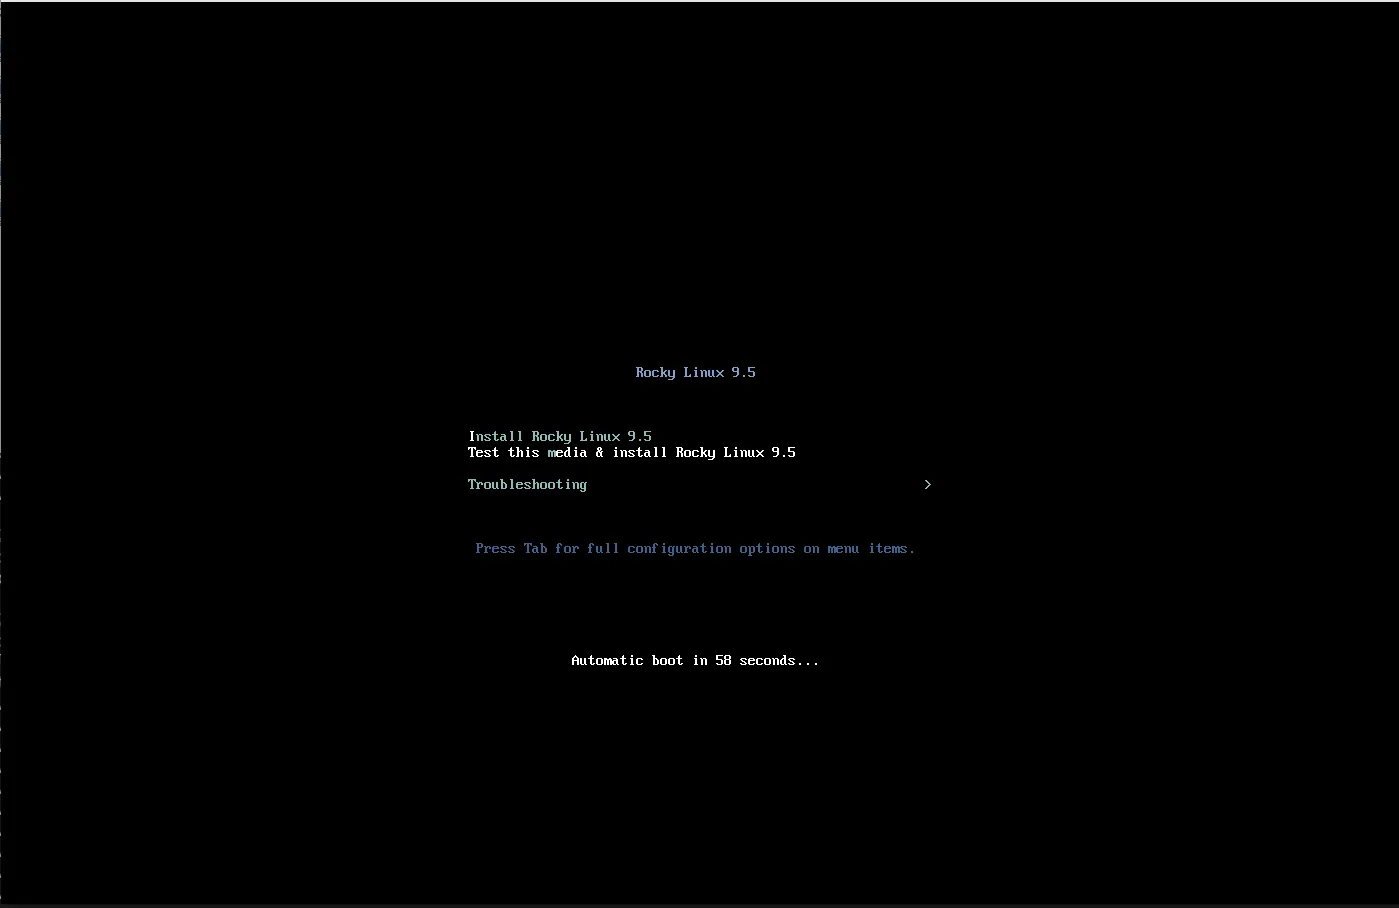
Photo by admingeek from Infotechys
Step 4: Select Installation Language |
Once the system boots from the USB drive, you’ll be greeted by the Rocky Linux 9.5 Installer. The first step is to choose the installation language.
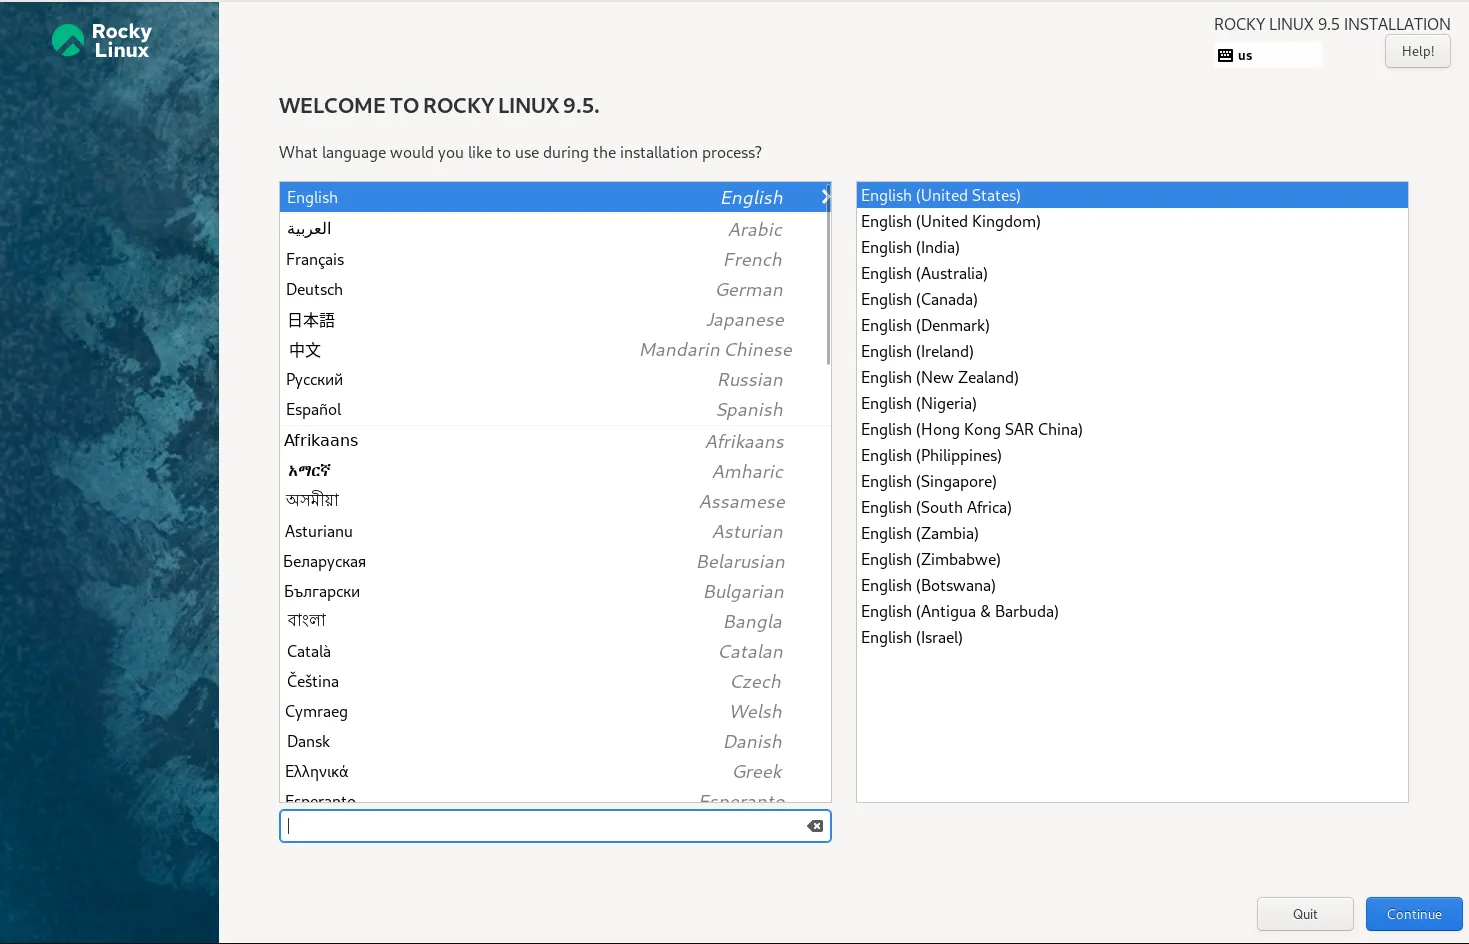
Photo by admingeek from Infotechys
Select your preferred language from the list (e.g., English). Click Continue to proceed.
Step 5: Configure Keyboard Layout |
In the Installation Summary window, click on the Keyboard option. Select your preferred keyboard layout, and click Done.
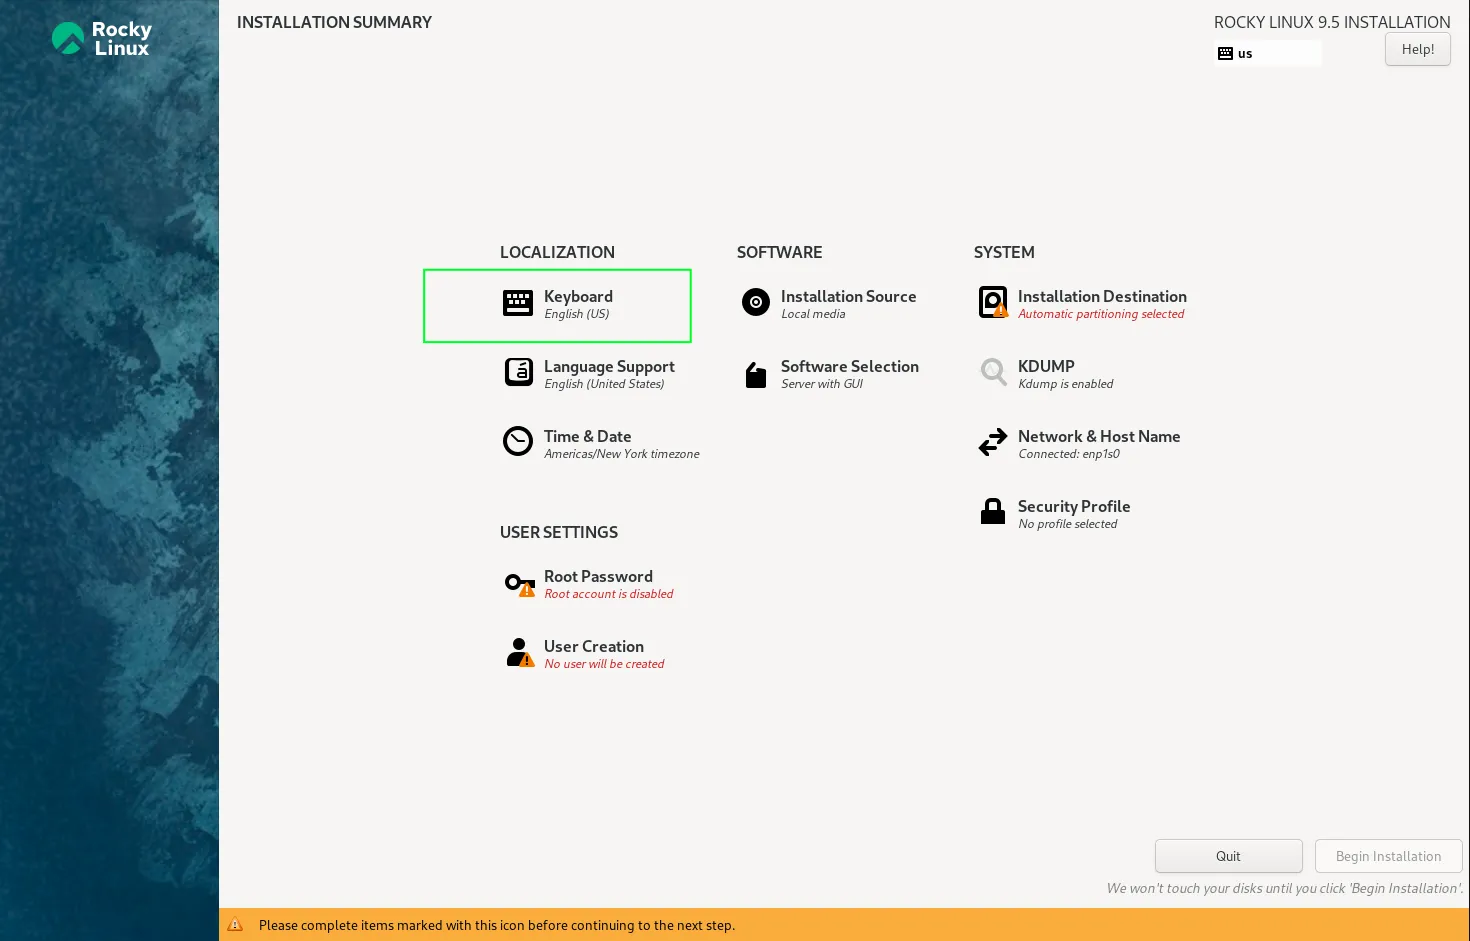
Photo by admingeek from Infotechys
Example: For a U.S. keyboard layout, select English (US). This will already be your default setting.
Step 6: Configure Timezone and Date/Time Settings |
Click on the Time & Date option to set your timezone. The system will typically auto-detect your location based on the system’s IP address. Choose your timezone from the list (e.g., America/New_York). You can configure NTP (Network Time Protocol) to ensure the system’s time is synchronized.
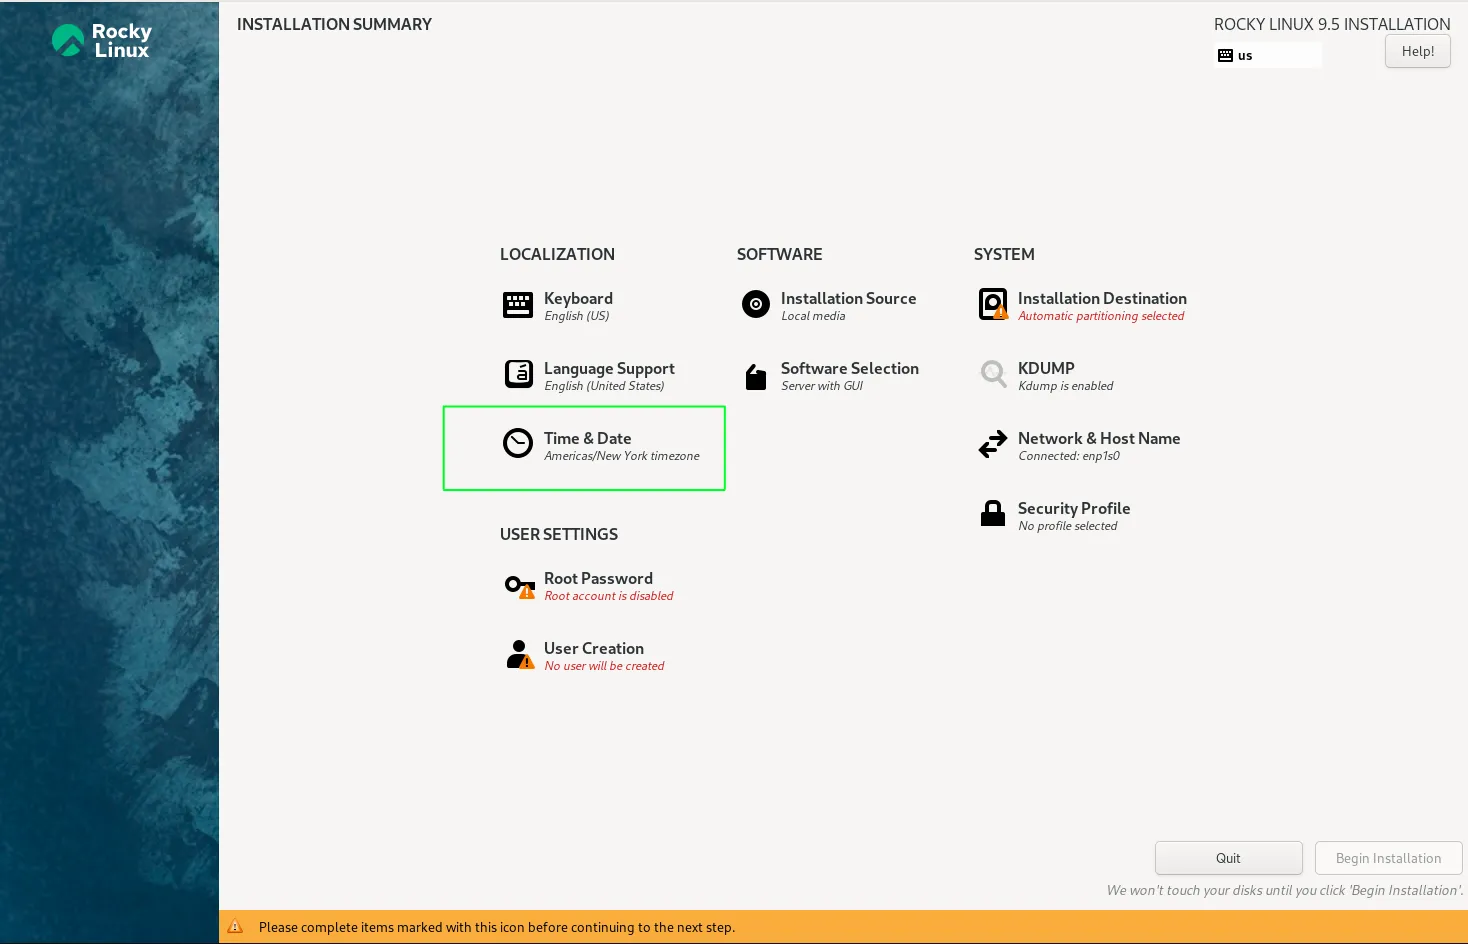
Photo by admingeek from Infotechys
Click Done to save your settings.
Step 7: Set Installation Destination |
Click on Installation Destination to select the disk where Rocky Linux will be installed. Select the disk where you want to install Rocky Linux (e.g., /dev/sda).
You can choose to use the entire disk or set up custom partitions using Custom.
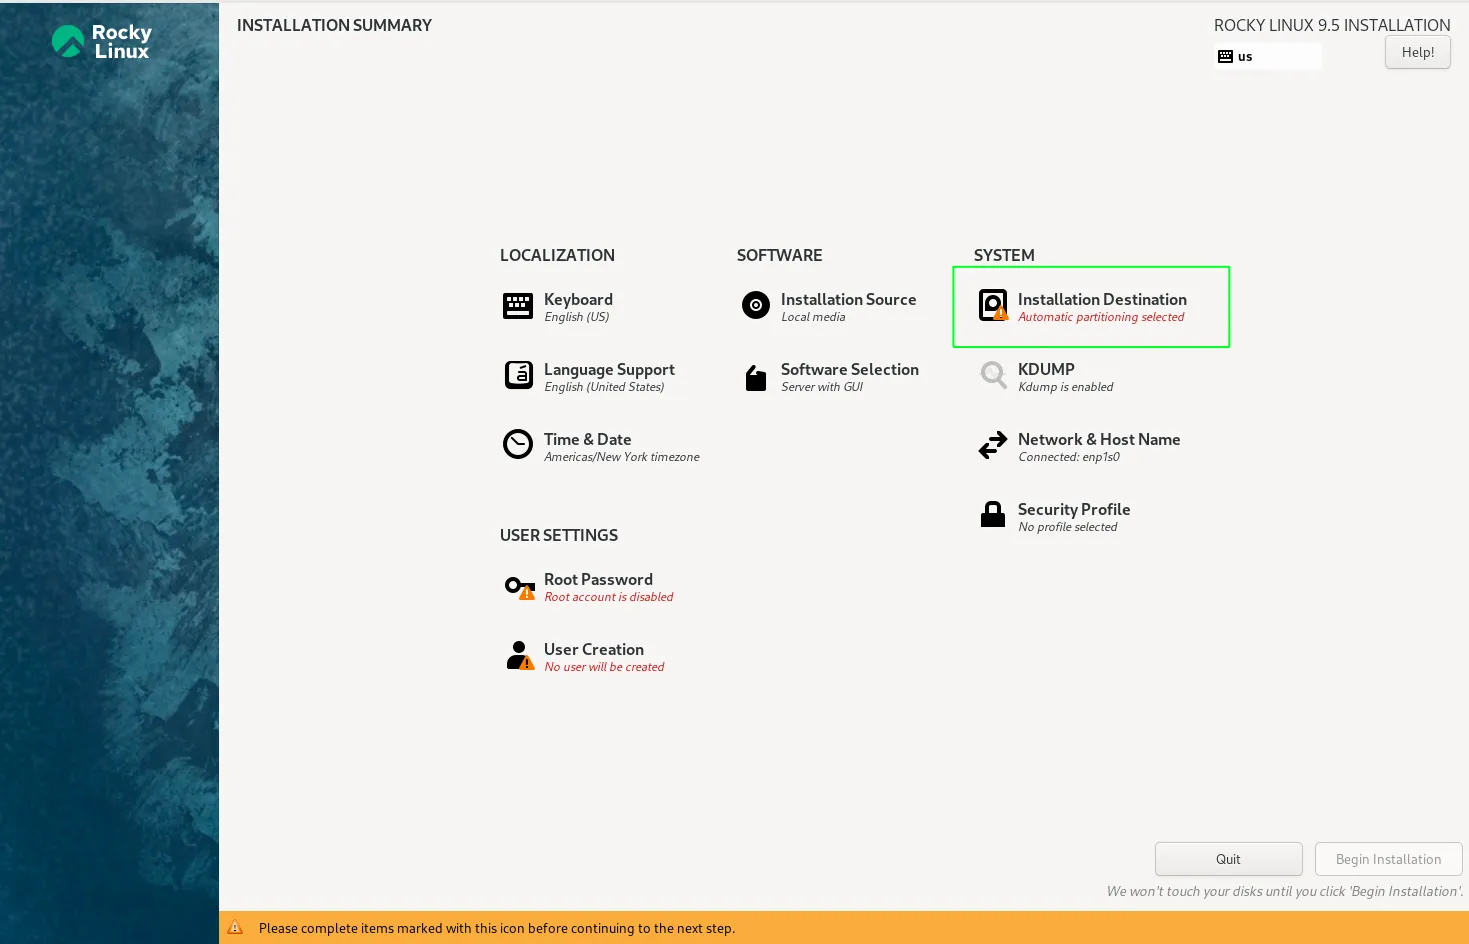
Photo by admingeek from Infotechys
Recommended Partition Layout (for new users): |
- /boot: 1 GB (formatted as ext4)
- /root: 20-40 GB (formatted as ext4 or XFS)
- swap: Equal to the amount of RAM for systems with less than 8GB RAM, otherwise 4GB is typically enough.
- /home: Remaining space (if you need a separate partition for user data)
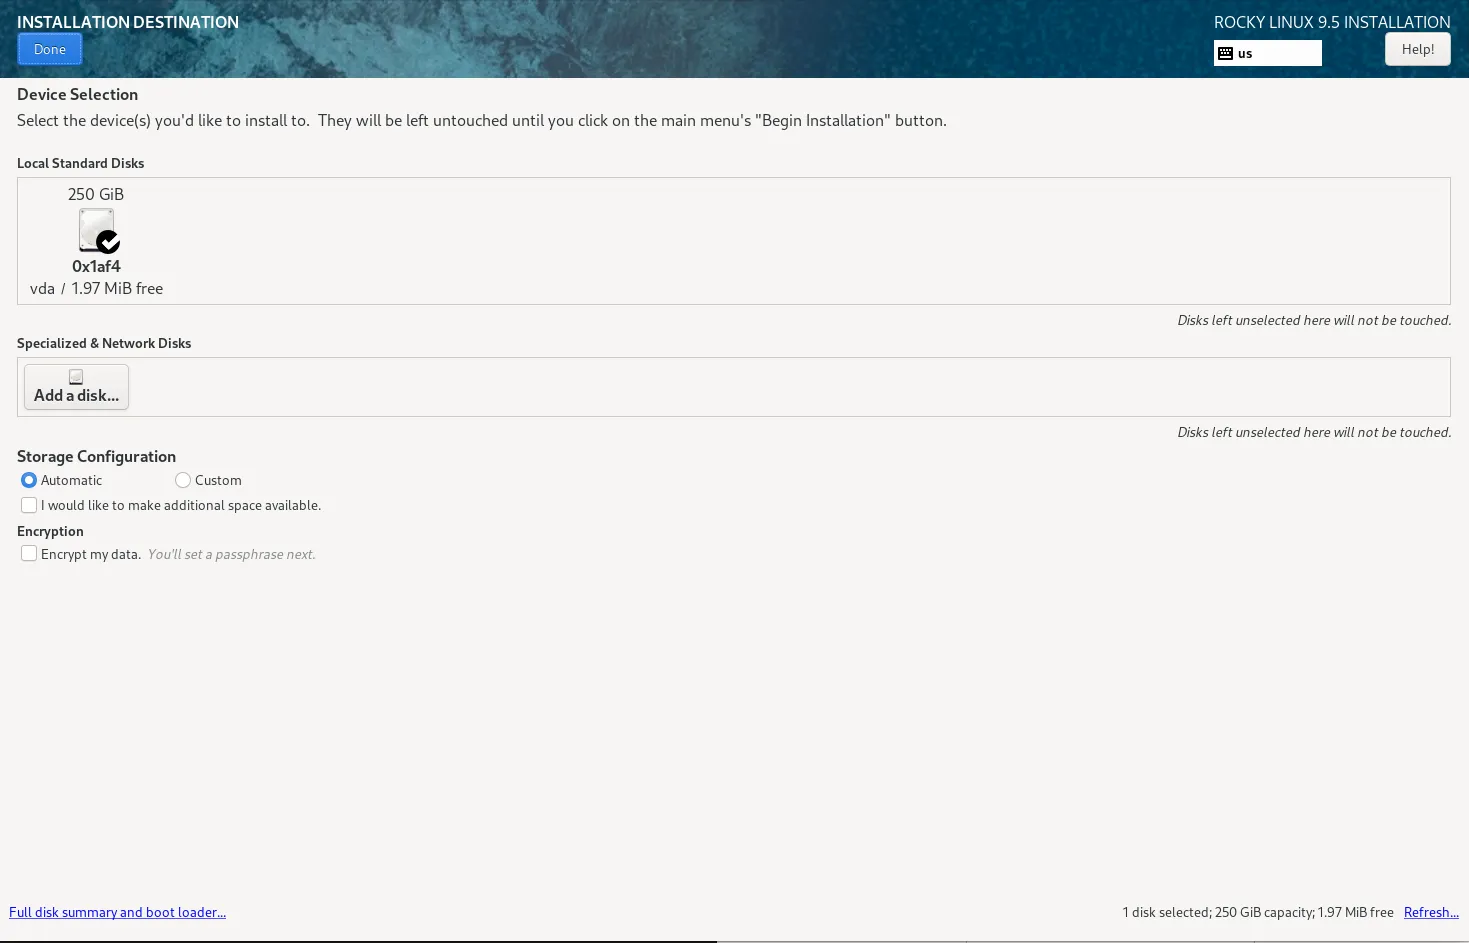
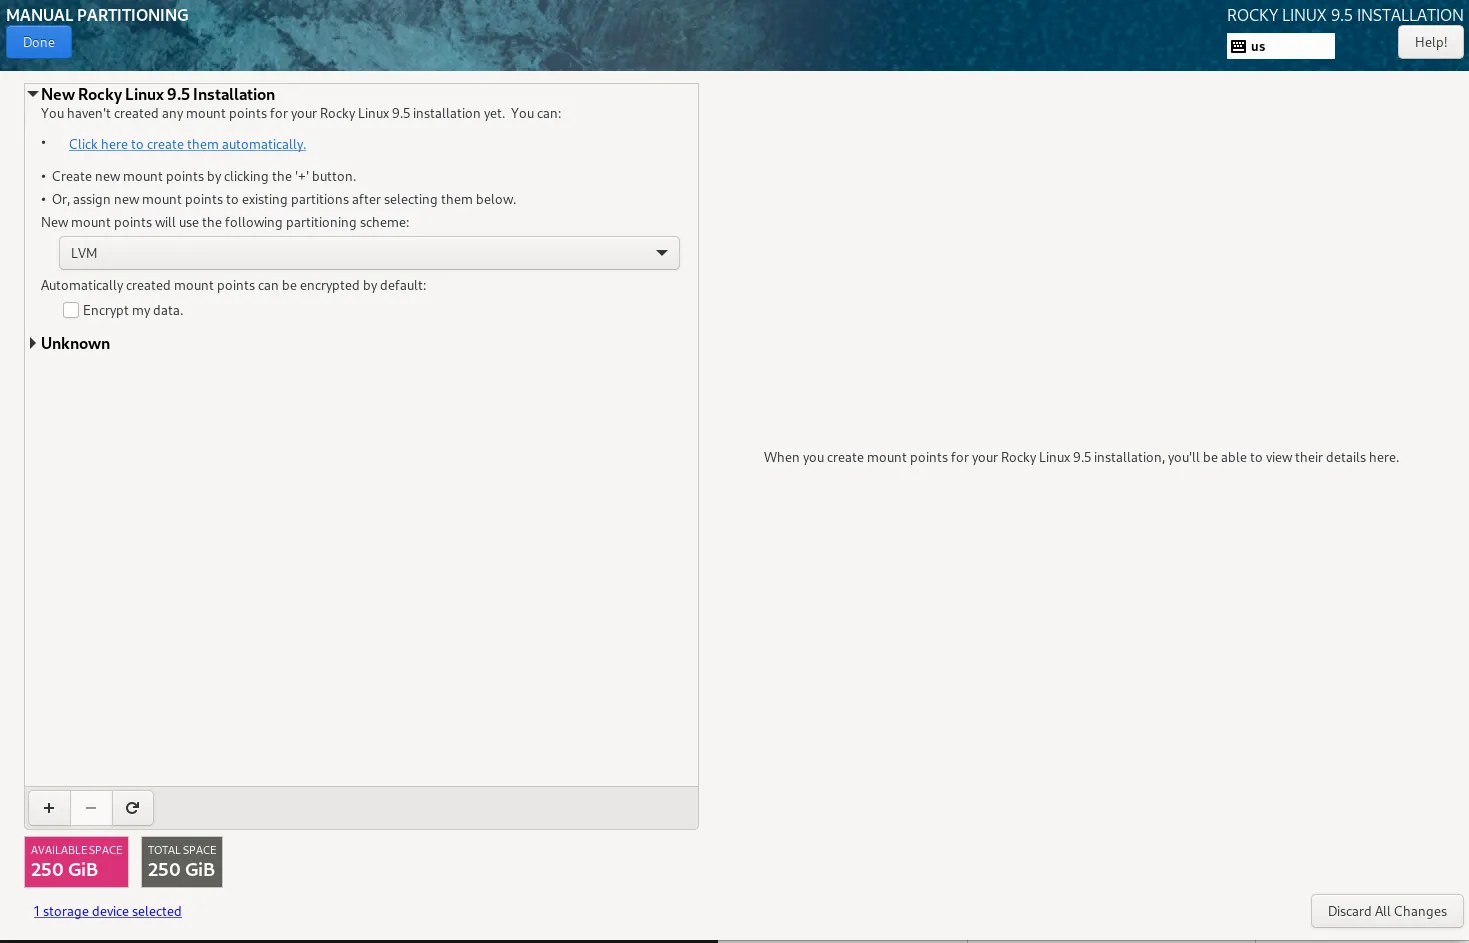
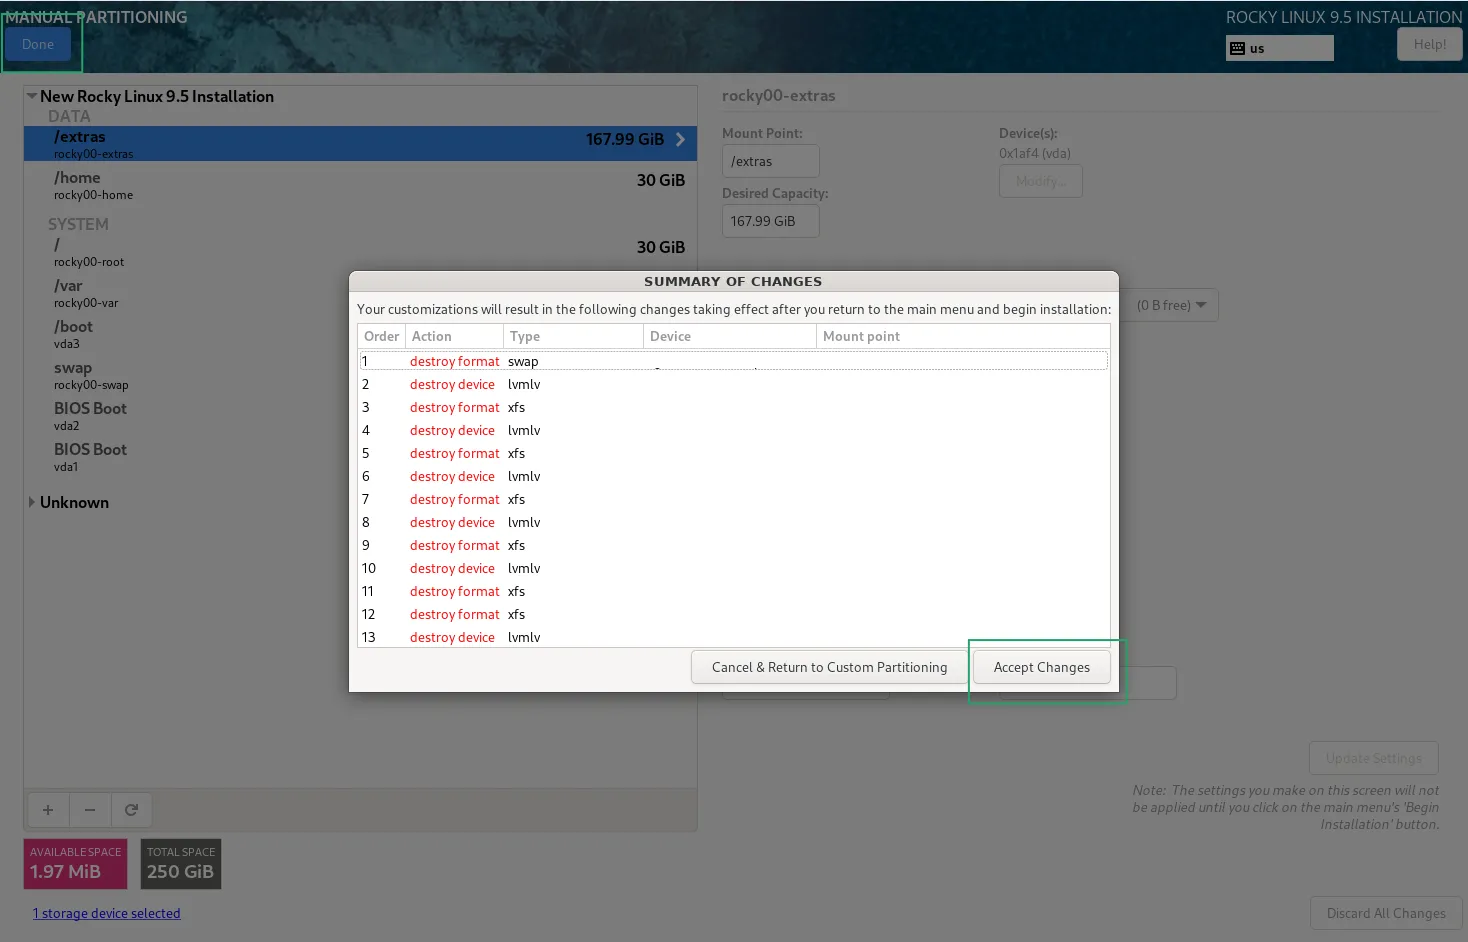
Photo by admingeek from Infotechys
Click Done after selecting the disk and partition scheme and then, click the Accept Changes button to continue.
Network and Hostname Settings |
Next, configure your network settings. Click on Network & Hostname to:
- Set your hostname (e.g.,
rocky-vm1). It’s localhost.localdomain by default. - Configure your network interface. If you have a wired connection, it should automatically connect. For wireless, select your Wi-Fi network and enter the password.
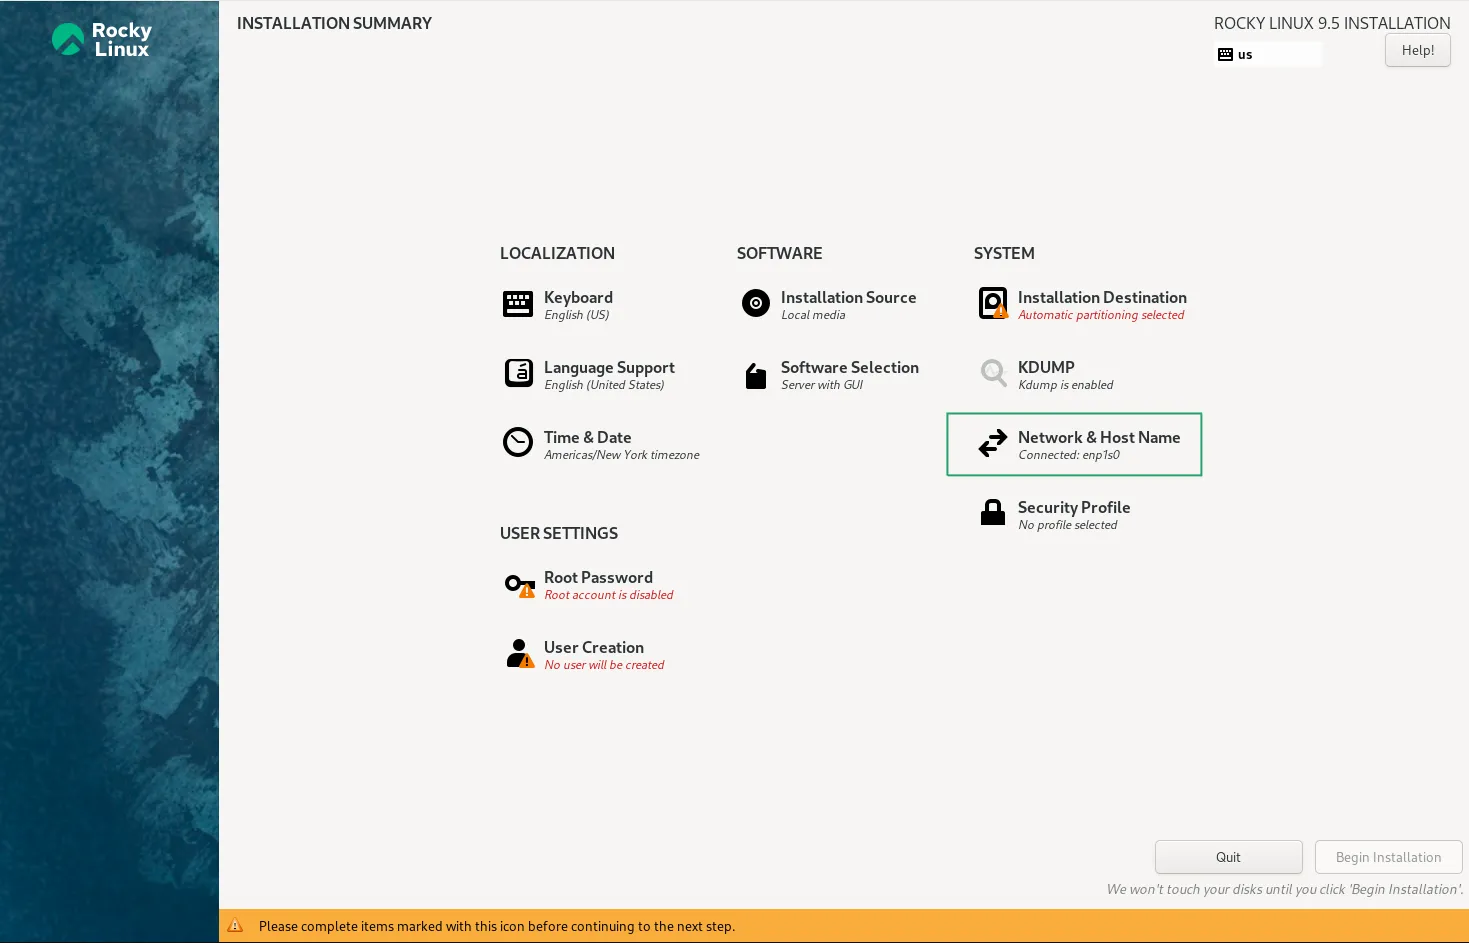
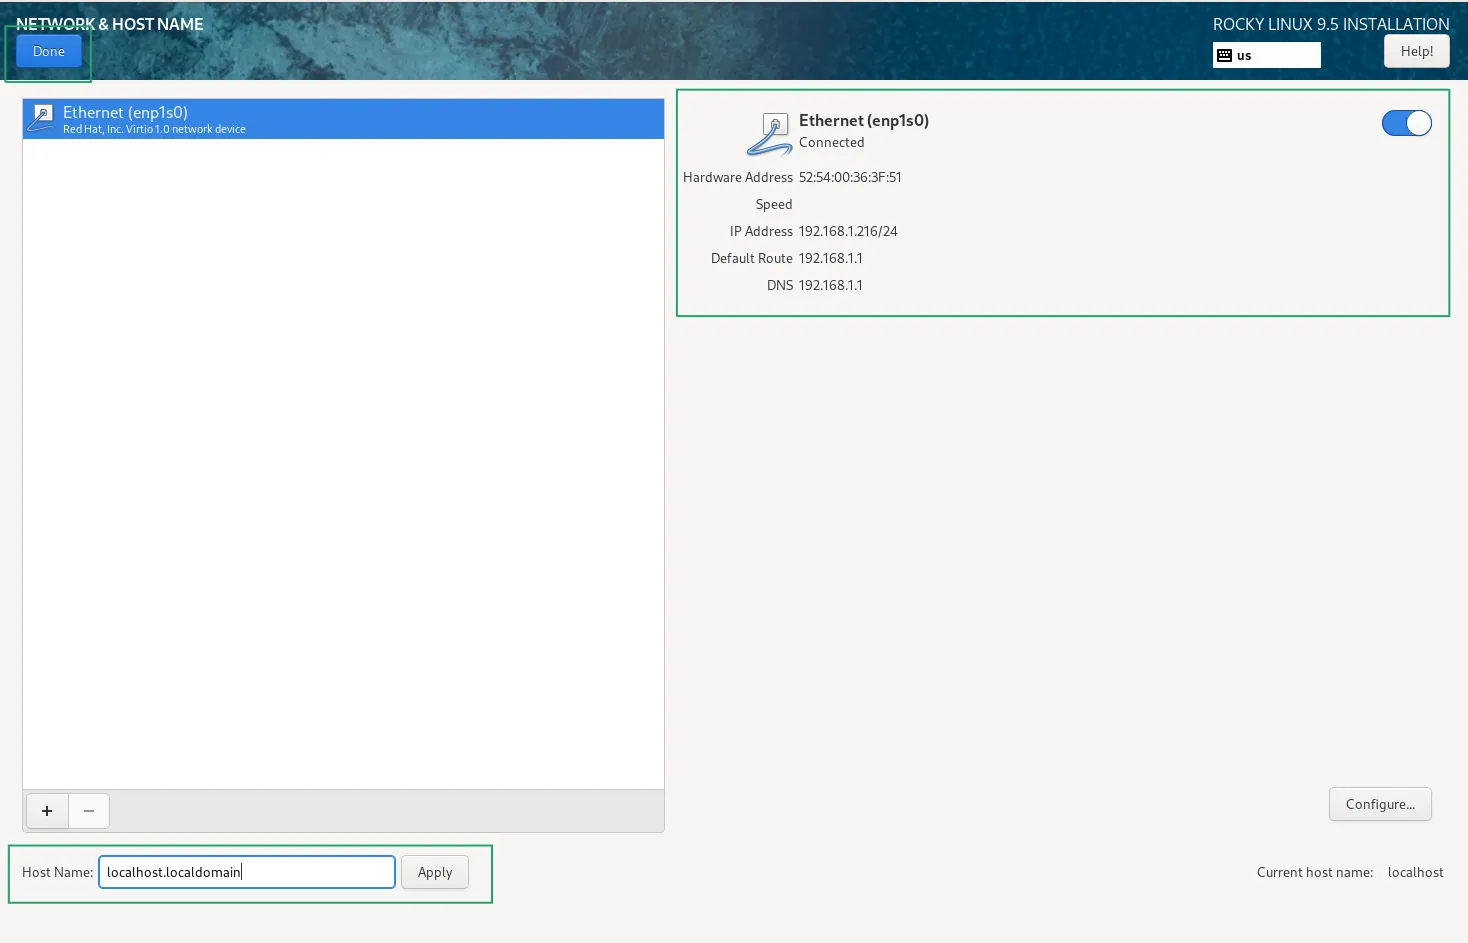
Ensure that Automatic IP Configuration is selected unless you are using a static IP address.
Step 8: Software Selection |
For this demonstration, we selected the “Workstation” option for a setup with the GNOME desktop, graphical utilities, and essential software. You can also choose additional software, such as Development Tools, Web Server, or Virtualization, under “Software Selection.”
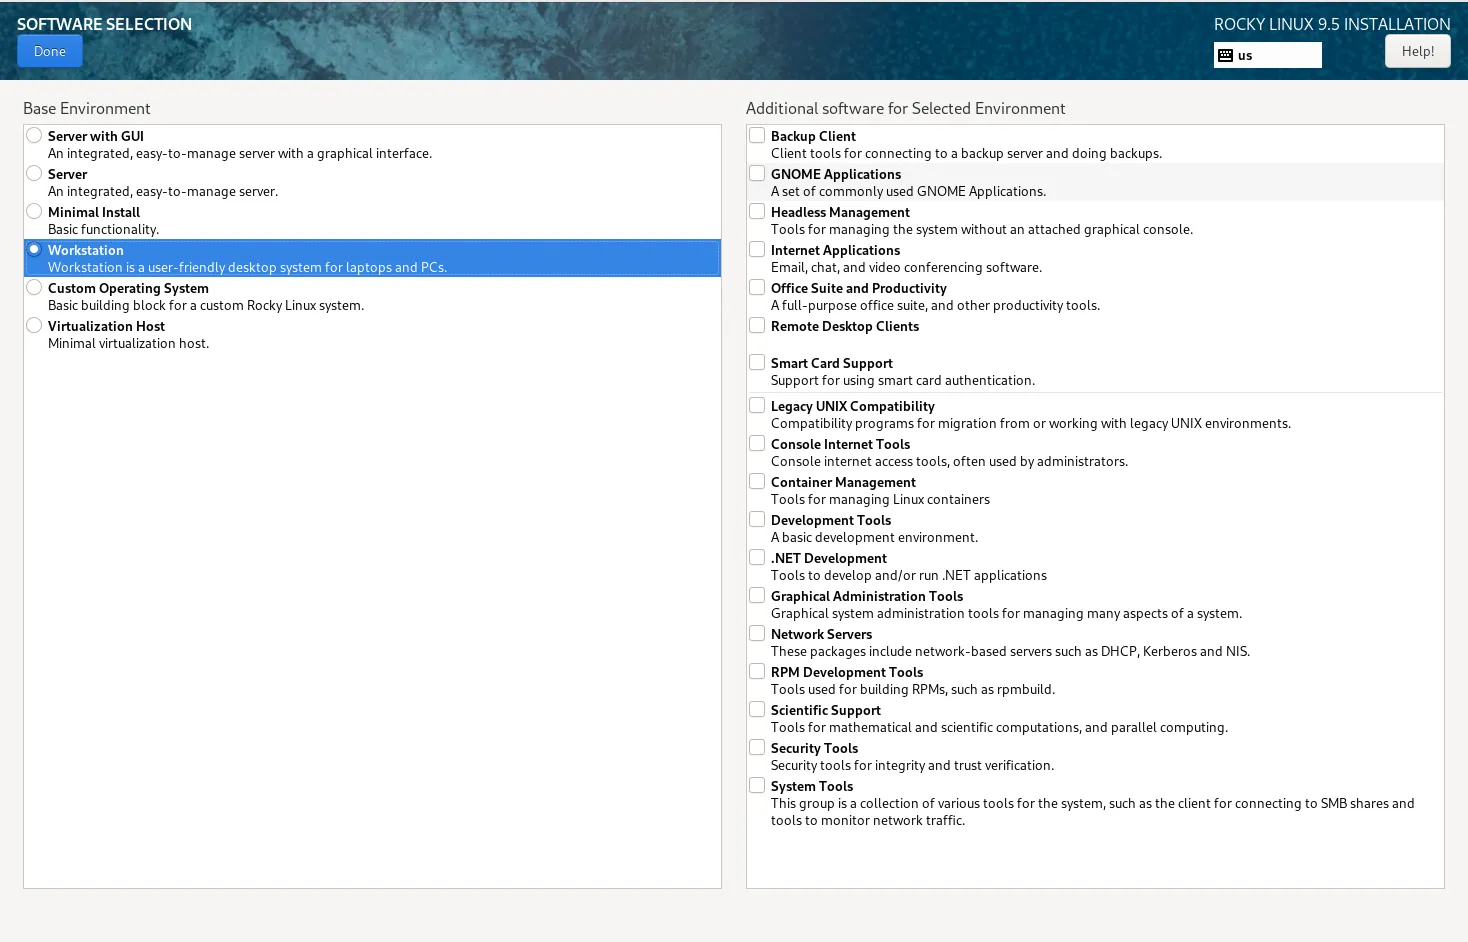
Photo by admingeek from Infotechys
Click the Done button to continue.
Step 9: Set Root Password |
Click on Root Password to set the administrator password. This password will be required to perform administrative tasks on your system.
Make sure to use a strong, secure password with a combination of uppercase, lowercase, numbers, and symbols.
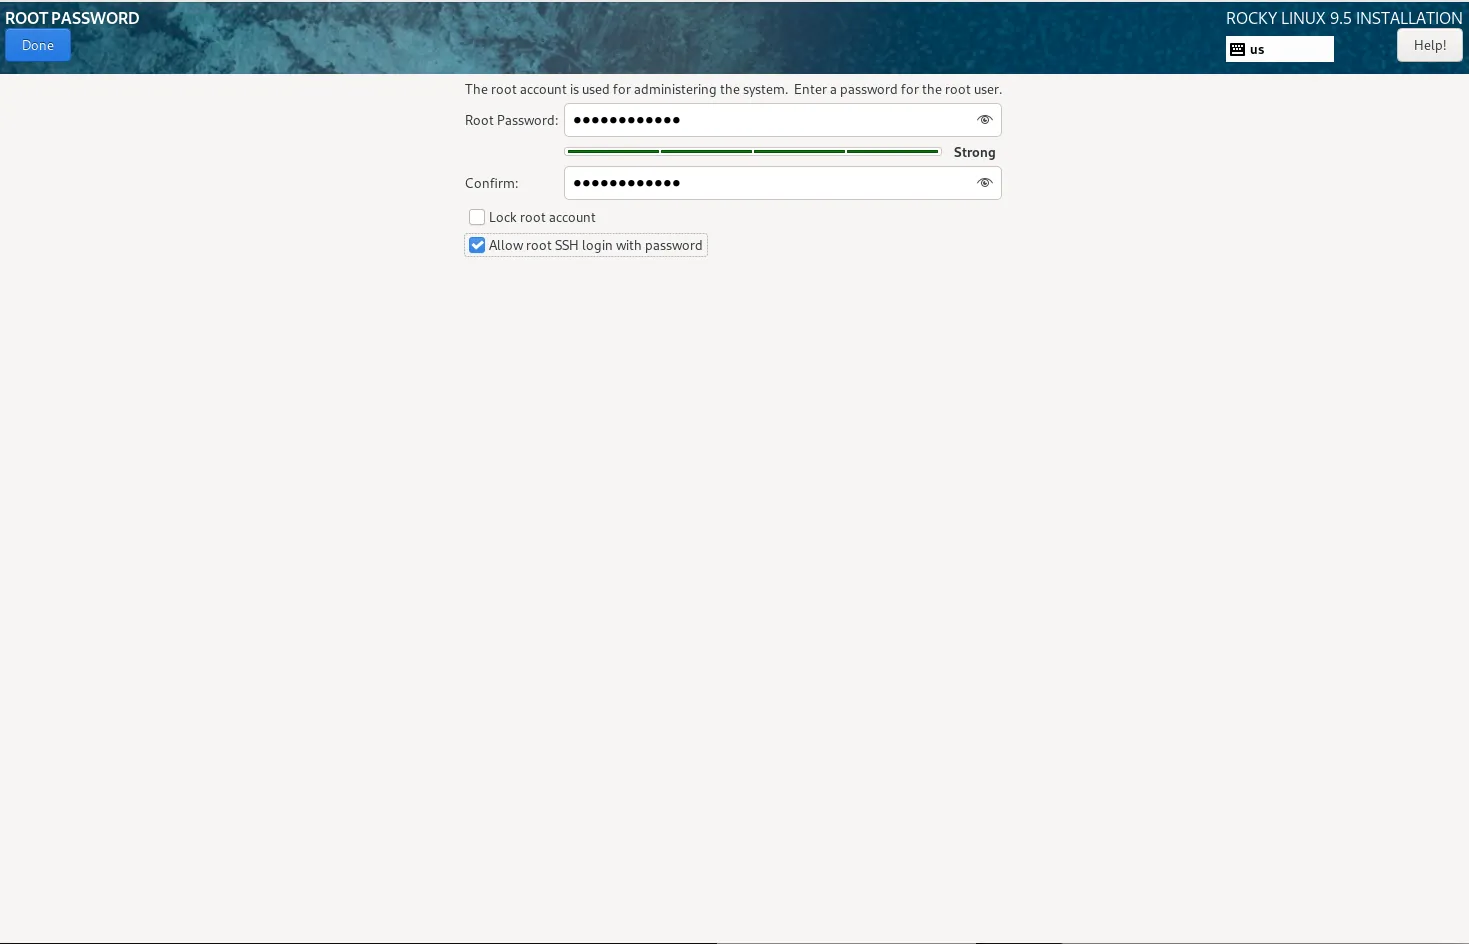
Photo by admingeek from Infotechys
Step 10: Create User Account (Optional) |
You can also create a regular user account for everyday use by clicking on the User Creation option. Enter the following:
- Username: Choose a name for your user.
- Password: Set a password for the user account.
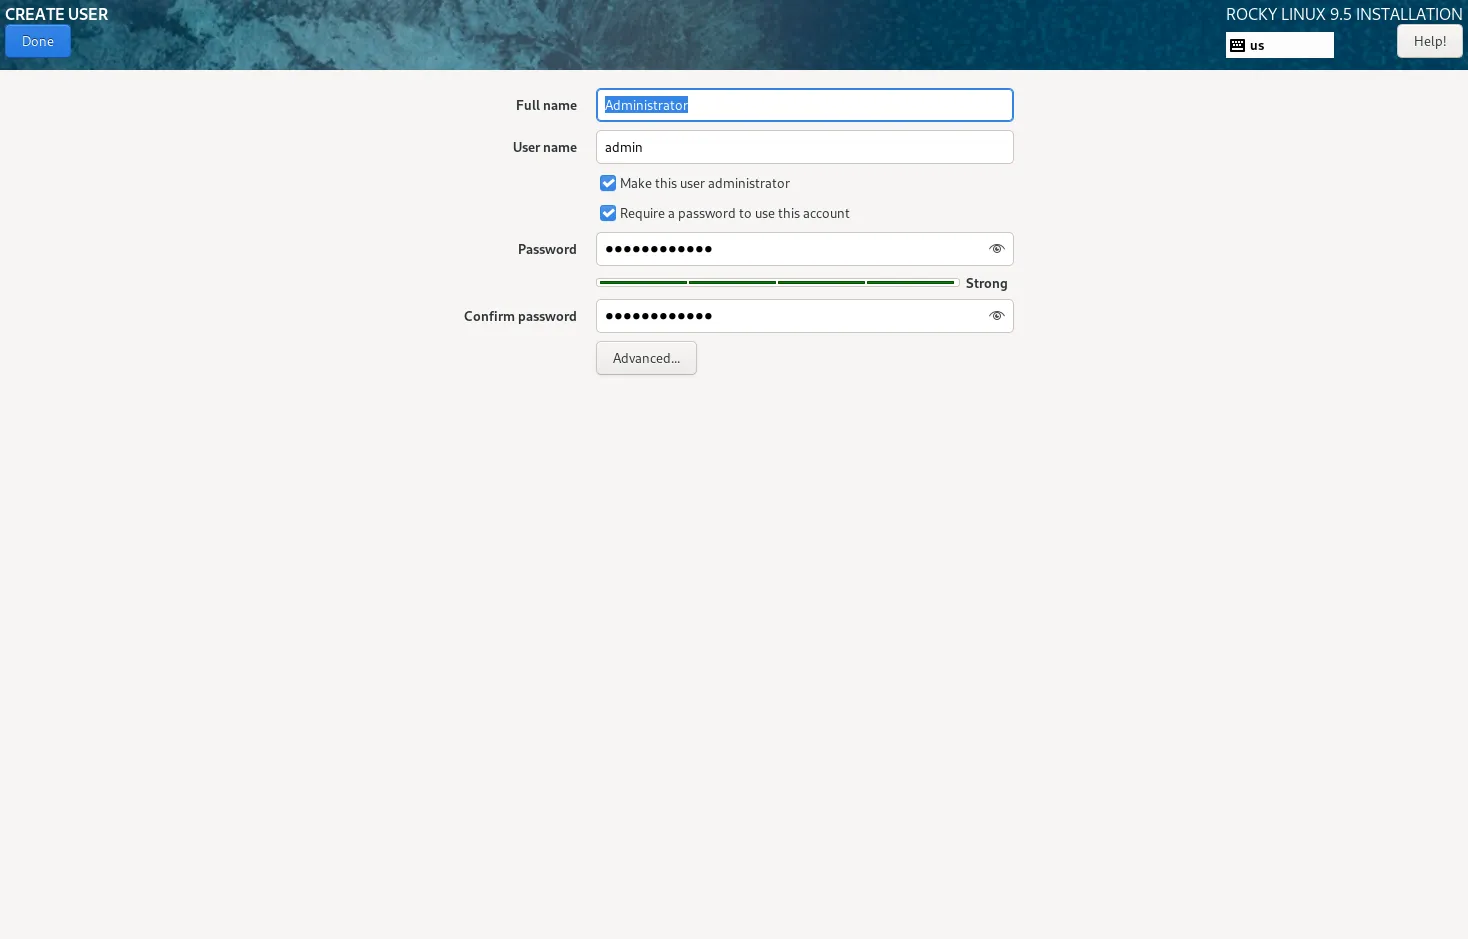
Photo by admingeek from Infotechys
You can also enable or disable administrator privileges (i.e., whether this user can run sudo commands). Click Done when finished.
Step 11: Begin Installation and Monitor Progress |
Once all configurations are set, click on Begin Installation to start the installation process. The installer will now format the disk and install the required files. This process may take some time depending on your system’s speed.
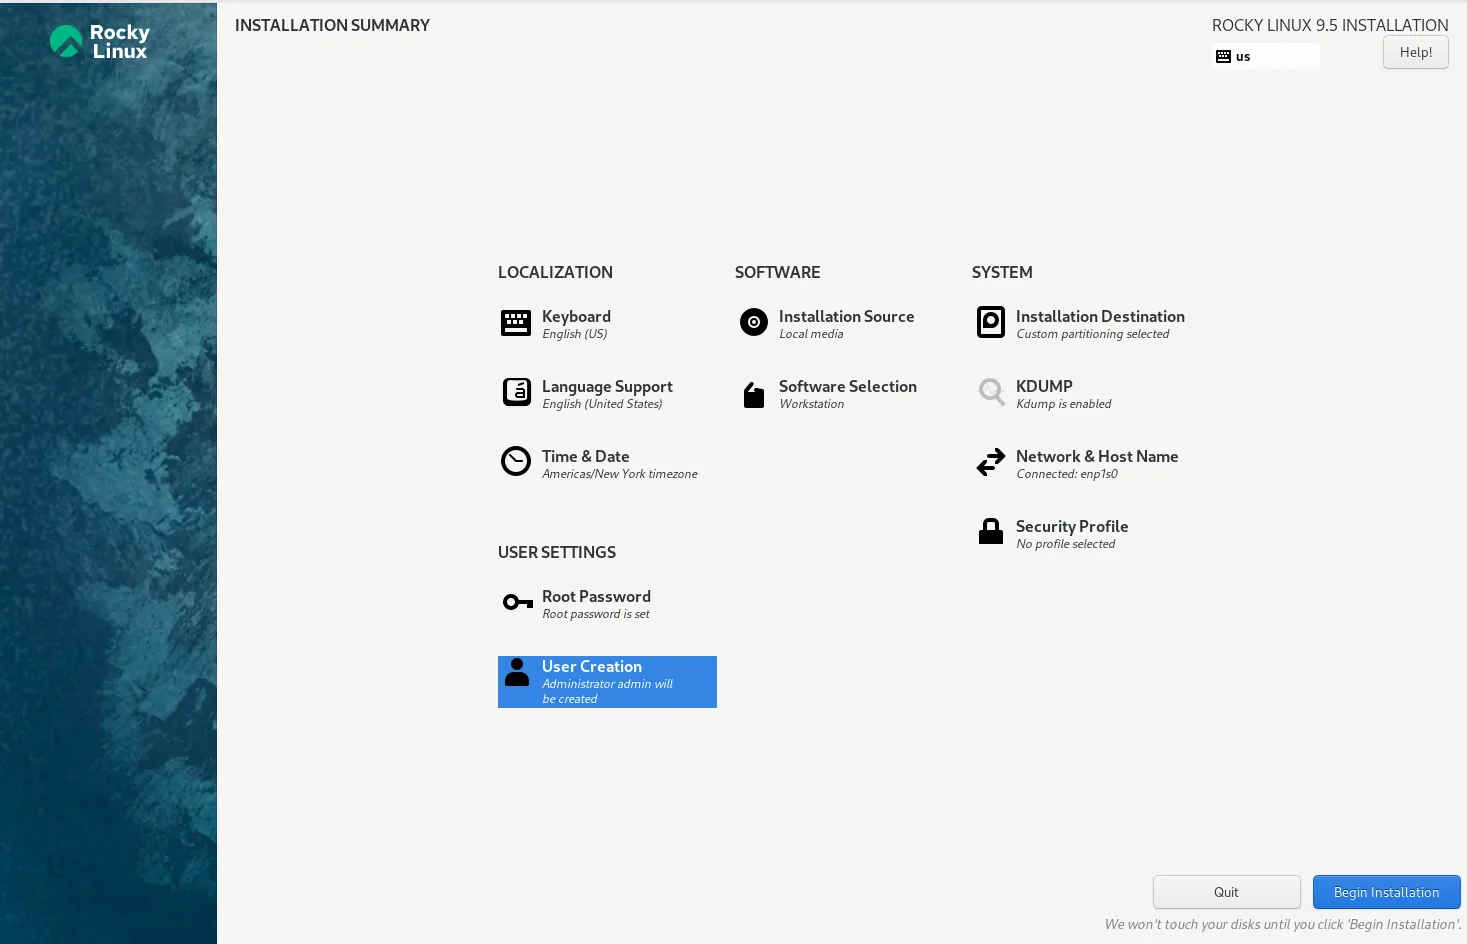
Photo by admingeek from Infotechys
During installation, you can monitor the progress and see what tasks are being performed. The installation will automatically handle the following:
- Copying files to the disk.
- Installing software packages.
- Setting up the bootloader.
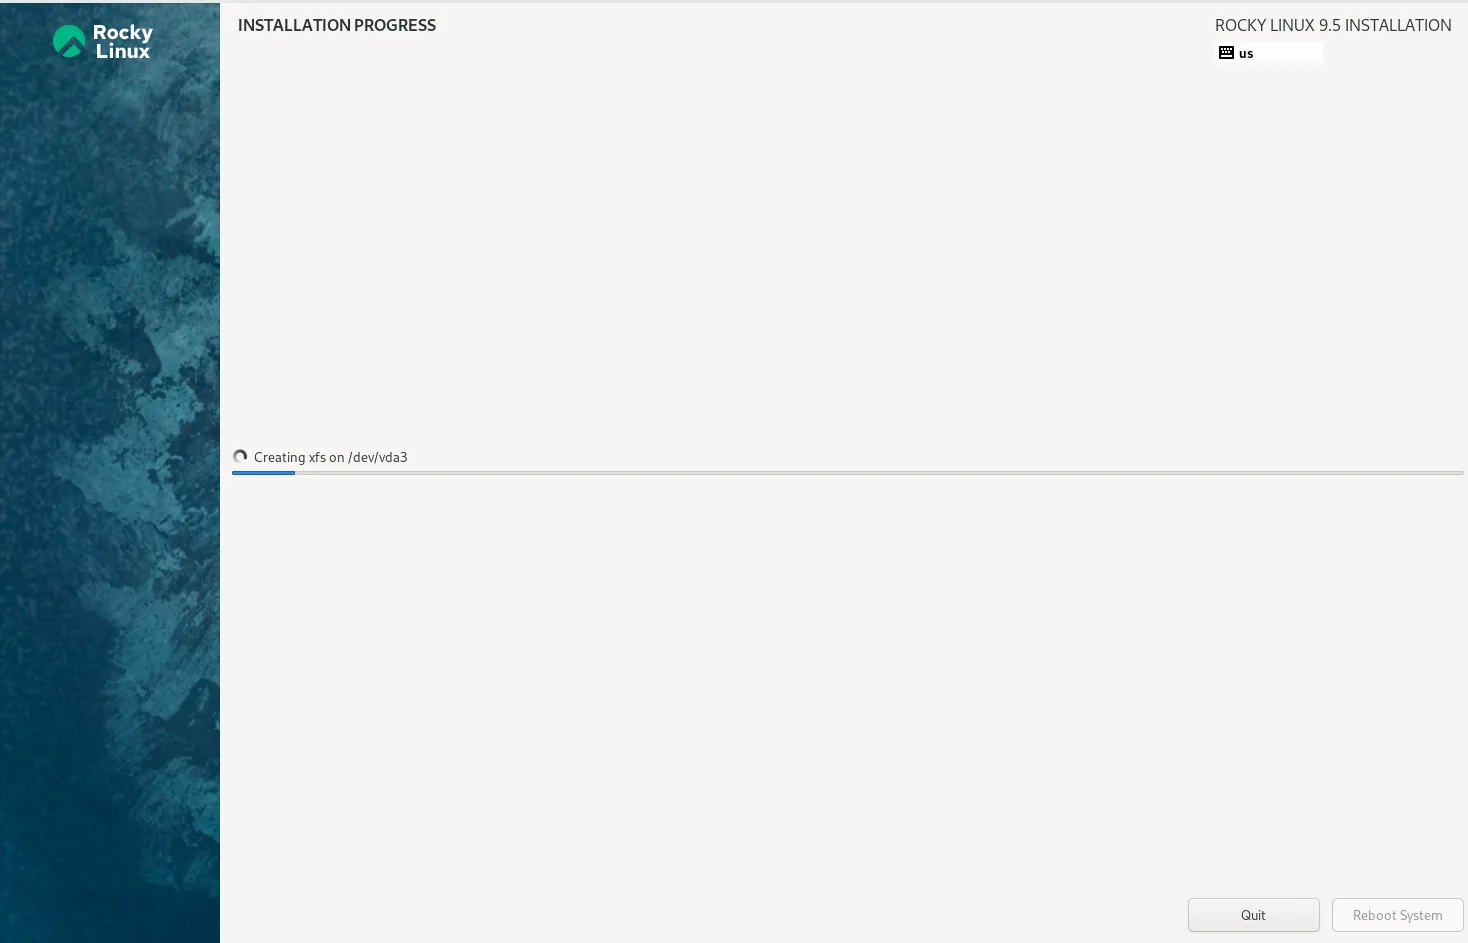
Photo by admingeek from Infotechys
Once the installation is complete, you will be notified with a message saying that the installation was successful.
Step 12: Reboot and First Boot Configuration |
- Once the installation is complete, click Reboot to restart the system.
- Remove the USB drive from the machine to ensure the system boots from the hard disk.
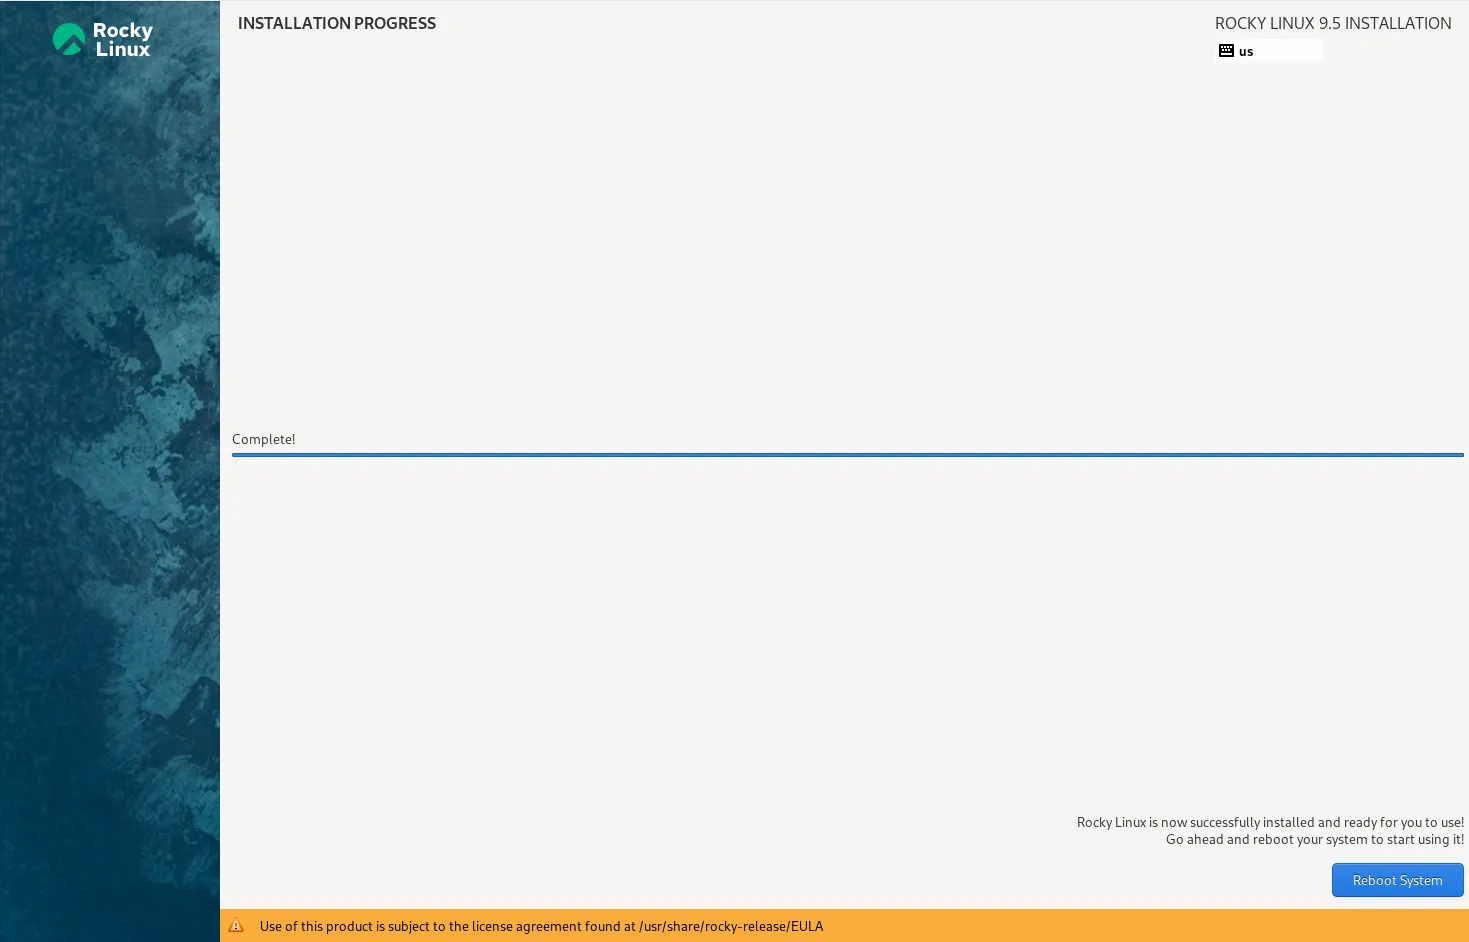
Photo by admingeek from Infotechys
- Upon reboot, you will be greeted by the Rocky Linux 9.5 login screen

Photo by admingeek from Infotechys
- Log in using the root or user account credentials you created earlier.
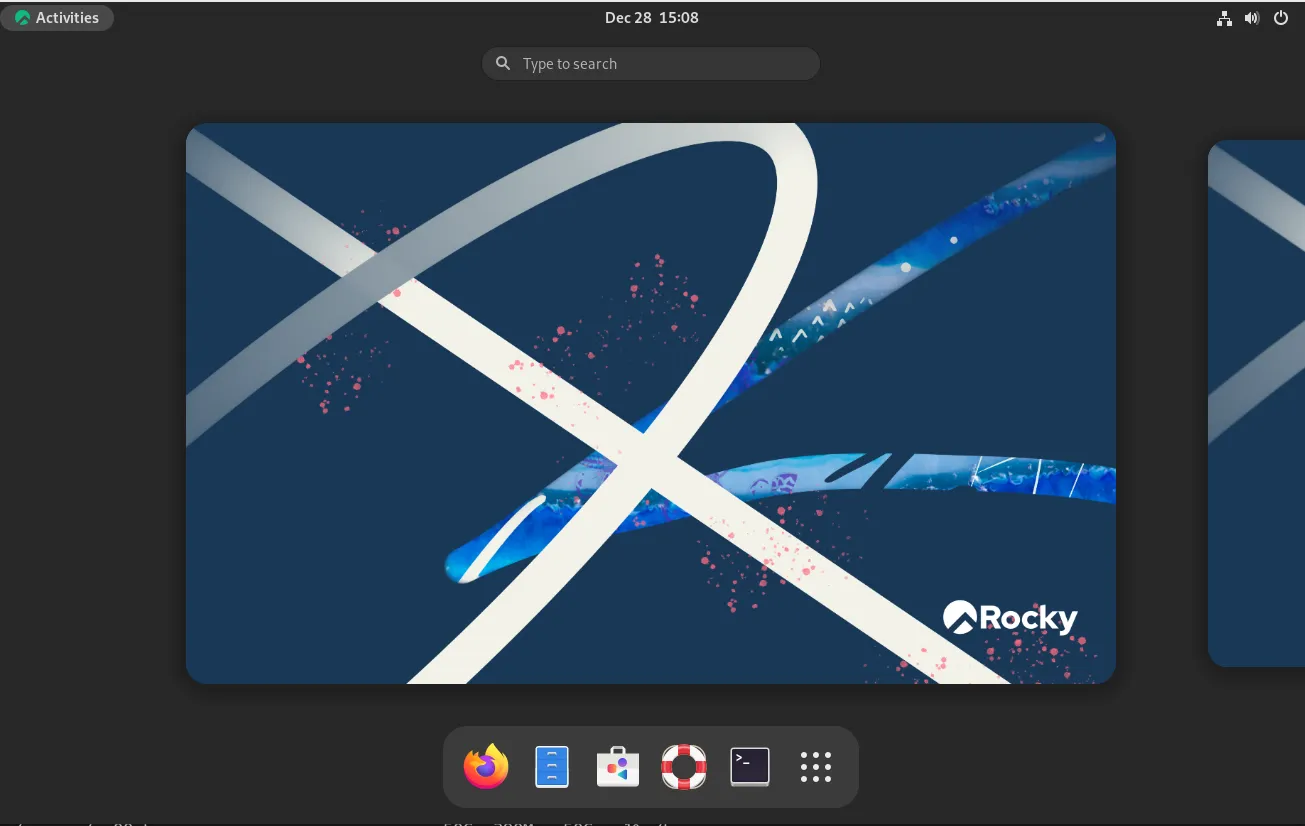
Photo by admingeek from Infotechys
Post-Installation Setup
After logging in for the first time, there are a few important configurations you may want to perform:
Update the system |
sudo dnf update -yInstall additional software |
As per your needs, such as web servers, database servers, or development tools (example below).
sudo dnf install nginx httpd mariadb-server git -yEnable and start services |
Run the following to enable and start services (e.g. Firewalld, Nginx)
sudo systemctl enable --now nginx && sudo systemctl enable --now firewalldSummary: Rocky Linux 9.5 Installation
In this guide, we’ve walked you through the installation of Rocky Linux 9.5 in 12 easy steps. Here’s a quick summary:
| Step | Action |
|---|---|
| 1 | Download Rocky Linux 9.5 ISO |
| 2 | Create Bootable USB Drive |
| 3 | Boot from USB Drive |
| 4 | Select Installation Language |
| 5 | Set Keyboard Layout |
| 6 | Configure Timezone and Date/Time |
| 7 | Choose Installation Destination |
| 8 | Software Selection |
| 9 | Set Root Password |
| 10 | Create User Account (Optional) |
| 11 | Begin Installation and Monitor Progress |
| 12 | Reboot and First Boot Configuration |
After installation, you’re ready to start using Rocky Linux 9.5, whether it’s for web development, enterprise servers, or just a solid Linux-based desktop.


No comments:
Post a Comment