Introduction
Minikube, a lightweight Kubernetes distribution designed for local development and testing purposes, has evolved significantly since its inception. Initially released by Kubernetes as an open-source project in 2016, Minikube quickly gained popularity among developers seeking a convenient way to run Kubernetes clusters locally.
Over the years, Minikube has undergone several iterations and enhancements, with continuous improvements to its features, stability, and ease of use. As Kubernetes adoption surged, Minikube became an indispensable tool for developers, providing a reliable environment for experimenting with Kubernetes concepts, developing applications, and testing configurations before deployment to production environments.
Prerequisites
Before installing Minikube on Red Hat Enterprise Linux (RHEL 9), there are a few prerequisites that need to be met. These include:
A working installation of the latest Docker release on your system.
The latest version of the kubectl command-line tool installed.
A browser (e.g. Firefox, google chrome, etc) installed for accessing the Kubernetes dashboard
An administrative account with sudo privileges to access root (e.g.
admin)A registered RHEL physical server or virtual machine (e.g.
subscription-manager register)At least 4GB of RAM and 2 CPU cores are recommended, although these requirements may vary based on the available resources in your environment.
| Hostname | mkube-srv1.localdomain |
| IP address | 192.168.1.153 |
| RAM | 4 |
| Cores | 2 |
| Docker Version | Docker version 25.0.1, build 29cf629 |
| Kubectl Version | { “clientVersion”: { “major”: “1”, “minor”: “29”, “gitVersion”: “v1.29.1”, “gitCommit”: “bc401b91f2782410b3fb3f9acf43a995c4de90d2”, “gitTreeState”: “clean”, “buildDate”: “2024-01-17T15:51:03Z”, “goVersion”: “go1.21.6”, “compiler”: “gc”, “platform”: “linux/amd64” }, “kustomizeVersion”: “v5.0.4-0.20230601165947-6ce0bf390ce3” } |
| Kubernetes Version | v1.28.3 |
| Minikube Version | v1-32.0 |
Install minikube-v1.32.0 on RHEL9: Installation
Follow these steps to install minikube-v1.32.0 on RHEL9 or CentOS9:
Update your machine
Before we proceed, it’s best practice to ensure our machine or instance is up-to-date:
[admin@mkube-srv1 ~]$ sudo dnf update -yNOTE: If wget and xorg-x11-xauth are not already installed, it’s necessary to do so in order to download the required dependencies for subsequent steps and access the kubernetes dashboard.
[admin@mkube-srv1 ~]$ sudo dnf install wget xorg-x11-xauth -yDocker Repository
Now let’s enable the Docker repository and install Docker along with its dependencies:
[admin@mkube-srv1 ~]$ sudo yum install -y yum-utils

[admin@mkube-srv1 ~]$ sudo dnf config-manager --add-repo=https://download.docker.com/linux/centos/docker-ce.repo

[admin@mkube-srv1 ~]$ sudo dnf install docker-ce --nobest -yAdd User to the Docker group
Run the following command to add your administrative user account to the docker group and ensure the docker service running:
[admin@mkube-srv1 ~]$ sudo usermod -aG docker $USER && newgrp dockerAlso, start and enable docker with the following commands:
[admin@mkube-srv1 ~]$ sudo systemctl --now start dockerInstall minikube-v1.32.0 on RHEL9: Install Kubectl
Run the following curl command to install the latest stable kubectl release:
[admin@mkube-srv1 ~]$ sudo curl -LO https://storage.googleapis.com/kubernetes-release/release/$(curl -s https://storage.googleapis.com/kubernetes-release/release/stable.txt)/bin/linux/amd64/kubectlMake kubectl executable by running the following commands:
[admin@mkube-srv1 ~]$ sudo chmod +x kubectl

[admin@mkube-srv1 ~]$ sudo mv kubectl /usr/local/bin/Install conntrack
Install the conntrack package using dnf:
[admin@mkube-srv1 ~]$ sudo dnf install -y conntrackInstall crictl
Run the following commands to install and enable crictl for Kubernetes:
[admin@mkube-srv1 ~]$ sudo curl -LO https://github.com/kubernetes-sigs/cri-tools/releases/download/v1.22.0/crictl-v1.22.0-linux-amd64.tar.gz

[admin@mkube-srv1 ~]$ sudo tar -C /usr/local/bin -xzvf crictl-v1.22.0-linux-amd64.tar.gz

[admin@mkube-srv1 ~]$ sudo rm crictl-v1.22.0-linux-amd64.tar.gzInstall minikube
Finally, install the latest and stable minikube release with the following commands:
[admin@mkube-srv1 ~]$ curl -LO https://storage.googleapis.com/minikube/releases/latest/minikube-latest.x86_64.rpm

[admin@mkube-srv1 ~]$ sudo rpm -ivh minikube-latest.x86_64.rpmInstall minikube-v1.32.0 on RHEL9: Launch minikube
Now lets start minikube and confirm it was installed successfully.
[admin@mkube-srv1 ~]$ minikube start
😄  minikube v1.32.0 on Redhat 9.3 (vbox/amd64)
✨  Automatically selected the docker driver. Other choices: none, ssh
📌  Using Docker driver with root privileges
👍  Starting control plane node minikube in cluster minikube
🚜  Pulling base image ...
💾  Downloading Kubernetes v1.28.3 preload ...
    > preloaded-images-k8s-v18-v1...:  403.35 MiB / 403.35 MiB  100.00% 8.05 Mi
    > gcr.io/k8s-minikube/kicbase...:  453.90 MiB / 453.90 MiB  100.00% 5.88 Mi
🔥  Creating docker container (CPUs=2, Memory=2200MB) ...
🐳  Preparing Kubernetes v1.28.3 on Docker 24.0.7 ...
    ▪ Generating certificates and keys ...
    ▪ Booting up control plane ...
    ▪ Configuring RBAC rules ...
🔗  Configuring bridge CNI (Container Networking Interface) ...
    ▪ Using image gcr.io/k8s-minikube/storage-provisioner:v5
🔎  Verifying Kubernetes components...
🌟  Enabled addons: storage-provisioner, default-storageclass
🏄 Done! kubectl is now configured to use "minikube" cluster and "default" namespace by defaultThis is an opportune moment to step away from the terminal, stretch your legs, or perhaps grab a cup of coffee. The installation process involves several packages and will require a few minutes to complete.
Verify Installation
Finally, use kubectl to verify minikube is installed and running properly:
[admin@mkube-srv1 ~]$ kubectl cluster-info
Kubernetes control plane is running at https://192.168.49.2:8443
CoreDNS is running at https://192.168.49.2:8443/api/v1/namespaces/kube-system/services/kube-dns:dns/proxy

To further debug and diagnose cluster problems, use 'kubectl cluster-info dump'.Install minikube-v1.32.0 on RHEL9: Accessing the Kubernetes Dashboard
Minikube also provides a web-based dashboard that you can use to manage your Kubernetes cluster. To access the dashboard, run the following command:
[admin@mkube-srv1 ~]$  minikube dashboard
🔌  Enabling dashboard ...
    ▪ Using image docker.io/kubernetesui/dashboard:v2.7.0
    ▪ Using image docker.io/kubernetesui/metrics-scraper:v1.0.8
💡  Some dashboard features require the metrics-server addon. To enable all features please run:

	minikube addons enable metrics-server


🤔  Verifying dashboard health ...
🚀  Launching proxy ...
🤔  Verifying proxy health ...
🎉  Opening http://127.0.0.1:44801/api/v1/namespaces/kubernetes-dashboard/services/http:kubernetes-dashboard:/proxy/ in your default browser...
👉 http://127.0.0.1:44801/api/v1/namespaces/kubernetes-dashboard/services/http:kubernetes-dashboard:/proxy/Forward X11 to the minikube server and launch Firefox or your favorite browser and enter the URL provided above:
In this instance, the URL provided is: http://127.0.0.1:44801/api/v1/namespaces/kubernetes-dashboard/services/http:kubernetes-dashboard:/proxy/
[admin@mkube-srv1 ~]$ firefox &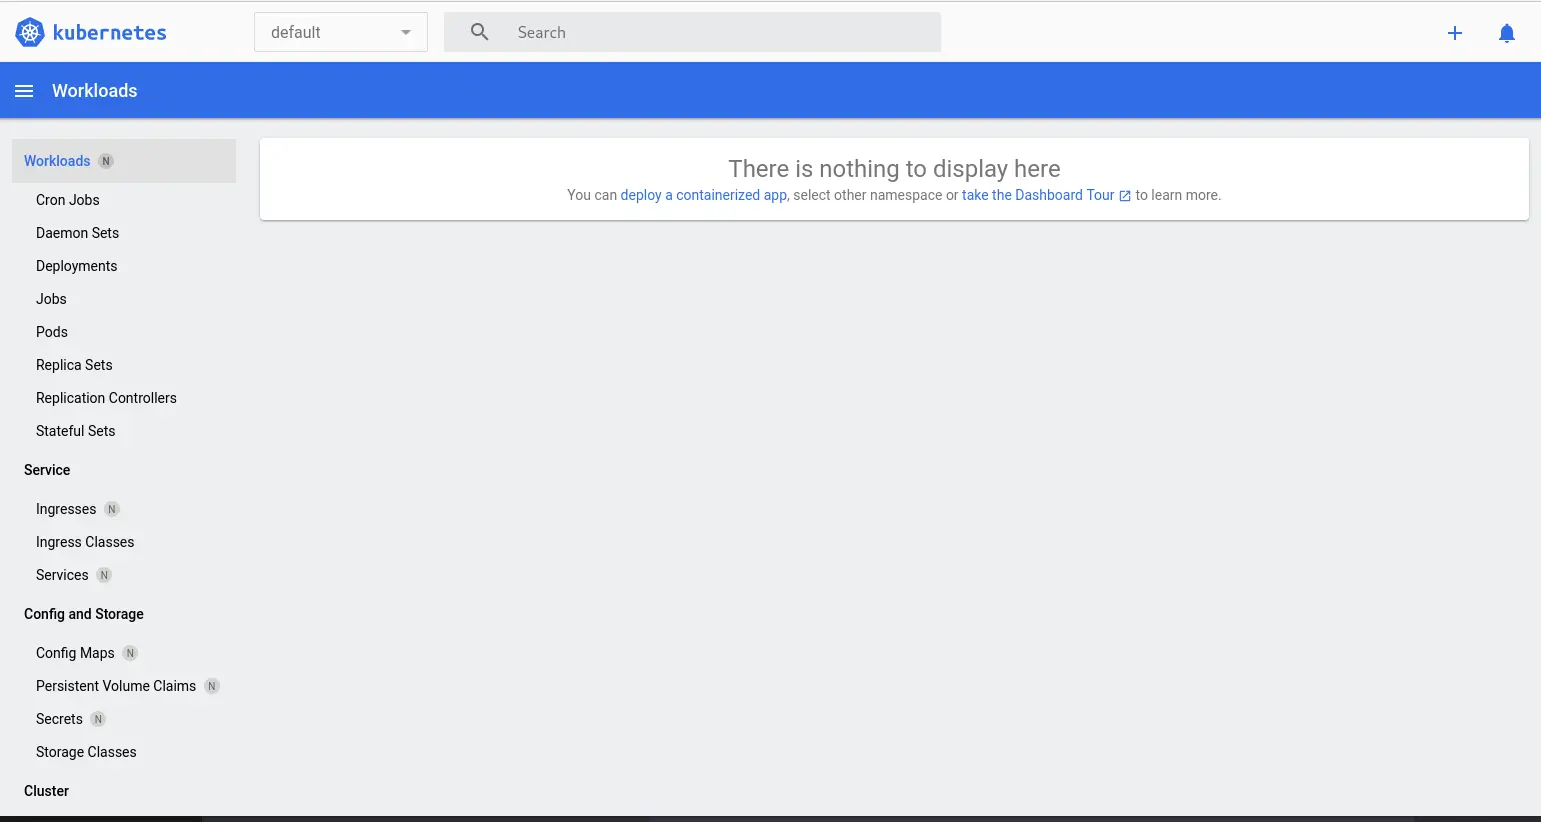


No comments:
Post a Comment