Introduction
In the realm of IT monitoring, Zabbix stands out as a powerful and versatile tool. However, to leverage its full potential, setting up notifications is crucial. In this guide, we will walk you through enabling Gmail notifications in Zabbix, ensuring you never miss a critical alert. By following the steps outlined here, you’ll not only improve your monitoring capabilities but also enhance your overall operational efficiency.
Why Use Gmail for Notifications? |
Using Gmail for Zabbix notifications offers several advantages:
- Reliability: Gmail’s robust infrastructure ensures that your notifications are delivered promptly.
- Accessibility: Gmail can be accessed from any device, making it easy to check alerts on the go.
- Familiarity: Many users are already familiar with Gmail, which can streamline the notification process.
Prerequisites
Before you start configuring Gmail notifications in Zabbix, ensure you have the following:
- A running instance of Zabbix (version 4.0 or higher recommended).
- A Gmail account that you will use to send notifications.
- Basic knowledge of Zabbix administration and configuration files.
Enabling Gmail Notifications in Zabbix: A Step-by-Step Guide
Zabbix is an open-source monitoring solution that provides real-time monitoring of servers, networks, and applications. One of its core features is the ability to send notifications to users when specific triggers are activated. These notifications are vital for prompt response to incidents, reducing downtime, and maintaining optimal performance.
Photo by admingeek from Infotechys
Step 1: Configure Gmail Settings |
According to Google, starting on September 30, 2024, less secure apps, third-party apps, or devices that have you sign in with only your username and password will no longer be supported for Google Workspace accounts. Therefore, we’ll utilize “App Passwords” to setup our Gmail Notifications:
Log into your Gmail account |
Go to your Google Account settings |
Click on your profile picture in the top right corner.
Select “Manage your Google Account.”

Photo by admingeek from Infotechys
Navigate to Security |
On the left side, click on “Security.”
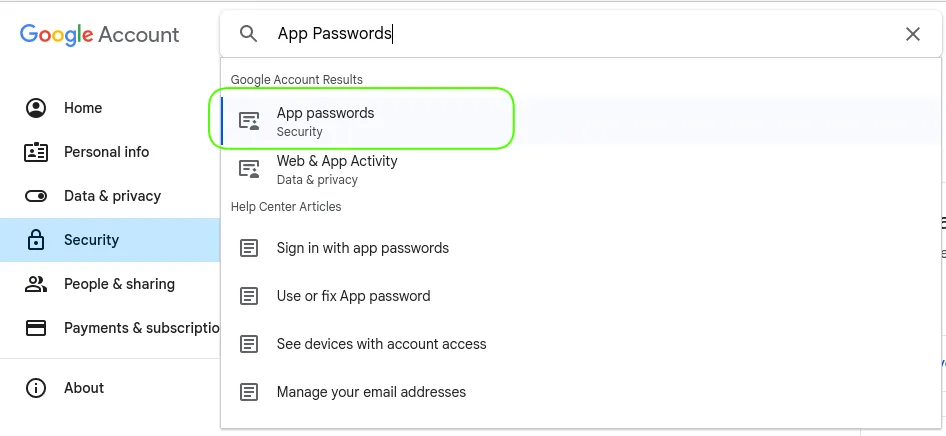
Photo by admingeek from Infotechys
Select App Passwords |
Click create button to create a password for Zabbix. You will be presented with a 16-character password.
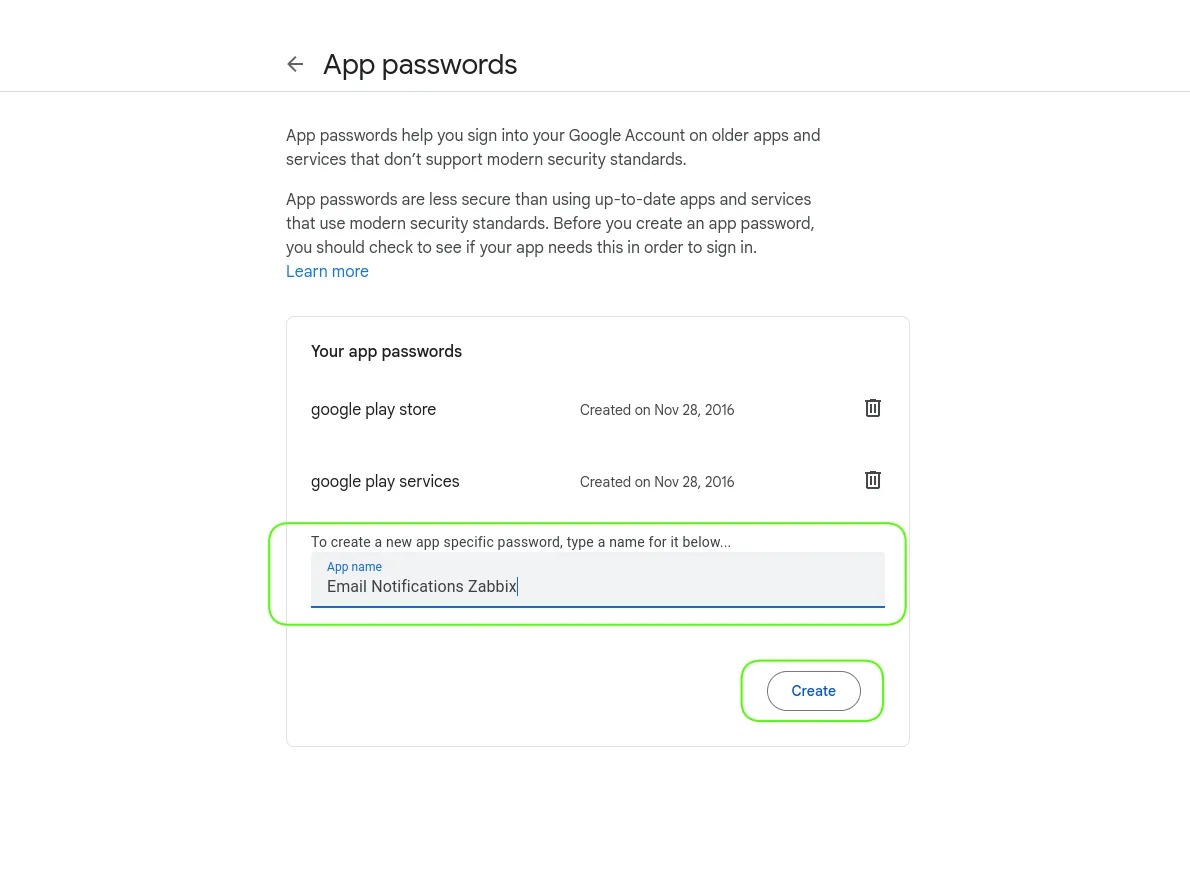
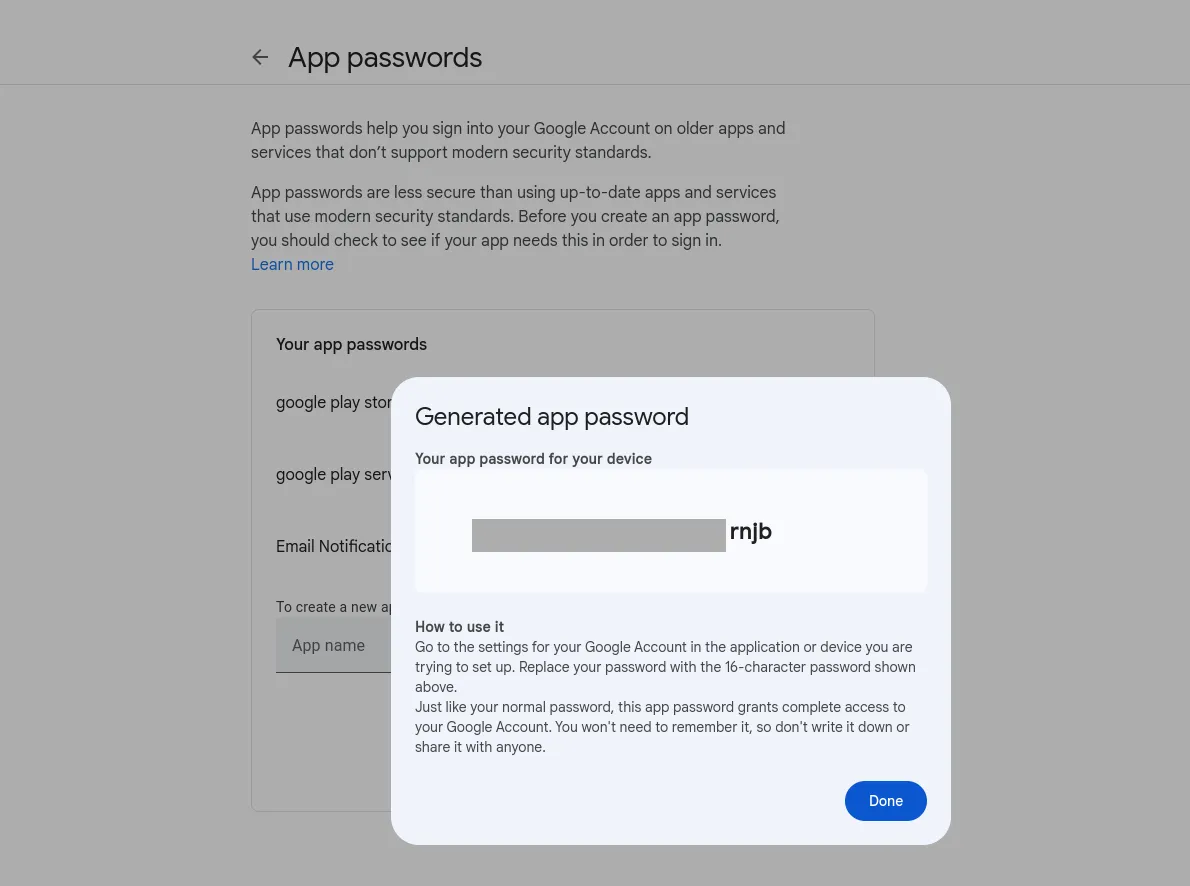
Photo by admingeek from Infotechys
Copy the 16-character password and then click the [Done] button to continue.
Step 2: Set Up Zabbix Media Type |
Next, you’ll need to configure a media type in Zabbix to use Gmail for notifications.
Log into Zabbix web interface |
Navigate to Administration > Media types |
The location will vary depending on what version of Zabbix you have installed. For example, in Zabbix 7.0, you would navigate to Alerts -> Media Types.
Click on “Gmail” media type |
Populate the text fields with the following:
- Name:
Gmail - Type:
Email - Email Provider:
Gmail - Email:
your-email@gmail.com - Password:
your-password(paste in your 16-character app password) - Description: Provide a description (optional)
- Checkbox (Enabled): Click on the checkbox to enable the media type
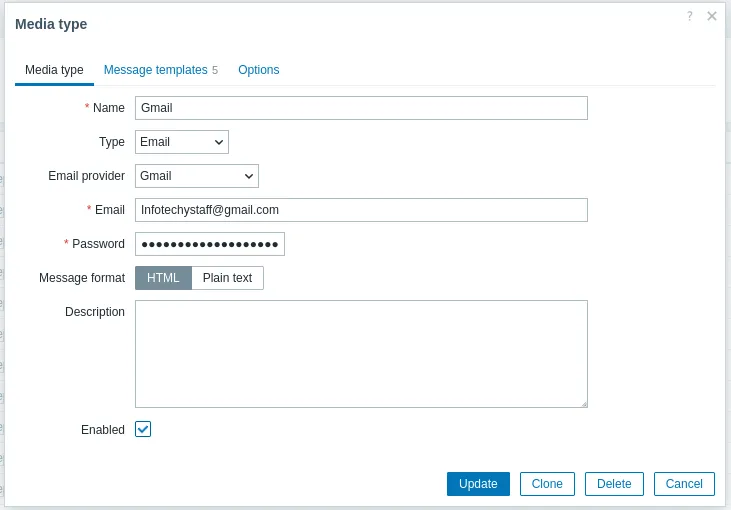
Photo by admingeek from Infotechys
Save the media type |
Click the [Update] button to continue. On the media types page, click on the [Test] link to the right of the page to verify the media type is operational.
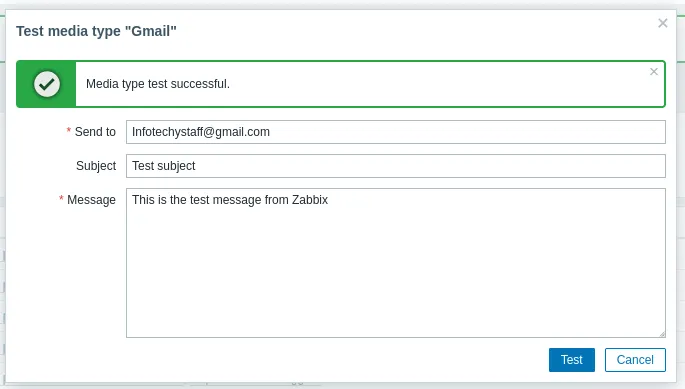
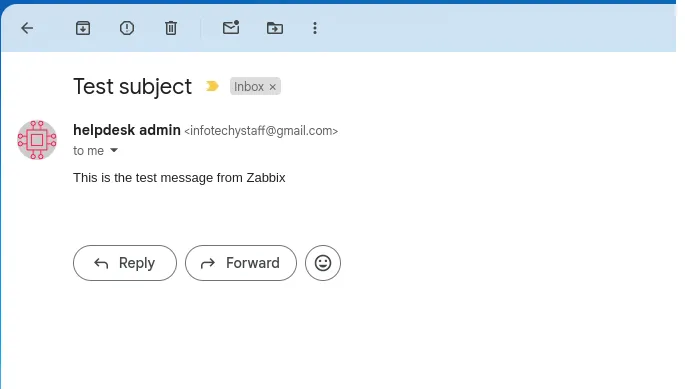
Photo by admingeek from Infotechys
On the media types page, click on the [Test] link to the right of the page to verify the media type is operational.
General Media Type Settings For Gmail
| Field | Value |
|---|---|
| Name | Gmail |
| Type | |
| SMTP server | smtp.gmail.com |
| SMTP server port | 587 |
| SMTP helo | yourdomain.com |
| SMTP authentication | Plain |
| Username | your-email@gmail.com |
| Password | your-password |
| Encryption | TLS |
Step 3: Create User and Assign Media Type |
Now, you need to create a user in Zabbix who will receive the notifications.
Go to Administration > Users |
Again, the location will vary depending on your version of Zabbix. In Zabbix 7.0, navigate to the Users -> User .
Click the “Create user” Button |
Click the [Create user] button to the top right of the page.
- Username:
NotificationUser(or any name you choose) - Name:
Notification User - Last Name:
Surname - Password:
your-password - Confirm password:
your-password
You can accept the defaults options for the rest of it and then, click the [Media] Link to proceed to the next page.

Photo by admingeek from Infotechys
Media Section |
Click the “Add” link and select the Gmail media type you created earlier.
- Send to:
your-email@gmail.com - When active:
1-7,00:00-24:00 - Use if Severity: Choose what severity levels your prefer to receive email notifications about.
- Checkbox (Enabled): Click the checkbox to enable your settings.
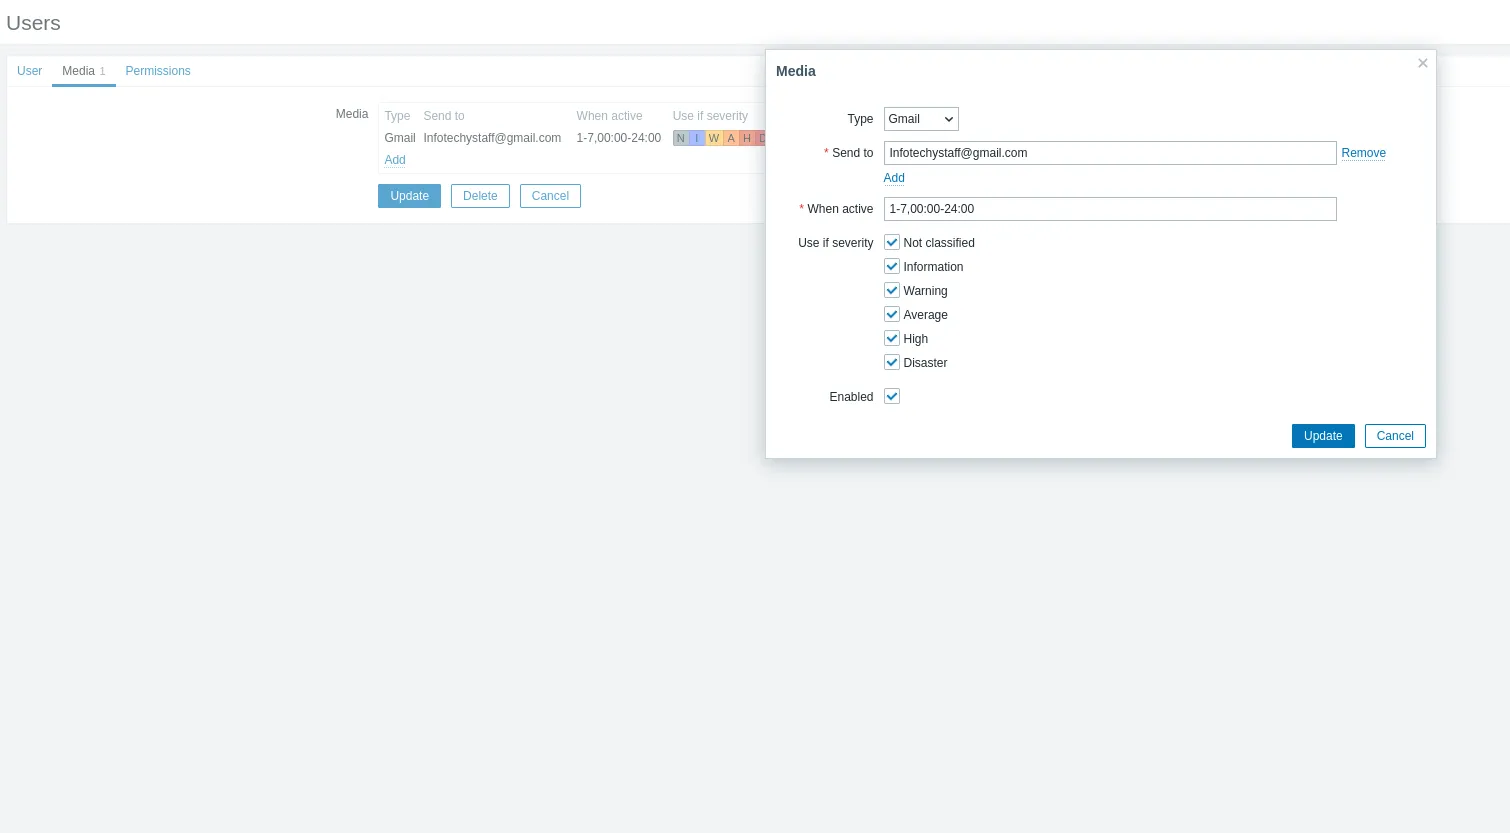
Photo by admingeek from Infotechys
Permission Section |
Finally, click the “Permission” link and select a role for your user. For this demonstration, our test user was assigned the admin role. You will also be presented with all of the various components your new user will have access to. Click the [Update] button to save your settings and continue.
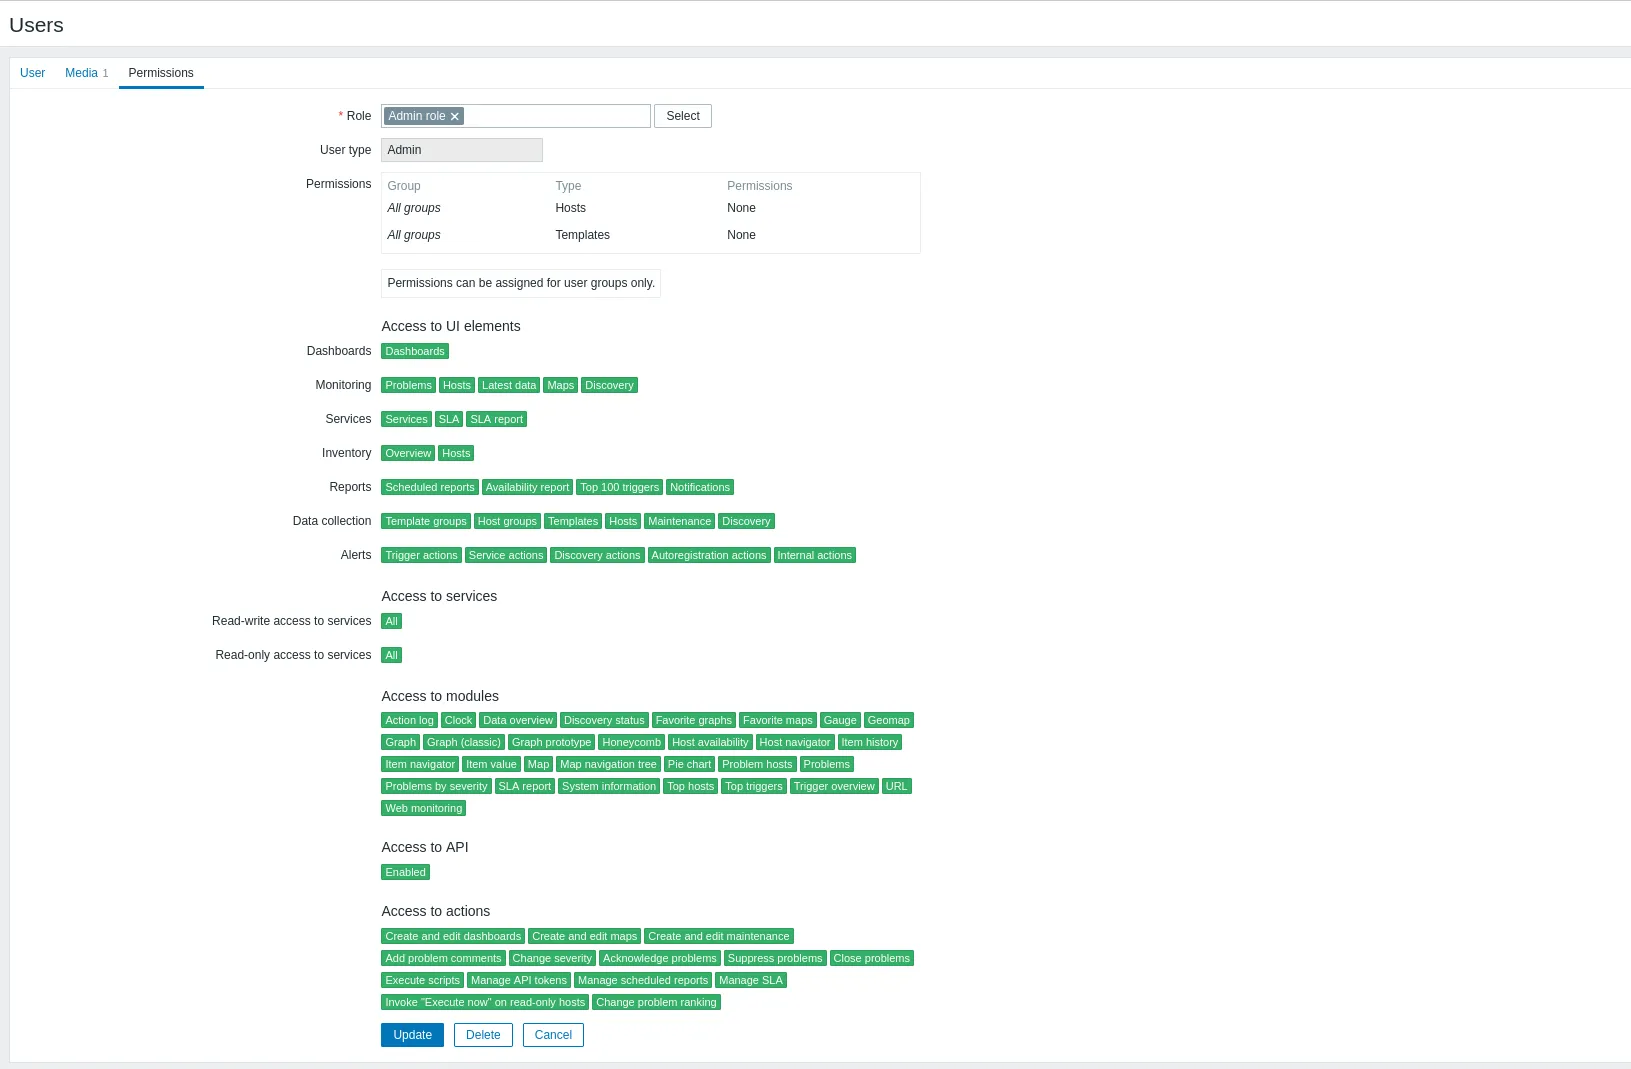
Photo by admingeek from Infotechys
Congratulations! You’ve successfully configured Zabbix to send email notifications whenever triggers are activated. With your Zabbix user and media types set up, you’re ready to test your email notifications by simulating an event. For instance, rebooting one of your monitored hosts will trigger a warning and allow you to verify the notification process.
Note: For more detailed guidance on setting up customized trigger actions and specific checks for your environment, please refer to the official Zabbix Documentation.
Troubleshooting Common Issues
If you don’t receive emails, consider the following troubleshooting tips:
- Check SMTP settings: Ensure you have the correct SMTP server and port.
- Check Google account security settings: If using “Less secure app access,” ensure it is enabled.
- Review Zabbix logs: Check the Zabbix server log for any SMTP-related errors.
Common Error Messages |
| Error Message | Solution |
|---|---|
SMTP Error: Failed to connect | Check SMTP server address and port. |
Authentication failed | Verify username and password. |
Connection timed out | Ensure that your firewall allows outgoing SMTP traffic. |


No comments:
Post a Comment