Introduction
As Fedora 37 continues to gain popularity among Linux users, it becomes increasingly important to equip individuals and organizations with essential tools to meet their database management needs. One such critical tool is MySQL, a robust and versatile relational database management system renowned for its reliability, scalability, and ease of use. In this comprehensive guide, we’ll walk you through the process of installing MySQL on Fedora 37, providing detailed instructions and insights to ensure a seamless experience.
Why Choose MySQL?
MySQL stands out as one of the most widely used open-source relational database management systems globally, powering countless websites, applications, and enterprise solutions. Its popularity stems from its feature-rich nature, including support for various data types, efficient indexing, robust transaction support, and strong security features. MySQL’s extensive community support, frequent updates, and compatibility with a wide range of platforms further solidify its position as a preferred choice for developers, sysadmins, and businesses alike.
With its ability to handle large volumes of data while maintaining high performance, MySQL is suitable for projects of all sizes, from small-scale applications to mission-critical enterprise systems. Its seamless integration with popular programming languages and frameworks, such as PHP, Python, and Java, simplifies development and enhances productivity. Additionally, MySQL’s modular architecture allows for easy customization and scalability, ensuring it can grow alongside your evolving database requirements.
Install MySQL on Fedora 37: Step-by-Step Instructions
Before diving into the MySQL installation process, it’s essential to ensure that your Fedora 37 system is up to date. Running the latest software repositories not only improves system stability but also ensures compatibility with the latest MySQL packages and dependencies. Open the terminal and execute the following command:
$ sudo dnf update -yBy updating your system packages, you lay a solid foundation for a successful MySQL installation.
Install MySQL Server
Once your system is updated, you can proceed to install the MySQL server package. This package contains the core components necessary to run MySQL on your Fedora 37 system. In the terminal, execute the following command:
$ sudo dnf install mysql-server -yAllow the package manager to download and install the MySQL server package along with any required dependencies.
NOTE: Installing mysql-server will default to mariadb-server instead. MariaDB is an open-source relational database management system, developed as a fork of MySQL, designed to maintain compatibility with MySQL while providing additional features, performance enhancements, and improved security.
Led by the original developers of MySQL, MariaDB offers a robust, scalable, and high-performance database solution suitable for a wide range of applications, from small-scale projects to large enterprise deployments. It boasts features such as advanced clustering, support for multiple storage engines, and a rich ecosystem of plugins and extensions.
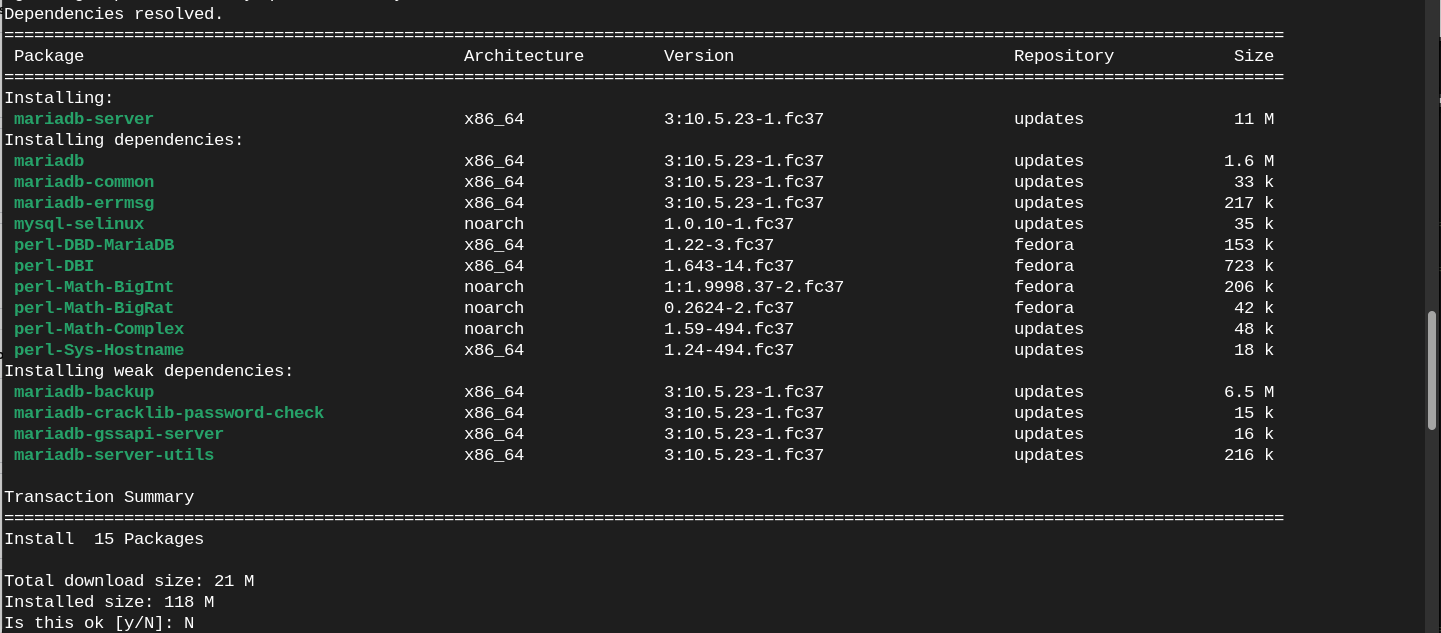
Photo by admingeek from Infotechys
Download and Install MySQL8.0
To install mysql8.0 on Fedora 37, download and install its repository with the following command:
$ sudo dnf install https://dev.mysql.com/get/mysql80-community-release-fc37-1.noarch.rpmNext, enable the MySQL8.0 community repository:
$ sudo dnf config-manager --enable mysql80-communityLastly, install mysql-server:
$ sudo dnf install mysql-serverMySQL 8.0 Community Server 3.6 kB/s | 2.6 kB 00:00
MySQL Connectors Community 90 kB/s | 2.6 kB 00:00
MySQL Tools Community 6.4 kB/s | 2.6 kB 00:00
Dependencies resolved.
================================================================================================================================
Package Architecture Version Repository Size
================================================================================================================================
Installing:
mysql-community-server x86_64 8.0.35-10.fc37 mysql80-community 20 M
replacing mariadb-connector-c-config.noarch 3.3.5-1.fc37
Installing dependencies:
mecab x86_64 0.996-3.fc37.4 fedora 353 k
mysql-community-client x86_64 8.0.35-10.fc37 mysql80-community 3.6 M
mysql-community-client-plugins x86_64 8.0.35-10.fc37 mysql80-community 1.3 M
mysql-community-common x86_64 8.0.35-10.fc37 mysql80-community 557 k
mysql-community-icu-data-files x86_64 8.0.35-10.fc37 mysql80-community 2.3 M
mysql-community-libs x86_64 8.0.35-10.fc37 mysql80-community 1.4 M
Installing weak dependencies:
mecab-ipadic x86_64 2.7.0.20070801-25.fc37 fedora 11 M
mecab-ipadic-EUCJP x86_64 2.7.0.20070801-25.fc37 fedora 9.6 M
Transaction Summary
================================================================================================================================
Install 9 Packages
Total download size: 50 M
Is this ok [y/N]:Start and Enable MySQL Service
After the installation is complete, it’s time to start the MySQL service and configure it to launch automatically at system boot. Execute the following command in the terminal:
$ sudo systemctl enable --now mysqldThis command initiates the MySQL service and sets it to start automatically whenever your system boots up, ensuring continuous availability of your database server.
Secure MySQL Installation
Security is paramount when setting up a database server, and MySQL provides a convenient script to help you secure your installation. Run the following command in the terminal:
$ sudo mysql_secure_installationFollow the on-screen prompts to configure security options such as setting a root password, removing anonymous users, disallowing remote root login, and removing test databases. By addressing these security considerations, you mitigate potential vulnerabilities and safeguard your MySQL installation against unauthorized access and malicious activities.
Verify MySQL Installation
Once the MySQL installation and configuration are complete, it’s essential to verify that the MySQL service is running correctly. You can do this by executing the following command in the terminal:
$ sudo systemctl status mysqldIf MySQL is running without any errors, you should see an “active (running)” status indication, confirming that the MySQL service is operational.
Access MySQL Shell
To interact with MySQL and perform administrative tasks, you can access the MySQL command-line interface (CLI) known as the MySQL shell. Execute the following command in the terminal:
$ sudo mysql -u root -pYou’ll be prompted to enter the root password you set during the installation process. Once authenticated, you’ll gain access to the MySQL shell, where you can execute SQL queries, manage databases, and perform various administrative tasks.


No comments:
Post a Comment