Introduction
Managing a server efficiently often requires robust administrative tools that streamline tasks and provide a user-friendly interface. Webmin is one such tool, offering a comprehensive web-based administration platform for Linux servers.
Webmin, initially released in 1997 by Jamie Cameron, quickly gained popularity as a powerful web-based system administration tool for Unix-like systems.
Over the years, Webmin has evolved into a feature-rich platform, offering administrators a graphical interface to manage various aspects of their servers, including user accounts, file systems, network configurations, and more. Its modular design allows for easy extension with additional modules, catering to a wide range of server management needs.
Despite its longevity, Webmin continues to receive regular updates and improvements, ensuring compatibility with modern Linux distributions and addressing security vulnerabilities. Its active community of developers and users contributes to its ongoing development and maintenance, making it a reliable choice for server administration tasks.
For illustrative purposes, we’ve configured our system with the following settings (set yours according to your environment):
| Hostname | testsrv1.localdomain |
| Public IP address | 192.168.1.240 (Private IP: 10.0.2.15) |
| RAM | 2 |
| Cores | 2 |
Now, let’s dive into the installation process of Webmin on your RHEL 9 or CentOS 9 server.
Update Your System
Before proceeding with the installation of Webmin, it’s essential to ensure that your system is up-to-date. Open a terminal and run the following commands:
$ sudo dnf update -yThis will update your system with the latest packages and security patches, ensuring a stable environment for Webmin installation.
Install Webmin Dependencies
Webmin relies on several dependencies to function correctly. Install them by executing the following command:
$ sudo dnf install perl perl-CPAN perl-App-cpanminus perl-Digest-SHA perl-Net-SSLeay perl-Data-DumperDownload Webmin Package
Next, download the latest version of Webmin from the official website or repository. You can use wget or curl to download the package (most recent version as of the date of this publication) directly to your system. For example:
$ wget https://github.com/webmin/webmin/releases/download/2.105/webmin-2.105-1.noarch.rpmInstall Webmin on RHEL9 or CentOS9: Install Webmin
Once the package is downloaded, install it using the dnf package manager:
$ sudo dnf install ./webmin-2.105-1.noarch.rpmThis command will install Webmin along with its dependencies on your system.
Updating Subscription Management repositories.
Last metadata expiration check: 0:01:04 ago on Tue 30 Jan 2024 02:02:25 AM UTC.
Dependencies resolved.
===============================================================================================
 Package                Arch       Version          Repository                            Size
===============================================================================================
Installing:
 webmin                 noarch     2.105-1          @commandline                          39 M
Installing dependencies:
 redhat-indexhtml       noarch     9-4.el9_2        rhel-9-for-x86_64-appstream-rpms     245 k
Installing weak dependencies:
 lynx                   x86_64     2.8.9-19.el9     rhel-9-for-x86_64-appstream-rpms     1.6 M
 perl-Encode-Detect     x86_64     1.01-37.el9      rhel-9-for-x86_64-appstream-rpms      94 k
 shared-mime-info       x86_64     2.1-5.el9        rhel-9-for-x86_64-baseos-rpms        561 k

Transaction Summary
===============================================================================================
Install  5 Packages

Total size: 41 M
Total download size: 2.4 M
Installed size: 127 M
Is this ok [y/N]: yStart Webmin Service
After the installation is complete, start the Webmin service using the following command:
$ sudo systemctl start webminYou can also enable the service to start automatically on system boot:
$ sudo systemctl enable webminOpen port 10000 for access
Now lets open the Webmin port (10000) for access by running the following commands:
$ sudo firewall-cmd --permanent --add-port=10000/tcp

$ sudo firewall-cmd --reloadInstall Webmin on RHEL9 or CentOS9: Access Webmin Interface
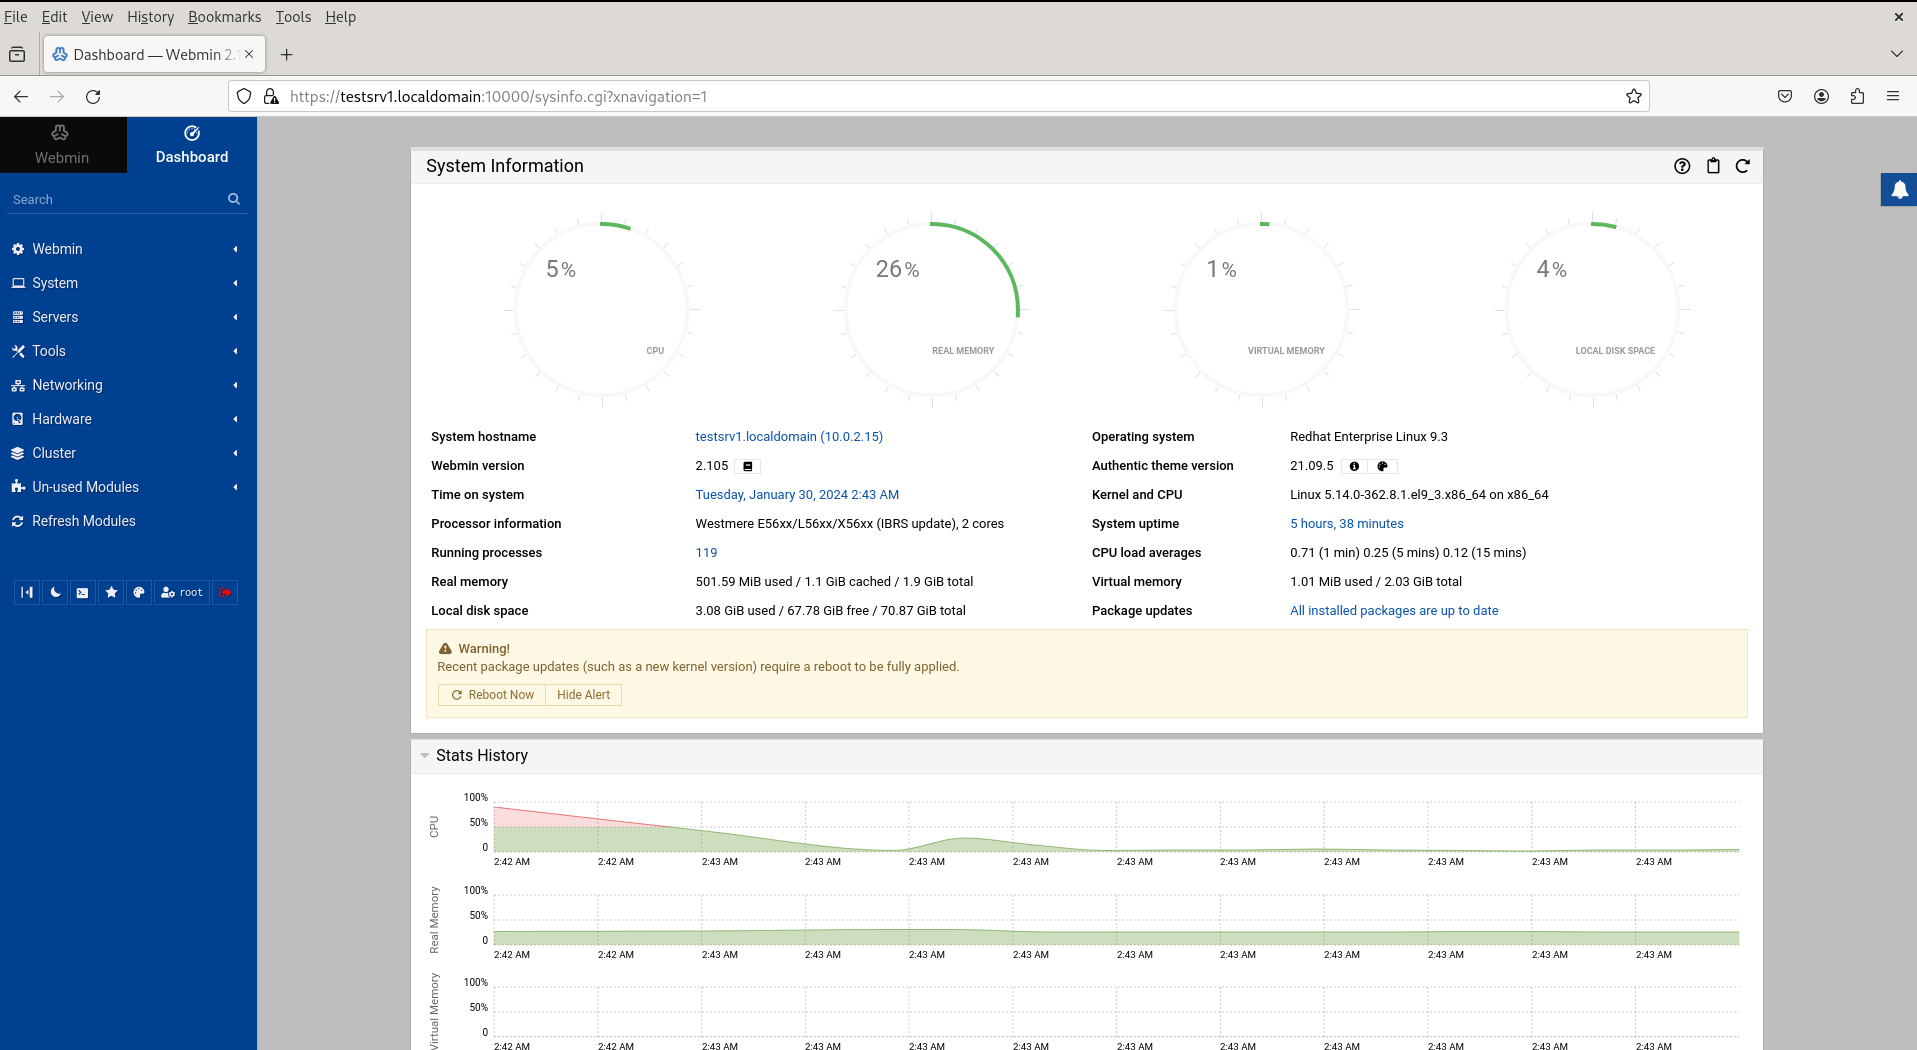
Webmin should now be up and running on your server. Open a web browser and navigate to the following address:

Photo by admingeek from Infotechys
Replace your_server_ip or hostname with the actual IP address or hostname of your server. You will be greeted with the Webadmin login screen.
Login and Configure
Use the root credentials of your server to log in to the Webadmin interface. Once logged in, you can configure various aspects of your server, including users, services, firewall settings, and more, through the intuitive Webadmin dashboard.


No comments:
Post a Comment