Introduction
As containerization continues to transform the landscape of software development and deployment, Podman emerges as a powerful alternative to Docker. Podman provides a lightweight and secure way to manage containers on Linux systems, offering features such as rootless containers and seamless integration with systemd.
Unlike Docker, Podman operates without a central daemon, eliminating potential single points of failure and reducing attack surfaces. Moreover, Podman’s compatibility with existing container images and workflows makes it an attractive choice for organizations seeking to modernize their infrastructure without overhauling their existing processes.
Why Choose Podman?
Before delving into the installation process, let’s explore some key reasons why Podman is gaining traction among developers and system administrators:
Rootless Containers: Podman allows users to run containers without requiring root privileges, enhancing security and minimizing the risk of privilege escalation attacks.
Compatibility with Docker: Podman provides a Docker-compatible command-line interface (CLI), enabling users familiar with Docker to seamlessly transition to Podman without a steep learning curve.
Systemd Integration: Podman integrates with systemd, enabling users to manage containers as systemd services, facilitating automation and orchestration tasks.
OCI Compatibility: Podman adheres to the Open Container Initiative (OCI) standards, ensuring compatibility with OCI-compliant container images and runtimes.
Installing Podman on Ubuntu 22.04: Step-by-Step Instructions
With these advantages in mind, let’s proceed to the installation steps.
Update your system
Before installing Podman, it’s essential to ensure that your Ubuntu system is up to date. Open a terminal and run the following commands:
$ sudo apt update -y; sudo apt upgrade -yInstall Podman
Once your system is updated, you can proceed to install Podman. Run the following command to install Podman and its dependencies:
$ sudo apt install podman -yThis command will download and install Podman along with any required packages.
Verify Podman Installation
After the installation is complete, you can verify that Podman is installed correctly by running the following command:
$ podman --versionpodman version 3.4.4This command should display the installed version of Podman, confirming a successful installation.
Installing Podman on Ubuntu 22.04: Get Started with Podman
Now that Podman is installed on your Ubuntu 22.04 system, you can start exploring its features and capabilities. Here are some basic commands to get you started:
Podman run
Launch a container from a specified image: In this instance, we will pull a web server image (NGINX) using Podman.
$ podman pull docker.io/library/nginxThe Breakdown
- “docker.io” is the registry where the image is hosted.
- “library/nginx” is the name of the image.
By specifying the full image name along with its registry, Podman will be able to pull the image successfully.
$ podman pull docker.io/library/nginx
Trying to pull docker.io/library/nginx:latest...
Getting image source signatures
Copying blob c7f80e9cdab2 done
Copying blob c3ea3344e711 done
Copying blob e1caac4eb9d2 done
Copying blob da8fa4352481 done
Copying blob cc1bb4345a3a done
Copying blob 88f6f236f401 done
Copying blob 18a869624cb6 done
Copying config e4720093a3 done
Writing manifest to image destination
Storing signatures
e4720093a3c1381245b53a5a51b417963b3c4472d3f47fc301930a4f3b17666aOnce the image completes its successful download, we can proceed to the next step and create a detached container using this image.
$ podman imagesREPOSITORY TAG IMAGE ID CREATED SIZE
docker.io/library/nginx latest e4720093a3c1 2 days ago 191 MB$ podman run -d -p 8080:80 nginxAs evident, the container was created and assigned random names like (upbeat_shannon) due to the absence of a --name option during creation.
$ podman psCONTAINER ID IMAGE COMMAND CREATED STATUS PORTS NAMES
f0b180fab587 docker.io/library/nginx:latest nginx -g daemon o... 6 seconds ago Up 5 seconds ago 0.0.0.0:8080->80/tcp upbeat_shannonUsing the --name option, we can name our container instances whatever we choose:
$ podman ps$ podman run --name web_instance -d -p 8080:80 nginx
bb1a04e7d291045c628c5888daba716a69aef37e2adec922a4be0e6f1cd7b579CONTAINER ID IMAGE COMMAND CREATED STATUS PORTS NAMES
bb1a04e7d291 docker.io/library/nginx:latest nginx -g daemon o... 5 seconds ago Up 4 seconds ago 0.0.0.0:8080->80/tcp web_instanceNote: To prevent conflict errors when creating multiple containers, it’s essential to ensure that port mappings and container names are distinct. In this particular case, we reused the same port mappings, as we had removed the original “upbeat_shannon” container (Visit Podman rm section below).
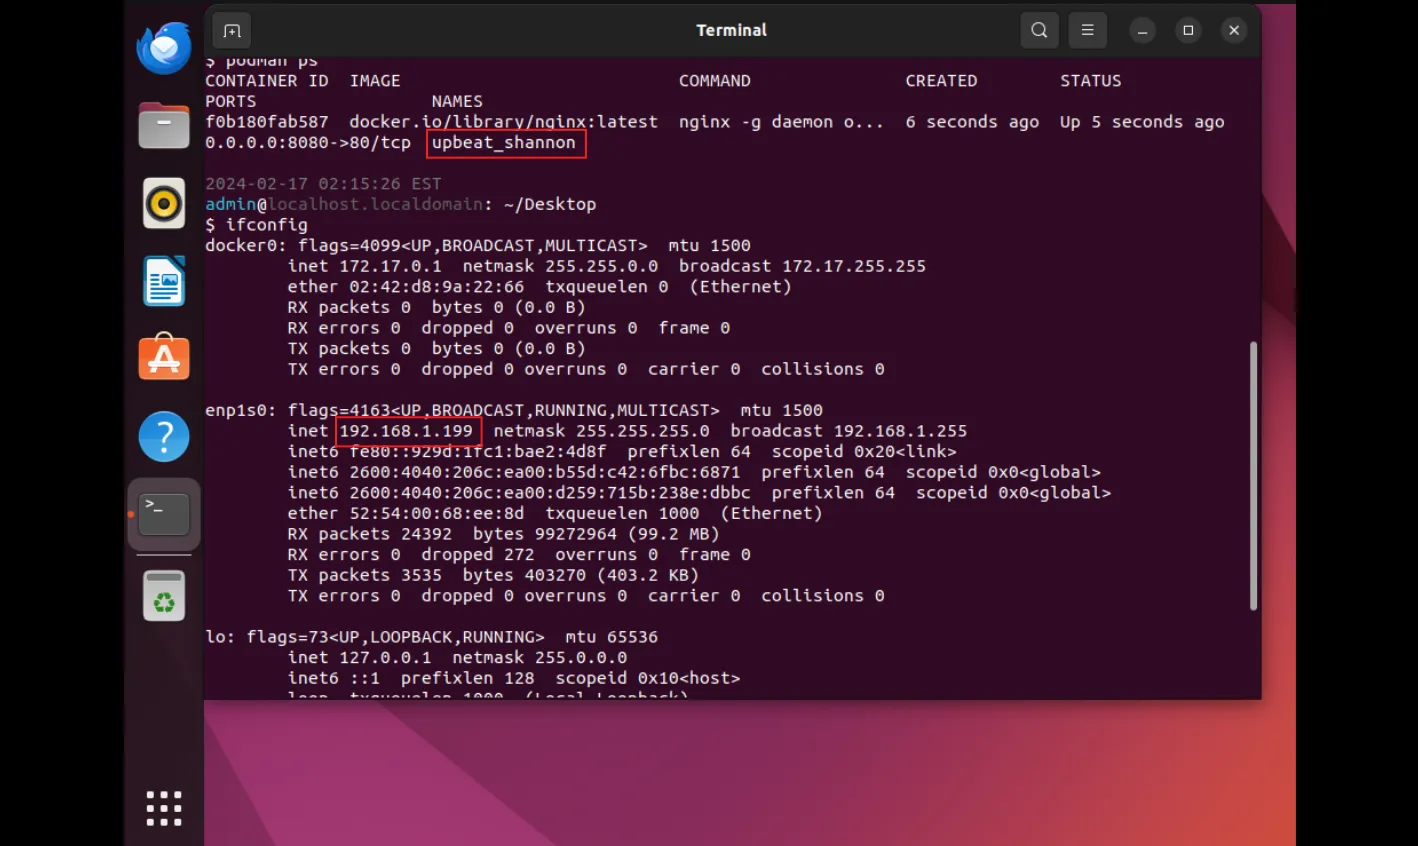
Photo by admingeek from Infotechys
Highlighted above in red, we observe the newly created container alongside the IP address of the host machine. This information will be necessary for the subsequent step.
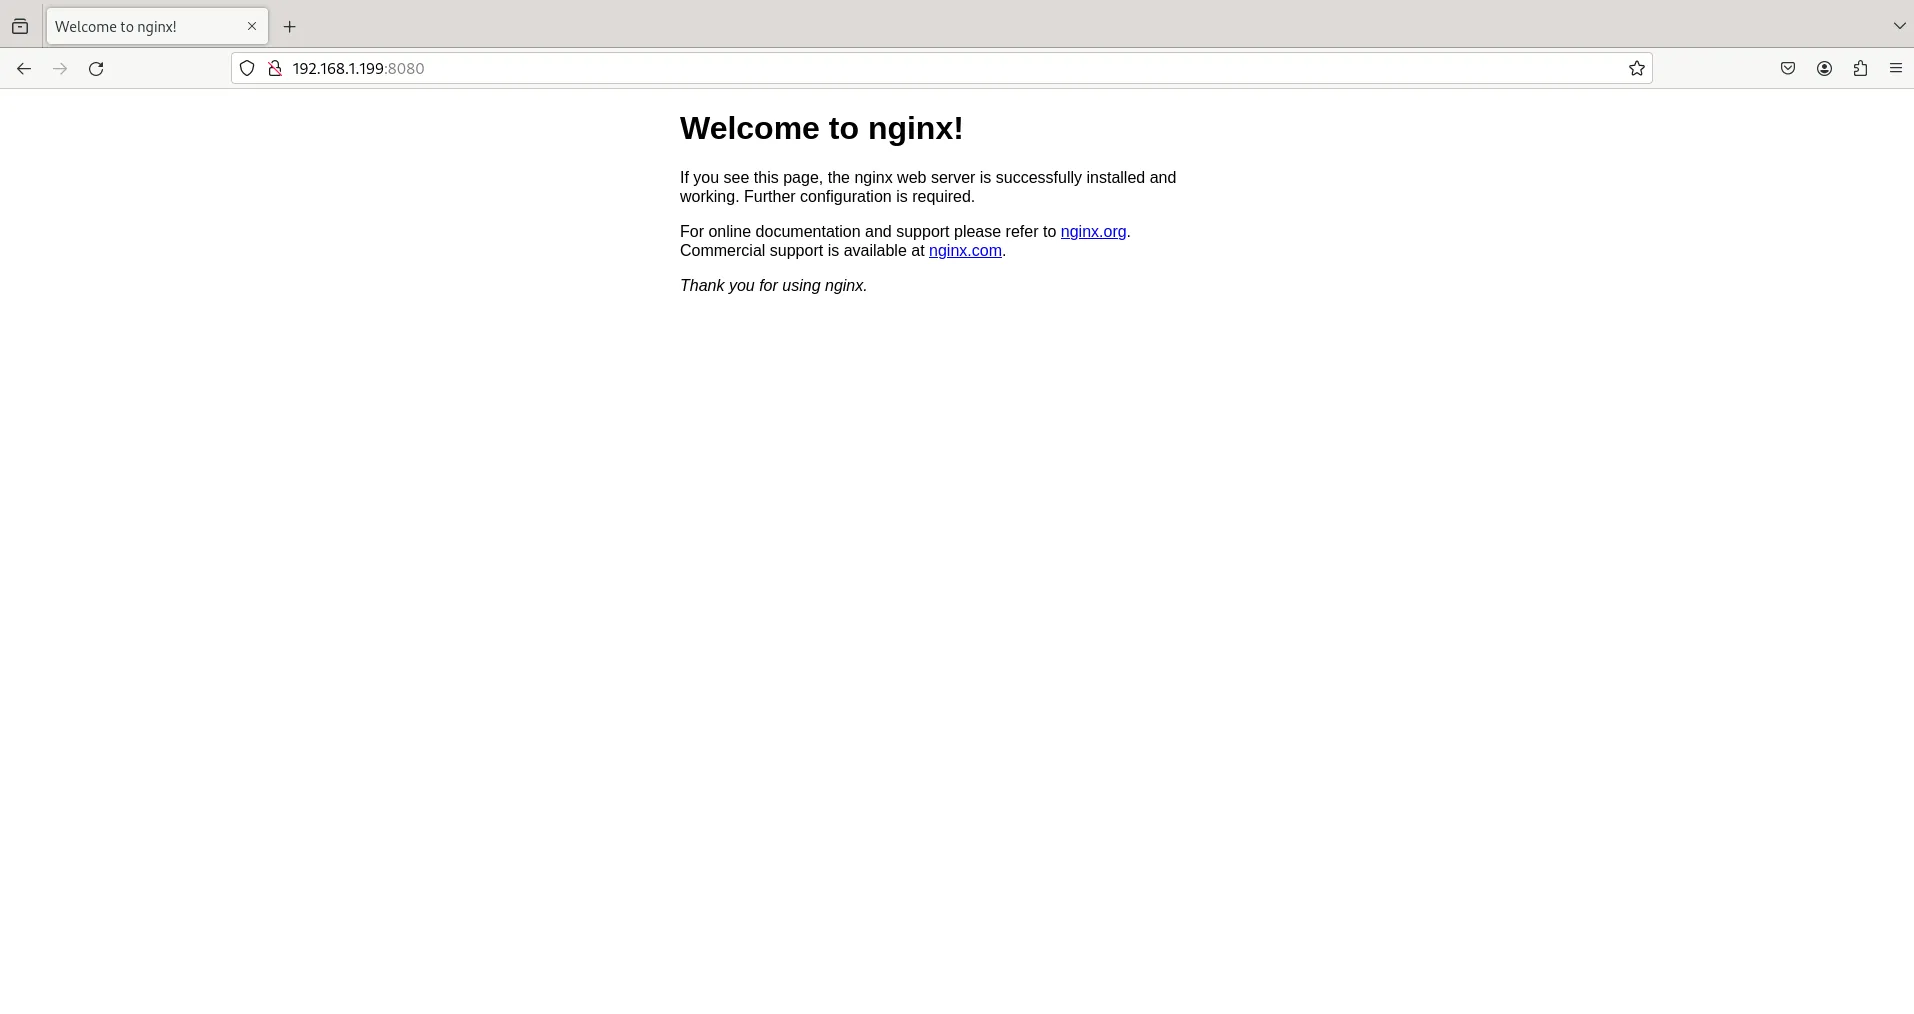
Photo by admingeek from Infotechys
The NGINX welcome page is displayed when the installation is successful, providing a clear indication that the web server is up and running. This default landing page not only confirms the successful deployment of NGINX but also serves as a starting point for further customization and development.
Podman rm (remove)
Once you’re done with the container, run the following command(s) to delete it!
$ podman stop <container ID or Container Name>; podman rm <container ID or Container Name>For instance, the following commands will remove the upbeat_shannon container.
$ podman stop upbeat_shannon; podman rm upbeat_shannonupbeat_shannon
f0b180fab587bd9a6f309bf80cb1f34d80a8e2e785e56b07a9f913f230482073To remove the image entirely, run the following commad:
$ podman imagesREPOSITORY TAG IMAGE ID CREATED SIZE
docker.io/library/nginx latest e4720093a3c1 2 days ago 191 MB$ podman rmi nginx

No comments:
Post a Comment